
Psst ….Have you heard about milling wheat berries at home to make fresh ground flour? In case you didn’t know, all the cool kids are baking with fresh milled flour. Does it sound overwhelming? Where do you begin? Do you need a mule hooked up to a large grinding stone in your backyard?
We’re about to embark on a journey that will take you from wheat berries (those little nuggets of nature) to freshly ground flour (the powdery stuff dreams are made of). It’s time to turn your kitchen into a miniature flour mill, so put on your apron, grab your sense of humor, and prepare for a possible mess.
For purposes of this blog, I assume you already own a mill to grind wheat berries. If you need help picking out which mill is the best for you … then check out this article. Answering four easy peasy questions will help you know which grain mill to buy.

How to Convert Recipes When Milling Wheat Berries
The first thing you might want to do is to convert one of your recipes from using humdrum store-bought flour into a fresh-milled flour treat. I am about to give you a quick overview, but if you’d like the detailed guide, I’ve written a full article for you right here.
When milling wheat berries, not every grain weighs the same. But for everyday baking conversions, we’ll keep it simple with these baselines:
All-Purpose / Bread Flour (store-bought) = 120 g per cup (per King Arthur)
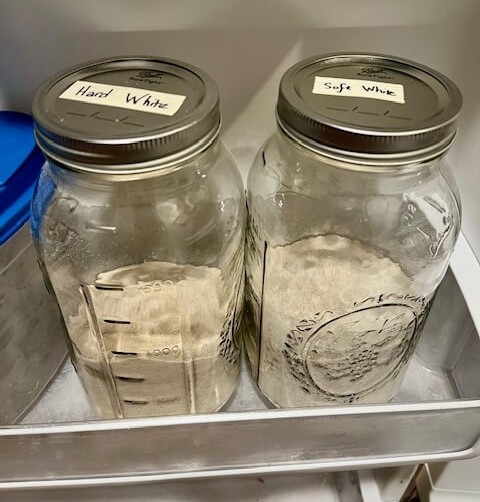
Hard White Wheat Berries = 120 g per cup
Hard Red Wheat Berries = 120 g per cup
Soft White Wheat Berries = 120 g per cup
Ancient Grains (Kamut, Einkorn, Spelt, etc.) = Different weights → Don’t assume they’re the same. Think of it like speed dating ancient grains: each one has its own quirks, and some don’t play by the “120 grams per cup” rule.
When you’re converting recipes, it’s best to measure flour by weight in grams instead of using cups. Cups can give different amounts every time, but grams stay the same and make your baking more reliable. This is the scale I use … I heart it!
Step 1: Decide Yeast vs. Non-Yeast
This is the big fork in the road. Before you start milling wheat berries, ask yourself:
Is this a yeast or sourdough recipe?
→ You’ll need +15% more fresh milled flour by weight.Example: 120 g store-bought → 138 g fresh milled
Is this a non-yeast recipe (cookies, muffins, pancakes, biscuits)?
→ You’ll need +25% more fresh milled flour by weight.Example: 120 g store-bought → 150 g fresh milled
Conversion Chart
| Recipe Type | Regular Flour (120 g) | Fresh Milled Flour (+%) | Final Weight Needed |
|---|---|---|---|
| Yeast / Sourdough | 120 g | +15% | 138 g |
| Non-Yeast Goods | 120 g | +25% | 150 g |
Tips for Milling Wheat Berries
Use a kitchen scale for weight (grams) → Scales tell the truth (versus … volume / cups).
Don’t mix ancient grains randomly → They don’t weigh the same as modern wheat.
Hydration matters → Fresh milled flour absorbs liquid slowly.
Take notes → Your future self will thank you when your bread turns out fluffy instead of flat.
Free Cheat Sheet
I made a 1-page printable cheat sheet that shows exactly how to adjust recipes when milling wheat berries. It’s fridge-friendly, coffee-spill-resistant (ok, maybe not), and has bonus tips to save you from common mistakes.
Plus, here you will find my full article on converting recipes step-by-step. Honestly, it’s worth a read if you want to avoid the “why is my cookie crunchy like biscotti” crisis. It contains a bunch of helpful information.
Milling Wheat Berries
Milling those tiny wheat berries is the next course of action. A mule and grinding stone are NOT required!
- Go to your bin of wheat berries and weigh the amount you need for your recipe. (You figured this out in the section above.)
- Dump the wheat berries into the hopper of your grain mill. (Look at you, already succeeding.)
- Set the grain mill to the settings that produce fine flour. You know what store-bought flour looks like … your goal is getting your flour to that consistency. You want a fine fluffy texture. If your kids get their hands on it, they need to be able to make a mess of your kitchen.
Voilà! That only took 4 minutes and 24 seconds. Here is a video for proof!
Take a step back. Look at that bowl of flour. That’s right, you made that. You are now the proud owner of homemade flour. That’s really all you NEED to know. The rest of this is just bonus …
Extra: Hydration for Milling Wheat Berries
You can add extra time for hydrating the flour when you are using freshly milled wheat berries. At the point your recipe calls for you to add the flour. Add the flour. Then, let it rest for 30 minutes. This time allows the flour to hydrate. Freshly milled flour absorbs liquid a little differently than store-bought flour.
Do you wonder why you add more flour to a recipe (in the above calculations)? This is also partially a hydration issue. Freshy milled flour contains all three sections of a wheat berry: bran, germ, and endosperm. Store-bought flour only contains the endosperm. (Side note: commercial flour mills sift out the bran and germ … those sections contain the largest portion of the nutrients. When you have a moment you might enjoy reading this blog. The health benefits of freshly milled flour will blow your mind!). The bran and germ do not absorb liquid at the same rate as the endosperm. Since freshly milled flour contains the healthy bran and germ sections, you need to add more flour for the liquid to be properly absorbed in the recipe.
Extra: Gluten Development when Milling Wheat Berries
Gluten can take a little longer to form when using freshly milled wheat berries. If you are making a recipe that relies on strong gluten formation, then you want to knead your dough longer than you would if you were using store-bought flour. Bread, pizza dough, cinnamon buns, etc. are all good candidates for a longer kneading time. Sweet breads, muffins, cookies, pancakes, etc. do not need extra kneading time.
For illustration purposes, let’s talk about making a loaf of bread. Gluten development is of utmost importance for success in baking bread. When your recipe calls for flour … you add it … at this point, I will knead my bread for 8 minutes. Then, I will let it rest and hydrate for 30 minutes. Next, I will add more flour (if required) and knead it for another 8 minutes. See what we did there? We added extra kneading time to the dough. The dough was kneaded for a total of 16 minutes.
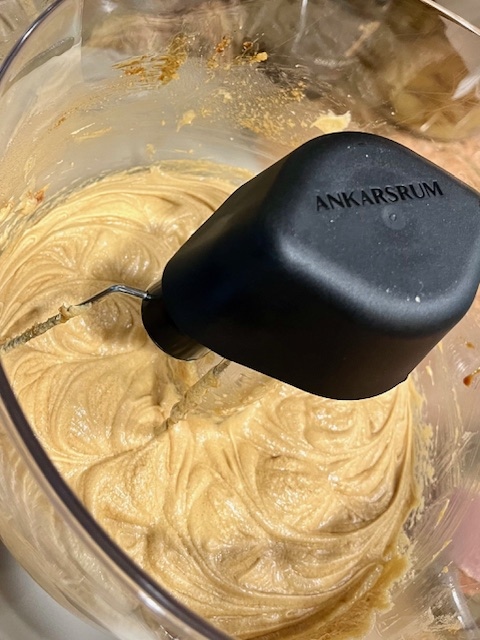
Warning – Warning – Warning: Maybe or maybe not this happened to me (wink) … Don’t destroy your stand mixer. If you are using a Kitchen Aid stand mixer, the maximum you are to knead is for 2 minutes on speed “2.” Then you are supposed to let the machine rest for 10 minutes. Ahem … I didn’t know this was Kitchen Aid’s recommendation … let’s just say that I have a beautiful new Ankarsrum in my kitchen. (#ad) I heart my Ankarsrum!
Another Warning: Some ancient grains do not respond well to kneading (for example einkorn). They get all sad and soggy.
Summary of Steps for Milling Wheat Berries
For Glutenous-y Baked Items (bread, rolls, pizza dough, cinnamon buns, etc.):
- Calculate the amount of wheat berries
- Mill the wheat berries
- Follow the recipe
- Add the flour
- Knead for 8 minutes
- Rest (for hydration) for 30 minutes
- Add more flour, if needed
- Knead for 8 minutes
- Continue with the recipe
For non-Glutenous-y Baked Items (pumpkin bread, blueberry muffins, pancakes, crepes, etc.):
- Calculate the amount of wheat berries
- Mill the wheat berries
- Follow the recipe
- Add the flour
- Rest (for hydration) for 30 minutes
- Continue with the recipe
Extra: Tips when Milling Wheat Berries
- If you mill too much flour, store the extra flour in your freezer. Eazy squeezy! The freezer slows down oxidization. Oxidization is the process when the nutrients degrade via a reaction with oxygen. The freezer will also help the flour not go rancid as quickly. Freshly milled flour has wonderfully healthy oils in it (from the germ). Therefore, if it is left in the cupboard too long it can go rancid.
- Never clean your mill with water. That would be a mess. I dust my machine off. If you think about it, it isn’t actually dirty … just dusty.
- Store your wheat berries in gamma buckets. (#ad) This lets bugs know that this is not their new home or new favorite restaurant.
Are you a dentist or a free-spirit when milling wheat berries?
Historically, I am the type of person that doesn’t measure when I cook. I get the salt out of the cupboard and give it a little shake. If I feel like I need to be precise, I will shake the salt into my hand and then dump it into my mixing bowl. “Meh, looks like a teaspoon-ish to me!” “Ish” is a daily part of my vocabulary.
I know that 50% (or probably even more) hate cooking with the likes of me. My father-in-law was a dentist. We had a common interest … baking. After he retired, he invited me over to his house to make Danish pastries. Let’s just say that he never invited me to bake pastries with him again. His decades of precision and attention to detail as a dentist conflicted with my “let’s just dump in some salt” personality. Don’t worry – I will never be a dentist!
This concept of precision baking brings me to the discussion about my kitchen scale.
Scale or Not to Scale - that is the question!
I know I mentioned my trusty kitchen scale. Trust me. This does not mean that I bake with the precision of my father-in-law, the dentist. I am still me. You can still be you. My kitchen scale helps me grind the correct amount of wheat berries for my recipe.
Do you have to use a scale? Absolutely not. You can be a “let’s just dump some salt in it” personality. Throw a few scoops of wheat berries in your mill without measuring them. If you need a little more flour, then throw a few more wheat berries into your mill. If you ground too much flour, then put the extra in your freezer.
On the other hand, you can be even more precise than this introductory blog. Each wheat berry actually measures a wee bit differently. My goal for this blog is to provide overarching principles that will help you successfully mill wheat berries today. But if you love spreadsheets, start tracking information about every grain. When you do that, please contact me in the comments. I would love to see your spreadsheet! I admire you.

Bake Something... Anything!
You could stop your journey at grinding the flour and pat yourself on the back for a job well done. But why stop there? You didn’t go through all this effort just to sit back and admire a pile of flour, did you? This is where the rubber meets the road (or, rather, the flour meets the water). Time to turn that freshly milled flour into something delicious. Bread, pizza dough, pancakes, or even cookies—let your imagination run wild. If you’re feeling truly brave, you can even try making a multi-day sourdough loaf that involves feeding a starter like it’s your newborn child.
But don’t be surprised if your bread doesn’t turn out quite like the store-bought stuff at first. Fresh flour has a mind of its own, and you’ll need to get used to its quirks. (Kind of like adopting a rescue pet.) You will also need to get used to the superior flavors and amazing health benefits.

Conclusion: You Did It, You Flour-Making Maverick!
Look at you, having gone from wheat berries to flour like a true grain master. Sure, it was a bit more work, but there’s something deeply satisfying about knowing you created flour from scratch. Plus, think of the bragging rights. The next time someone offers you store-bought bread, you can casually mention how you grind your own flour and bake bread like the artisan you are. You might even inspire them to embark on their own flour-grinding adventure. Or you’ll just scare them off entirely. Either way, you’ve earned a slice of homemade bread slathered with butter. Bon appétit!
Be sure to check out my other recipes, tutorials, and guides to keep your fresh milled flour baking journey going strong. There’s a whole world of floury fun waiting for you.
And if you want to make sure you never miss a fun, new post (and who wouldn’t want to?), subscribe right here. As a thank-you, I’ll send you a FREE gorgeous recipe card for the best pancakes on earth. Trust me, you’ll want them in your life.
Some sentences or ideas may be from chatgpt.


2 responses to “Milling Wheat Berries to make Fresh Flour”
I learned so many tips. Thank you!
I’m so glad it helped! Milling your own wheat berries is a game changer. Enjoy the fresh flour!