
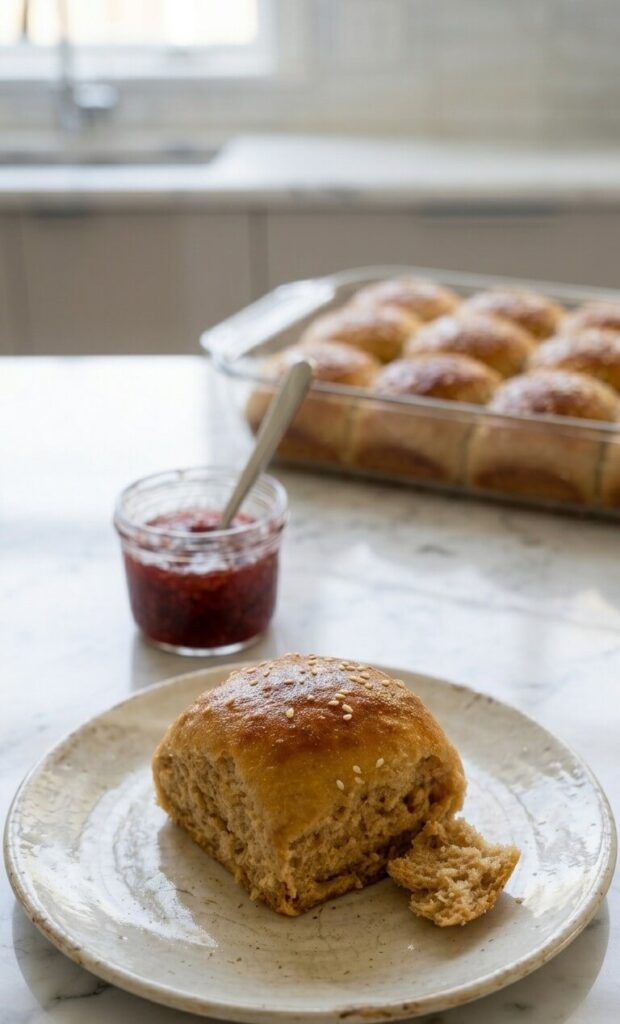


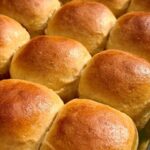
Yield: 12 rolls
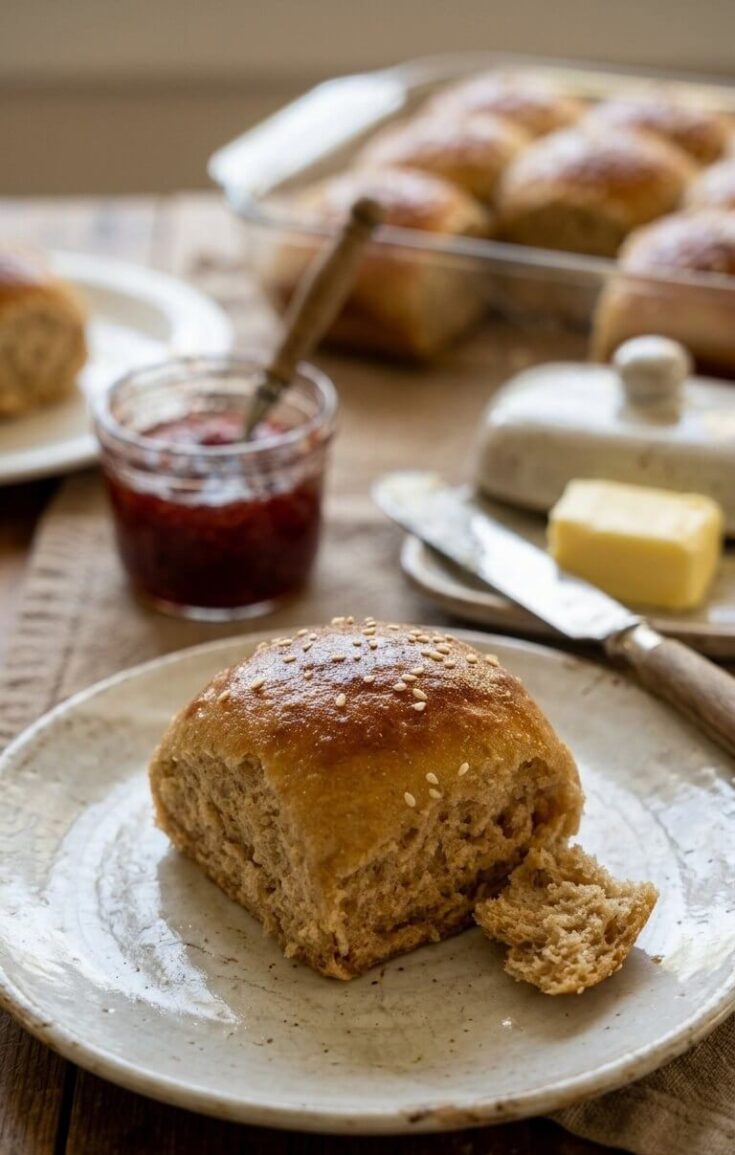
Dinner Rolls with Fresh Milled Flour (yeast)
5.0 Stars (1 Review)
Fluffy, buttery dinner rolls made with fresh milled flour ... so good you’ll “just try one” and accidentally eat three.
Ingredients
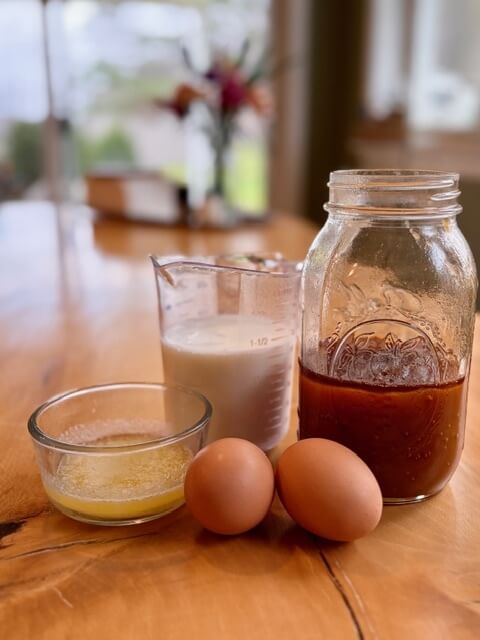
- 1 1/3 cup (320 g) warm whole milk (substitute: water)
- 2 eggs
- ¼ cup (85 g) honey (substitute: sugar or maple syrup)
- 3 tbsp butter, melted (substitute: olive oil)
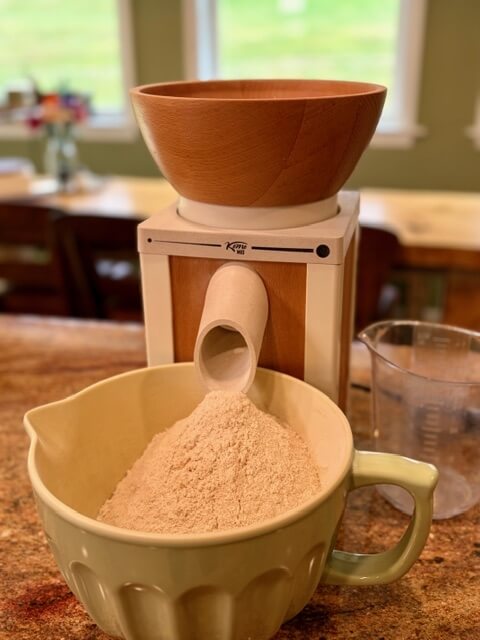
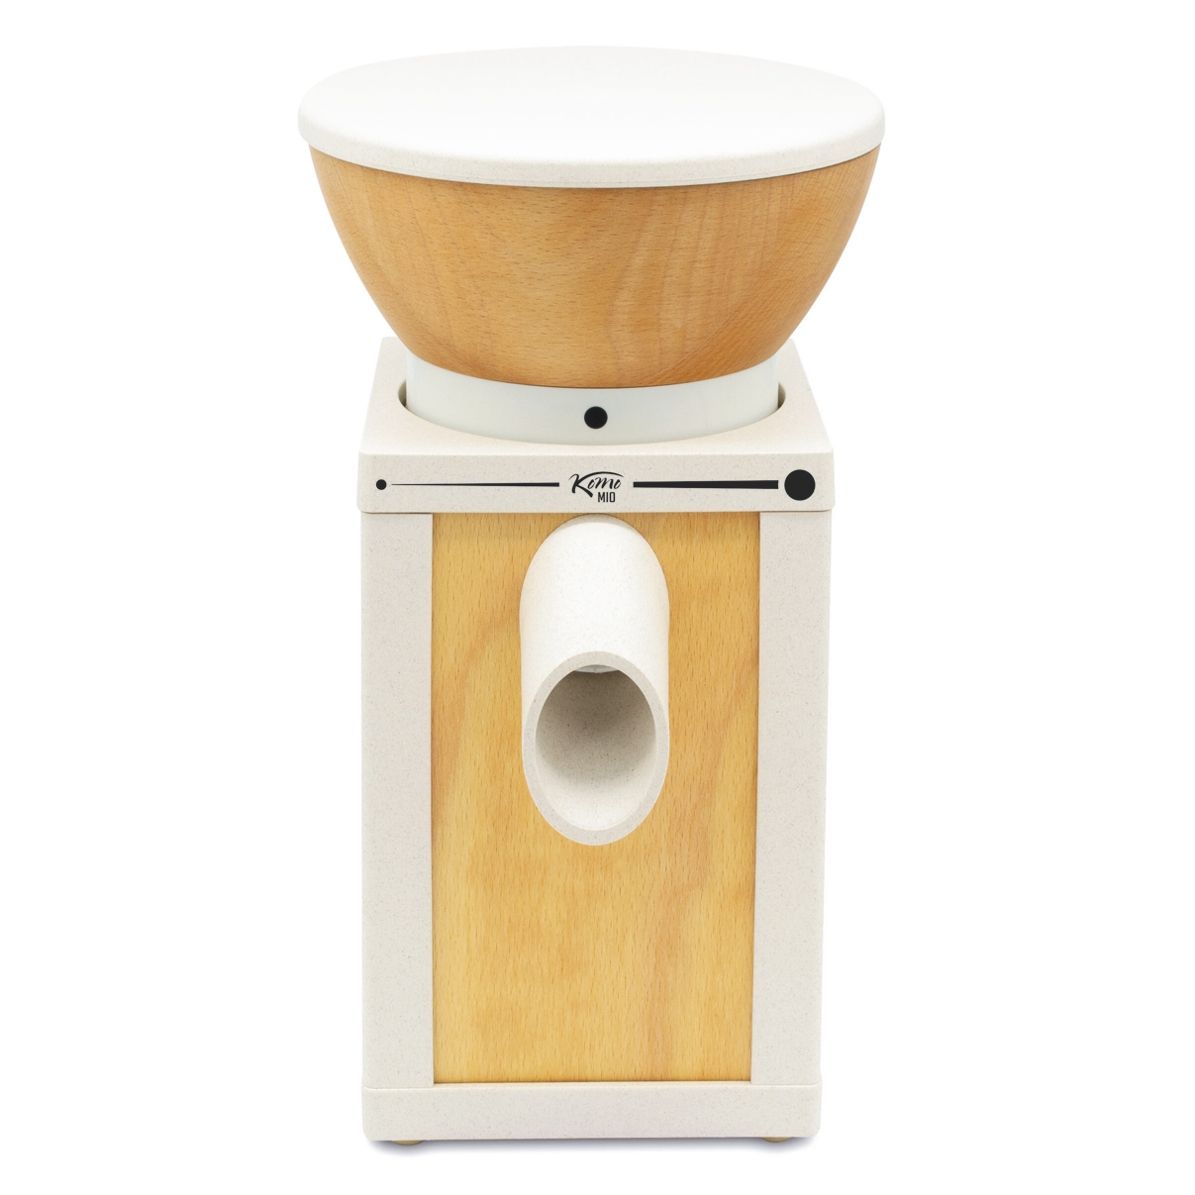
- 3 cups (600 g) hard white wheat berries, then finely grind
- 2¼ tsp yeast
- 2 tsp (12 g) salt
- 1-2 tbsp butter, melted (optional, to brush on top after cooking ... can also mix in 1 tbsp honey)
- 2 tbsp sesame seeds (optional, to sprinkle on top)
Instructions
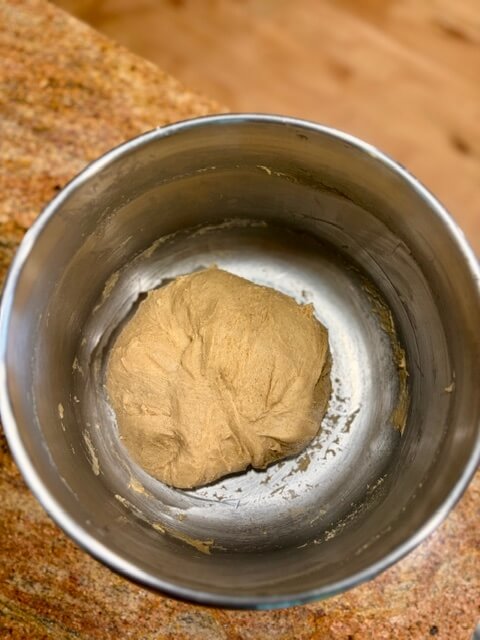
- Combine Wet Stuff: In the bowl of a mixer, add the milk, eggs, honey, and butter. Give it a mix and admire how wholesome this already feels. (1⅓ cup milk, 2 eggs, ¼ cup honey, 3 tbsp butter)
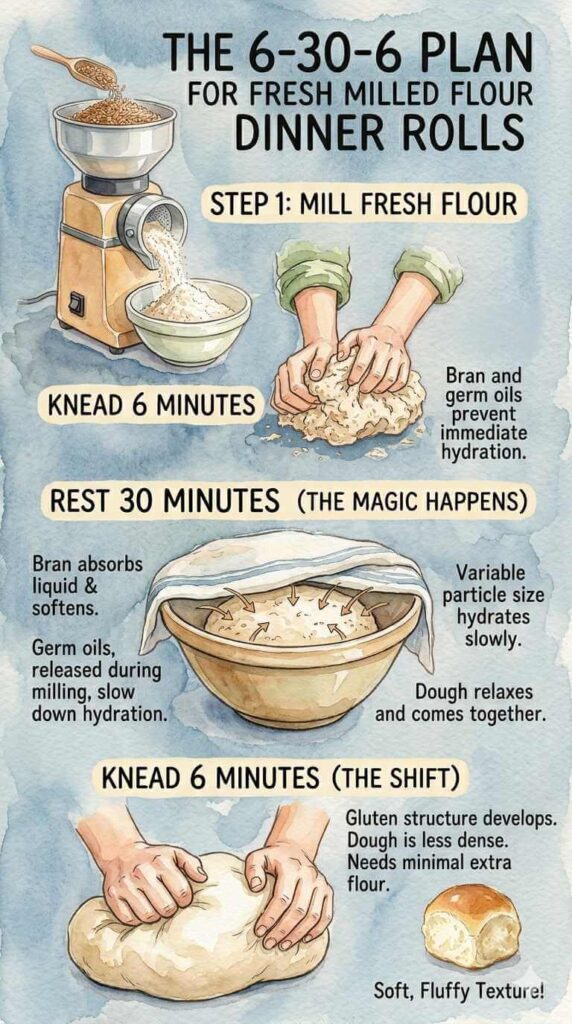
- Flour & Rest: Finely grind wheat berries. Add 4 cups of flour, knead for 6 minutes, then let the dough take a 30-minute hydration nap. (3 cups hard white wheat berries ... which, after ground, will turn into 5 cups of fluffy flour)
- Just a Little More Flour: After the rest ... add the yeast, salt, and if needed the remaining flour (1 cup) a little at a time until the dough starts pulling away from the sides of the bowl. It should come together but still be a little sticky ... clingy, not desperate. (2¼ tsp yeast, 2 tsp salt)
- Work That Dough: Knead for 6 more minutes.
- Rise and Shine: Cover the dough and place it in a warm spot to rise until doubled in size, about 1 hour. It should look puffy and proud.
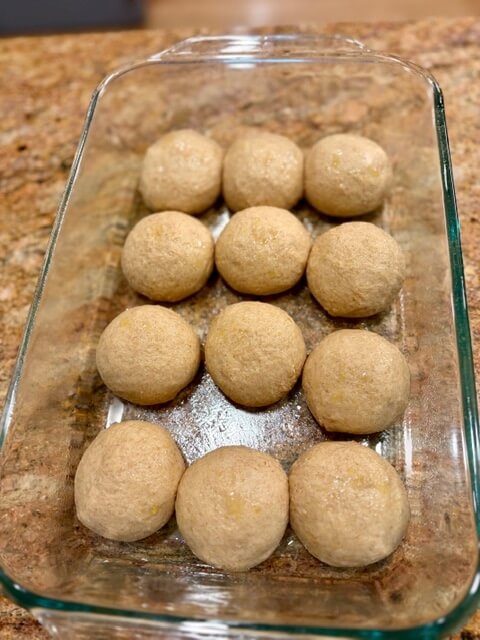
- Roll Call: Once puffy, turn the dough out onto an oiled surface and divide into 12 equal pieces. Shape each piece into a ball, making sure to create surface tension so they bake up nice and smooth.
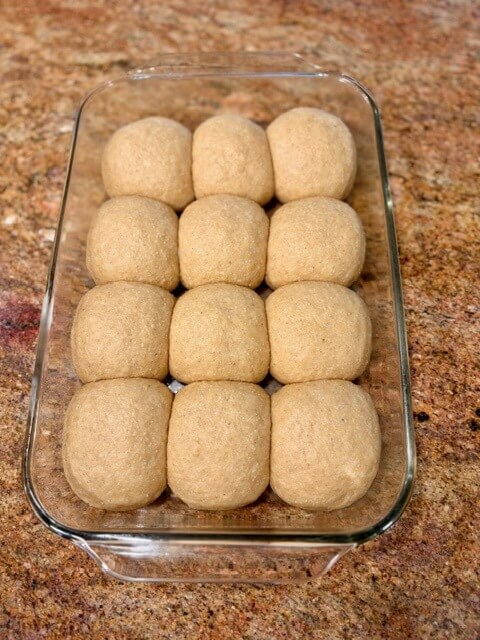
- Puff, Part Two: Place the rolls into a greased 9×13-inch baking dish. (You can pop them in the fridge at this point if you want to bake them tomorrow.) Cover and let them rise again until doubled, about an hour.
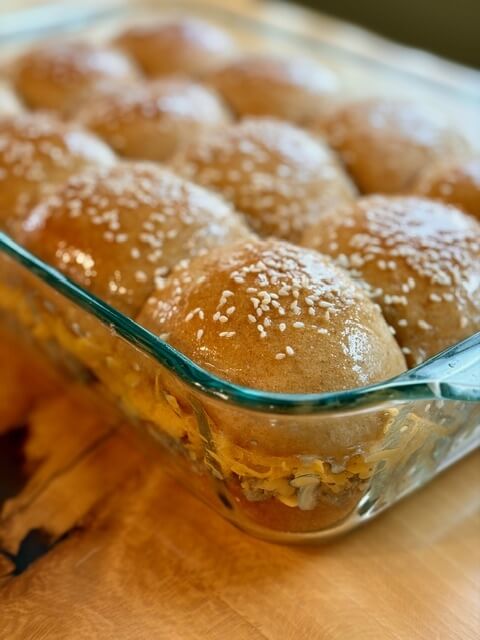
- Into the Oven: Preheat the oven to 375°F. Bake for 15–22 minutes, until the rolls are lightly golden and your kitchen smells amazing. Brush with butter and sprinkle with sesame seeds if you’re feeling fancy (optional).
Notes
- Fully Baked (No Guessing Games):
Wondering if the rolls are done? Grab a thermometer ... when the centers hit 190°F, they’re officially baked and ready to impress. - Storing (For Later Snacking):
Store leftover rolls in a bread box or an airtight container at room temperature for up to 2 days. - Freezing (Future You Will Be Grateful):
Let the rolls cool completely, then freeze in an airtight container or freezer bag for up to 3 months. To enjoy, thaw at room temperature. - Can I Double or Halve the Recipe? (Math-Friendly Dough):
Absolutely! This recipe scales beautifully. - Can I make ahead?
Yes! Shape, refrigerate overnight, then let rise at room temperature before baking. Pause now, bake later.
Recommended Products
As an Amazon Associate and member of other affiliate programs, I earn from qualifying purchases.


4 responses to “How to Make Fresh Milled Flour Dinner Rolls (yeast)”
These rolls are the bomb! Thanks for sharing!
You betcha! So glad you like them.
I’ve been searching for a good dinner roll recipe with fresh flour. Can’t wait to try it … thanks.
Warning: these rolls have a reputation for disappearing suspiciously fast. Enjoy every fluffy bite.