Welcome to

Hope this Werks

Fresh milled. Real Food. Pure energy.

Recipe for Sourdough Bread: Easy (optional fresh milled flour)

Updated: June 22, 2025

If you’re looking for the perfect first recipe for sourdough bread … this is it. This, my friends, is the iconic crusty artisan loaf that kicks off every sourdough journey with a bang (and maybe a little flour on your shirt). It’s basically fool-proof … like, easy enough that even your cat could probably make it. Not that I’m recommending that.

This loaf is the kind of show-off bread people post on Instagram. Except in this case, YOU really make it … and it will turn out gorgeous. Plus, it makes soup night feel like you’re dining at a rustic French farmhouse instead of your kitchen table that’s covered in Legos and mail.

Fun Fact: This easy sourdough recipe came straight from my daughter’s kitchen. She kept telling me it had almost no kneading and it was so easy … and I finally listened. Not only that, but you don’t need a fancy stand mixer (her Kitchenaid is basically a paperweight right now). You also don’t need a banneton basket … although they do look nice in photos. Just follow this easy recipe for sourdough bread and you’ll end up with a beautiful, crusty loaf to devour with your family.

Trust me … I’ve made it multiple times now, and every single time I’m like, “Wow… my daughter was totally right.” So if you’re just beginning sourdough, start here. This is truly a classic artisan sourdough recipe that belongs in your kitchen.

Starting your sourdough journey? This free Top 10 Tools List will help … click here to grab it!

Ready? Let’s dive in step-by-step and make this recipe for sourdough bread together. You bring the flour, I’ll bring the jokes.

Cut loaf of sourdough bread on a cutting board

Make the Levain: 12 Hours Before

(12 hours before you want to make this recipe for sourdough bread)

Alright, let’s get one thing out of the way: this bread needs a little planning ahead. BUT … it only takes two minutes of effort right now. The rest of the time it’s just sitting there, doing its bubbly sourdough thing.

What even is levain?

Basically, levain is like a mini power-charged version of your sourdough starter. It’s what gives your loaf that magical rise and delicious flavor. Think of it as the spark that kicks off your bread’s fermentation party.

To make the levain, you’ll need a container with tall sides. Personally, I like to use a large Chinese takeout soup container. Why? Because it’s sturdy, tall, and makes me feel like a resourceful baking ninja.

In your container, combine:

  • ½ cup (100g) of room temperature water (Not hot! We’re baking bread, not making sourdough stew.)
  • 1 tablespoon (25g) of active sourdough starter
  • ¾ cup (100g) of all-purpose flour

Stir it all together. It will look like really thick pancake batter … don’t worry, that’s exactly what we want. Now cover it with a towel and let it sit on your counter for about 12 hours. Yes, twelve. I know, it’s long. But it’s worth it. While you sleep, your levain is getting to work.

Plastic container with levain in it

Make Messy Dough (Recipe for Sourdough Bread)

When I wake up in the mornng, I head straight for the kitchen. This is when the recipe for sourdough bread really gets going. Now, just because I’m up doesn’t mean I got a solid eight hours of sleep. More likely, I stayed up way too late watching shows I’ve already seen five times, reading “just one more chapter,” or scrolling through the internet like a raccoon in a garbage can. But no matter what poor decisions I made the night before, making this beginner-friendly sourdough bread is my first mission of the day.

Step 1: Caffeine.

Please, do yourself a favor and make a cup of coffee, tea, or whatever hot drink gives your soul a hug. Everything in the kitchen feels a little more joyful (and a lot more doable) when you’ve got something warm and cozy in your mug.

Step 2: Let’s get messy.

Grab a big bowl. No, bigger. This is not the moment for dainty mixing. Now dump in the following ingredients like the confident bread boss you are:

  • 1 ¼ cups (310g) room-temperature water. Not ice-cold. Not lava-hot. Just pleasantly neutral, like a friendly handshake.


  • Levain. All of it. Yes, the whole bubbly bowl of sourdough magic from the night before. If you want to save 25g of it for your next sourdough experiment, go for it. If not, toss it all in.


  • 3¾ cups (450g) flour. You can use bread flour or all-purpose flour here. Either one will get the job done, so don’t overthink it. This is an easy recipe for sourdough bread, not a science fair project.  Psst … there are notes below for my fresh milled flour fans.


  • 2 teaspoons of salt. Quick side note: Has anyone else noticed that some fancy salts taste suspiciously bland? Like, I thought this fancy salt from the other side of the world was supposed to taste like unicorn tears, but instead … it tastes like saltless disappointment. I feel like I need to launch a full-blown investigation to get to the bottom of this.
shaggy dough in glass bowl

Fresh Milled Flour Notes (recipe for sourdough bread)

If you’re using regular ol’ store-bought flour, you can skip ahead to the next section with zero judgment … go ahead, your recipe for sourdough bread will turn out amazing.

Fresh milled flour?  Heck yes, you can!

If you’re on that fresh flour train (hi, fellow grain geek!), you’ll be happy to know this recipe for sourdough bread works with fresh milled flour. I’ve got some simple tweaks below to help your artisan sourdough loaf turn out glorious with flour you milled yourself.  I’ll walk you through exactly how to change this sourdough recipe so it doesn’t turn into a dry doorstop (been there).

Also! If you’re a visual learner, fear not … there’s a separate recipe card just for fresh milled flour lovers down at the bottom of this post.

If you are saying to yourself, “Wait, people mill their own flour?” Oh yes, they do. And once you dive in, there’s no going back (in a good way).  If you’re curious why anyone would willingly grind their own flour when stores literally sell it pre-bagged, check out this post all about the health benefits of fresh milled flour. Or, if you want a quick overview before committing to the whole “grind it yourself” lifestyle, this beginner-friendly guide will give you the full scoop … without overwhelming you with science-y stuff.

But if you’ve dove into the fresh milled flour life (go you!), then here are a few juicy tidbits that’ll help this easy, beginner-friendly sourdough bread recipe go a lot more smoothly for you …

Levain: Let’s Be Honest

I’m just going to say it … I rarely use fresh milled flour for my levain. Why? Because I’m not usually in the mood to haul out the grain mill late at night just to grind a few spoonfuls of flour. It’s bedtime, not mill-time.

That said, if you’ve got the energy of a sourdough-loving superhero and want to use fresh milled flour in your levain … go for it! You’ll get amazing flavor, and your starter will be happy. I respect the hustle.

Dough: Wheat Berries FTW (For The Win)

For the dough itself, I go all in with 450 grams of hard white wheat berries.

Sometimes, though, I like to mix things up with a combo: think 225 grams of hard red wheat and 225 grams of hard white. This adds depth to the flavor and little extra nuttiness.

Mixing: A Little Pinch-and-Squish Therapy

Fresh milled flour takes a little extra TLC. So when you’re mixing the dough, don’t rush it.

I usually pinch, squish, and smoosh it around for a good 4 to 5 minutes (not just the 2-3 minutes for store-bought flour). This extra time helps wake up the gluten and makes your dough stronger. Strong dough = better bread. That’s just science.

Bulk Fermentation: Stretch Goals

Now let’s talk about the bulk fermentation phase of this recipe for sourdough bread.

With fresh milled flour, gluten takes a little longer to develop, so don’t skip those stretch and folds. Aim for at least 4 to 8 rounds throughout the bulk ferment.

Temper Those Expectations (Literally)

Here’s the thing: your fresh milled flour loaf is probably not going to be as tall and airy as a loaf made with store-bought flour.  And that’s okay! Seriously. It’s still absolutely delicious. It’s just got a bit more of that rustic charm … which we all know is code for “shorter and a little denser, but in a cute way.”

Slice of recipe for sourdough bread. Fresh milled vs store bought
100% fresh-milled vs. 100% store-bought

50/50: The Best of Both Worlds

Not quite ready to commit 100% to fresh milled? This recipe is the perfect place to experiment with a 50/50 blend.  Use half store-bought flour and half fresh milled. This gives you the rise and structure you love from the store-bought stuff … plus the flavor, nutrients, and bragging rights that come with using fresh milled flour.

Too much fresh milled flour info? No worries … I wrapped it all up in one pretty recipe card (see below) so you don’t have to remember a thing.  That’s all the special news I have for fresh milled flour … now back to our regularly scheduled bread business.

Stir the Dough (Recipe for Sourdough Bread)

Okay, you’ve got your ingredients in the bowl, and now it’s time to make some magic happen. This is where our easy and beginner-friendly recipe for sourdough bread really starts to come together … literally.

First things first: grab your trusty wooden spoon. Or, honestly, whatever spoon hasn’t mysteriously disappeared into the dishwasher vortex. It just needs to be strong enough to move this floury blob around.

Now stir.

Keep going until it turns into what we lovingly call a shaggy, messy blob. It won’t be pretty. It might even look like a mistake. But this is exactly what we want. Ugly dough is just part of the journey.

Time to Get Your Hands Involved (recipe for sourdough bread)

Once it’s sufficiently shaggy, it’s time to say goodbye to the spoon and hello to your hands.  But wait … wet your hands first! This makes the dough way less sticky and way more manageable. (Unless you enjoy peeling dough off your fingers like glue from elementary school art class.)

Now go ahead and pinch, squish, and smush the dough like you’re giving it a weird little bread massage. You’re not going for perfection here. You’re just mixing things up and making sure there aren’t any sneaky pockets of dry flour lurking in the bowl.

If your enthusiastic squishing accidentally starts to resemble kneading? Congratulations! You’re basically a professional now. Keep this up for about 2 to 3 minutes … longer if you’re feeling energized, shorter if you only had one cup of coffee.

Tuck It In (recipe for sourdough bread)

Once your dough looks like it’s been thoroughly smushed into submission, it’s time to let it rest. Cover the bowl with a lid, plate, or a clean towel … whatever you’ve got handy … and tuck that dough into a warm, cozy spot.

So now your dough is resting and dreaming of becoming bread. Go put your feet up for 30 minutes … time to finish that warm drink.

Stretch and Folds (Recipe for Sourdough Bread)

Alright, friends … now that your dough has had a chance to chill for 30 minutes (literally and figuratively), it’s time to start building strength. This next step in our easy recipe for sourdough bread is called stretch and folds, and while it might sound like a gentle yoga class … it’s actually all about giving your bread that nice structure and chewy texture we all love.

What Even Is a Stretch and Fold?

Glad you asked! When you do a stretch and fold, you’re developing gluten and building strength in the dough … kind of like sending your bread to the gym, but with zero sweat and way more flour.

You’ll be doing 4 sets of stretch and folds, spaced 30 minutes apart. That’s right … this beginner sourdough bread recipe is about to get rhythmic. Think of it like sourdough’s version of interval training.

  • In a hurry? You can do just 2 sets instead of 4.
  • Is your dough being stubborn and not feeling very gluteny? Add in a fifth or sixth round.
  • But honestly, 4 sets is usually that just-right Goldilocks number for me.

How to Stretch and Fold (recipe for sourdough bread)

  1. Uncover your dough like you’re waking a tiny bread dragon from a cozy nap.

  2. Start with the “north” side of your dough (aka the top edge). Grab a handful of dough and gently stretch it up … not so hard that it rips, but high enough that you feel a little tension.

  3. Fold it over toward the opposite side (south), gently tucking it under.

  4. Now rotate the bowl and do the same thing on the west, south, and east sides.

  5. Boom. You’ve done one full stretch and fold set.

Once you finish your foldy workout, cover the bowl back up and let your dough rest in a warm, peaceful spot for another 30 minutes.

Repeat and Relax (recipe for sourdough bread)

You’ll repeat this same stretch-and-fold routine three more times, with a 30-minute rest in between each set. Set a timer if you’re forgetful (ask me how I know :), and feel free to give your dough a little “you’ve got this” pep talk each time you lift the towel.

The goal is to pass the windowpane test … pinch off a little piece of dough and gently stretch it between your fingers. If it gets thin enough to let light through without tearing (like a tiny, gluten-powered stained glass window), congrats! Your dough is ready for the next step. If it rips? Give it a few more folds … it’s still in its awkward stretchy stage.

After the final stretch and fold, it’s time to let the dough hang out and ferment undisturbed for about 2 hours. That’s right … this is its quiet time. No more poking, prodding, or peeking.  So now your dough is resting and dreaming of becoming bread. 

FYI: This whole phase is what bakers call bulk fermentation, which is a very official-sounding name for “let the dough do its thing for a while.”

dough in glass bowl doing stretch and folds

Grab Your Freebie: Top 10 Must-Haves for Sourdough Success

Feeling overwhelmed by all the sourdough tools out there? Don’t worry … I’ve got you.  I put together a FREE list of the Top 10 Things You Actually Need to start baking sourdough like a pro (even if you’re still learning what “proofing” means).

Click here to get the FREE checklist!

This list includes the basics I use every single week, plus a few fun extras that make sourdough baking easier and way more enjoyable. Perfect for beginners, or anyone who wants to up their bread game without buying a bunch of gadgets they’ll never use.

Shaping (Recipe for Sourdough Bread)

Now, back to our dough.  Your dough has just wrapped up a solid 2-hour nap. It’s relaxed, rested, and ready for its next big moment: getting into shape. That’s right … it’s time to shape your dough into its final bread-y form.

And don’t worry … this part is still totally beginner-friendly and way easier than braiding your kid’s hair or trying to fold a fitted sheet.

Step 1: Flip (Gently, Please)

Start by gently flipping your dough out onto your counter. No need to body slam it … this dough has been through enough.

Should you flour your counter?  Well, that depends on the mood of your dough.

  • If it feels extra wet or sticky, go ahead and dust the surface with a little flour.
  • But if your dough seems drier or more well-behaved, you can skip it.

Honestly, this is one of those “feel it out” steps in this recipe for sourdough bread.

Step 2: Create a Tense Little Dough Ball (recipe for sourdough bread)

Now comes the part where you shape that soft blob into a smooth, snug dough ball.

What you’re looking for here is surface tension … a nice, tight outer layer that helps the loaf hold its shape and rise beautifully.

Here’s how to do that:

  • Gently pull the edges of the dough underneath itself, tightening it from all sides.
  • You can also give it a little roll on the counter between your hands, if you’re feeling fancy. You may have seen professionals do this … feel free to channel their energy, minus the stress.

The goal? A round, tight, smooth dough ball that’s ready for its final proof.

Step 3: Prepare Its New Home (recipe for sourdough bread)

Grab a bowl and line it with a piece of parchment paper. Then, sprinkle cornmeal on the bottom. This step is easy to overlook, but cornmeal helps the dough release from the parchment after baking. Plus, it gives the bottom a little crunch. Win-win.

Now, place your dough into the bowl, seam-side down.  This is how your bread will rise and eventually bake.

Recipe for Sourdough Bread on parchment paper

Bonus points: If you own a proofing basket (a.k.a. a banneton), now is your time to shine.

  • Dust that basket generously with flour (like, really go for it … no one wants stuck dough).
  • Gently place your dough inside the basket, but you will do that seam-side up.

The banneton basket gives your dough a lovely round shape with cute little floury lines on top, but a parchment-lined bowl works just as well for this recipe for sourdough bread … especially for beginners.

Proofing (Recipe for Sourdough Bread)

Alright, dough baby … it’s almost showtime. But first, we let it proof, which is a fancy baker word for one final cozy rest before baking begins.

Step 1: Tuck It In

First things first, give your dough a light spritz of olive oil … just enough to keep it from drying out and forming a weird crust. Then cover it with a towel or some plastic wrap like you’re tucking in a tiny carb angel.

Pro tip: If you’re using a proofing basket (banneton), skip the olive oil! The flour coating already has you covered (literally).

Step 2: Give It Time to Rise

It’s time for your sourdough to puff up with pride. Let it rest for 1 to 2 hours, depending on the temperature in your kitchen and how impatient you’re feeling.  Now, here’s the part where the environment really matters. Warm air = dough is happy faster.  Cold air = dough is lazy.

  • Got a bread proofing setting on your oven? Use it! It’s like sending your dough to a warm yoga retreat.  When I use mine, my dough rises faster and happier. It’s a game-changer.
  • No proofing setting? No problem. Just turn your oven light on (don’t turn the heat on!) and pop your dough in there. It creates a pleasantly warm, dough-approved spa environment.

True story:
This past winter, I made a loaf of sourdough bread and left it on the counter. It took three ~ full ~ days to finally rise. THREE DAYS. My dough was practically hibernating. So yes, a warm spot makes all the difference … and maybe I should consider turning up the heat in my house.

So now your dough is resting and dreaming of becoming bread. You have time to throw in a load of laundry now … 

Step 3: The Finger Poke Test

Here’s how to tell when your dough is ready to move on to baking:  Give it a gentle poke.

If the dent bounces back slowly and leaves a slight impression, your dough is perfectly proofed.  If it springs back immediately, it needs a little more time.  And if it stays deeply dented and sad-looking, it may be slightly over-proofed … but don’t panic. It’ll still bake just fine (and we’ll call it rustic).

Baking (Recipe for Sourdough Bread)

You’ve made it to the grand finale! This is the moment when all your folding, squishing, waiting, and poking pays off. Your beginner-friendly recipe for sourdough bread is about to go from humble dough blob to glorious golden loaf.

But first … we bake.

Step 1: Preheat Like You Mean It (recipe for sourdough bread)

Grab your Dutch oven and pop it into your oven. Then crank that baby up to 500°F. Yes, five hundred. We’re not gently warming cookies here … we’re going full blast to get that crusty, steamy artisan finish we all crave.

Let the Dutch oven preheat for 30 minutes. Seriously. It needs to be lava-hot. This step is crucial for that dramatic oven spring and crispy crust.

Dutch Oven Note:
A 5-quart Dutch oven works stupendously for this easy sourdough bread recipe.  But if you’ve got a 7-quart Dutch oven, don’t worry … you can simply increase all your ingredients by 50% to make a big, glorious loaf worthy of a medieval feast.

Step 2: Get Ready to Bake (recipe for sourdough bread)

If your dough is in a proofing basket (banneton), now’s the moment to move it:

  • Place a sheet of parchment paper on the counter.
  • Sprinkle on some cornmeal for that rustic-bottom finish.
  • Then, gently flip your dough onto the parchment.

However, if you proofed your dough directly in a bowl lined with parchment paper (shoutout to the low-effort champions), you’re already set! No need to move a thing.

Now, brace yourself and carefully lower the parchment paper and dough into your preheated Dutch oven. Please, do not burn yourself. The Dutch oven is basically a small furnace at this point.

Step 3: Score Like a Bread Artist (recipe for sourdough bread)

This is your moment to shine.

  • Grab your lame (that’s pronounced lahm … not lame like your cousin’s jokes),
  • Or a razor blade,
  • Even a trusty pair of kitchen scissors … my personal favorite for beginner bakers.

Now score the top of your dough with a confident slash or snip. You’re not just decorating; you’re helping the steam escape and directing how your sourdough expands as it bakes. It’s both functional and fabulous.

recipe for sourdough bread scored on top
My daughter's 100% fresh milled bread ... she just out-baked me!

Step 4: Bake and Wait (and Try Not to Stare Through the Oven Door)

  • Spritz the top of the dough with a little water to help create extra steam.
  • Cover the Dutch oven with its lid to trap in all that moisture.

Now, drop the oven temperature to 450°F, and bake:

  • 15 minutes with the lid on
  • Then 25 minutes with the lid off

That’s a total of 40 minutes of baking time, and by the end, your kitchen will smell like a bakery, your soul will feel warm, and your loaf should be beautifully golden, crackly, and crusty.

And just like that, your recipe for sourdough bread is almost complete. Up next: we cool (as in let the bread cool … though yes, you’re cool too!)

Cooling (Recipe for Sourdough Bread)

You’ve made it! Your easy recipe for sourdough bread has officially gone from shaggy dough blob to a golden, crusty masterpiece. But before you slice into that beauty like a carb-crazed lumberjack … there’s one last step … cooling.

Step 1: Remove That Gorgeous Loaf

Once your bread is done baking and smells amazing, carefully lift it out of the Dutch oven. (Use oven mitts. Trust me. That pot is still hotter than the sun.) Then, remove the parchment paper like you’re unwrapping a surprise birthday present.

Place your loaf on a wire cooling rack, and admire your work for a moment. You did it. You actually made a homemade sourdough loaf from scratch. You’re basically a pioneer now.

Step 2: The Hardest Part … Waiting

Now, I know you’re tempted to cut into that warm, crusty sourdough right away. I get it. The bread is whispering your name, the butter is standing by, and your kitchen smells amazing. But please … don’t slice it yet.

Here’s why:
Even after it leaves the oven, your bread is still cooking on the inside. The steam inside the loaf is busy setting the crumb (a.k.a. the soft, holey goodness in the middle). If you slice too soon, you’ll end up with a gummy interior and steam burns on your fingers. No thanks.

So, be strong. Let your sourdough bread cool completely on the wire rack … ideally for at least 1 to 2 hours. Go for a walk, clean up the flour bomb that exploded across your kitchen, or just stand nearby and stare lovingly at your creation. Whatever works.

Step 3: Time to Feast

Once cooled? Go to town.
Slice it up, and serve with whatever brings you joy:

  • A fat slab of butter
  • Homemade jam
  • Peanut butter (crunchy or creamy, mmmm!)
  • Olive oil + balsamic vinegar for dipping
  • Or just plain, still slightly warm from within

Whatever you choose, enjoy every bite … because you just followed a full-blown recipe for sourdough bread from start to finish, and that, my friend, is no small feat.

Recipe for Sourdough Bread with Jam

Final Crust Thoughts (Recipe for Sourdough Bread)

So, should you make this bread?  Absolutely. Without question. Yes.

Whether you’re brand new to sourdough or just someone who loves the satisfying crackle of a fresh, crusty loaf … this easy recipe for sourdough bread is a total winner. It’s forgiving, beginner-friendly, and honestly, pretty hard to mess up (even if you accidentally forget a stretch and fold).

It’s the kind of recipe that builds your baking confidence while filling your kitchen with that irresistible bakery smell. And best of all? It’s delicious. Like, “I need another slice even though I just had three” kind of delicious.

Give this easy recipe a try and let me know how it goes! Did your dough rise like a champ? Did your crust sing when you sliced it? I want to hear it all. Drop a comment below, and if you snapped a pic of your beautiful loaf … even better! Tag me on Instagram [@hopethiswerksdiy] so I can cheer you on!

Before you go … don’t miss your free Top 10 Sourdough Tools Checklist! Just click here to have it appear.

Or … subscribe to the blog so you never miss a fun, cozy, slightly flour-dusted project. Whether it’s candle making, sourdough pancakes, or other “I bet I can make that” moments … I’ve got you covered. Join the fun and subscribe here!  As a thank-you, you’ll get a free awesome recipe card.

Now go forth, bake bread, and make your house smell like dreams.

Recipe for Sourdough Bread Cooling on Rack
Yield: 1 Loaf

Sourdough Bread: Crusty & No-Knead

Recipe for Sourdough Bread Cooling on Rack

This simple, crusty loaf is the perfect starter bread. Easy, foolproof, and so good you might eat half the loaf before it cools.

Ingredients

Levain

  • ½ cup (100g) room temperature water
  • 1 tablespoon (25g) sourdough starter
  • ¾ cup (100g) flour

Dough

  • 1¼ cups (310g) water
  • levain
  • 3¾ cups (450g) flour (all-purpose or bread)
  • 2 teaspoons salt

Instructions

Levain

1. Dump the water, sourdough starter, and flour into a bowl.

  • ½ cup (100g) water, 1 tablespoon (25g) sourdough starter, ¾ cup (100g) all-purpose flour

2. Give it a good stir until it looks like a thick batter.

3. Cover it up and let it hang out on the counter for 12ish hours.

Make a Dough Mess

4. Toss the water, levain, flour, and salt into a big bowl.

  • 1¼ cups (310g) water, levain, 3¾ cups (450g) flour, 2 teaspoons salt

5. Grab your trusty wooden spoon and stir it all together until you’ve got a shaggy, confused-looking blob.

6. Now, ditch the spoon and use a wet hand to pinch, squish, and smush the dough until everything’s nicely mixed ... about 2–3 minutes, depending on how enthusiastic you are. Adjust the flour or water, as necessary.

Stretch and Folds

7. Cover up your dough and pop that mixed dough into a warm, cozy spot ... let it hang out for 30 minutes.

8. Do a set of strength-building folds: grab one side, stretch it up, and tuck it in like you’re making a dough burrito. Repeat on all sides (north, west, south, east). Cover it back up and return it to its warm nap zone for another 30 minutes.

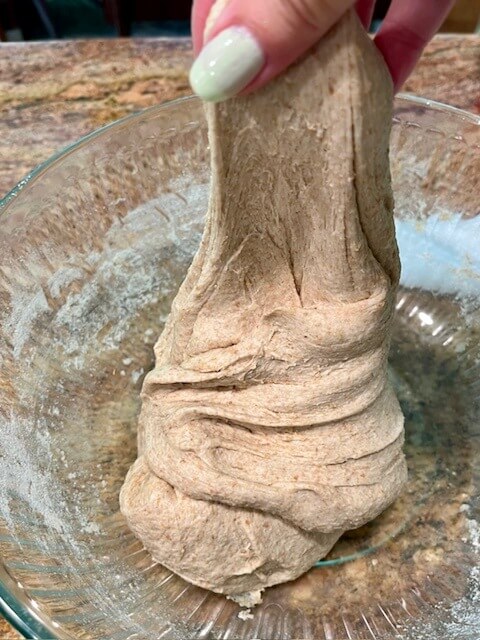
9. Do a total of 4 sets of stretch and folds, spaced 30 minutes apart. The goal is to pass the window pane test.

10. After your final stretch, cover it and let it ferment in peace for 2 hours.

Shaping

11. Gently flip the dough out onto your counter (floured or not ... your choice). Shape it into a round ball (think: smooth and snug). Put a piece of parchment paper in a bowl and sprinkle cornmeal on the bottom. Then, put that shaped dough ball right on top of the cornmeal ... seam side down.

12. Give your dough baby a little spa treatment ... spritz it with olive oil, tuck it in with some plastic wrap (or a cozy towel), and let it nap at room temp for about an hour or two. I highly recommend using your oven's bread proofing setting if you have one.

13. After its cozy nap, give it a gentle poke ... if the dent lingers just for a moment before springing back, it’s ready.

Bake Time

14. Preheat your Dutch oven inside a 500°F oven for 30-ish minutes (yes, it needs to get seriously hot ... like volcano hot).

15. Carefully (and I mean carefully) lower the parchment and dough into the lava-hot Dutch oven.

16. Score the top of your bread like an artisan baker ... use a lame, razor blade, or even scissors if that’s what you’ve got.

17. Give the dough a quick spritz with water. Pop the lid on to seal in the magic.

18. Drop the oven temp to 450°F and bake with the lid on for 15 minutes.

19. Take the lid off and bake for another 25 minutes, until your loaf is golden, crusty, and making the kitchen smell like a bakery.

20. Carefully lift your gorgeous loaf out of the Dutch oven, remove the parchment paper, and place it on a wire rack. Let it cool completely (yes, we know it’s hard to wait ... but slicing too soon is how you get gummy bread tears). And just like that… YOU made sourdough!

Notes

    • I put together for you a FREE list of of the Top 10 Things You Actually Need for Sourdough Success. Click here for it to magically appear.
    • This recipe is adapted from an awesome YouTube Video by Brian Lagerstrom. Click here to check out his website.
    • This recipe works best in a 5-quart Dutch oven. If yours is bigger, you’ll want to size things up a bit. I’ve used a 7-quart before and just bumped all the ingredients up by 50%. Easy peasy.

    Recommended Products

    As an Amazon Associate and member of other affiliate programs, I earn from qualifying purchases.

    Yield: 1 Loaf

    Sourdough Bread: Crusty & No-Knead (with Fresh Milled Flour)

    Recipe for Sourdough Bread Cooling on Rack

    This simple, crusty loaf is the perfect starter bread ... whether you're new to sourdough, fresh milled flour, or both. Easy, reliable, and totally delicious!

    Ingredients

    Levain

    • ½ cup (100g) room temperature water
    • 1 tablespoon (25g) sourdough starter
    • ¾ cup (100g) flour (fresh milled or store-bought)

    Dough

    • 1¼ cups (310g) water
    • levain
    • 2 ¼ cups (450g) hard white (or hard red) wheat berries, finely ground
    • 2 teaspoons salt

    Instructions

    Levain

    1. Dump the water, sourdough starter, and flour into a bowl.

    • ½ cup (100g) water, 1 tablespoon (25g) sourdough starter, ¾ cup (100g) flour

    2. Give it a good stir until it looks like a thick batter.

    3. Cover it up and let it hang out on the counter for 12ish hours.

    Make a Dough Mess

    4. Toss the water, levain, flour, and salt into a big bowl.

    • 1¼ cups (310g) water, levain, 2¼ cups (450g) ground wheat berries, 2 teaspoons salt

    5. Grab your trusty wooden spoon and stir it all together until you’ve got a shaggy, confused-looking blob.

    6. Now, ditch the spoon and use a wet hand to pinch, squish, and smush the dough until everything’s nicely mixed ... about 4-5 minutes, depending on how enthusiastic you are. Adjust the flour or water, as necessary.

    Stretch and Folds

    7. Cover up your dough and pop that mixed dough into a warm, cozy spot ... let it hang out for 30 minutes.

    8. Do a set of strength-building folds: grab one side, stretch it up, and tuck it in like you’re making a dough burrito. Repeat on all sides (north, west, south, east). Cover it back up and return it to its warm nap zone for another 30 minutes.

    9. Do a total of 4 to 8 sets of stretch and folds, spaced 30 minutes apart. The goal is to pass the window pane test.

    10. After your final stretch, cover it and let it ferment in peace for 2 hours.

    Shaping

    11. Gently flip the dough out onto your counter (floured or not ... your choice). Shape it into a round ball (think: smooth and snug). Put a piece of parchment paper in a bowl and sprinkle cornmeal on the bottom. Then, put that shaped dough ball right on top of the cornmeal ... seam side down.

    12. Give your dough baby a little spa treatment ... spritz it with olive oil, tuck it in with some plastic wrap (or a cozy towel), and let it nap at room temp for about an hour or two. I highly recommend using your oven's bread proofing setting if you have one.

    13. After its cozy nap, give it a gentle poke ... if the dent lingers just for a moment before springing back, it’s ready.

    Bake Time

    14. Preheat your Dutch oven inside a 500°F oven for 30-ish minutes (yes, it needs to get seriously hot ... like volcano hot).

    15. Carefully (and I mean carefully) lower the parchment and dough into the lava-hot Dutch oven.

    16. Score the top of your bread like an artisan baker ... use a lame, razor blade, or even scissors if that’s what you’ve got.

    17. Give the dough a quick spritz with water. Pop the lid on to seal in the magic.

    18. Drop the oven temp to 450°F and bake with the lid on for 15 minutes.

    19. Take the lid off and bake for another 25 minutes, until your loaf is golden, crusty, and making the kitchen smell like a bakery.

    20. Carefully lift your gorgeous loaf out of the Dutch oven, remove the parchment paper, and place it on a wire rack. Let it cool completely (yes, we know it’s hard to wait ... but slicing too soon is how you get gummy bread tears). And just like that… YOU made sourdough!

    Notes

    • I put together for you a FREE list of of the Top 10 Things You Actually Need for Sourdough Success. Click here for it to magically appear.
    • This recipe is adapted from an awesome YouTube Video by Brian Lagerstrom. Click here to check out his website.
    • This recipe works best in a 5-quart Dutch oven. If yours is bigger, you’ll want to size things up a bit. I’ve used a 7-quart before and just bumped all the ingredients up by 50%. Easy peasy.
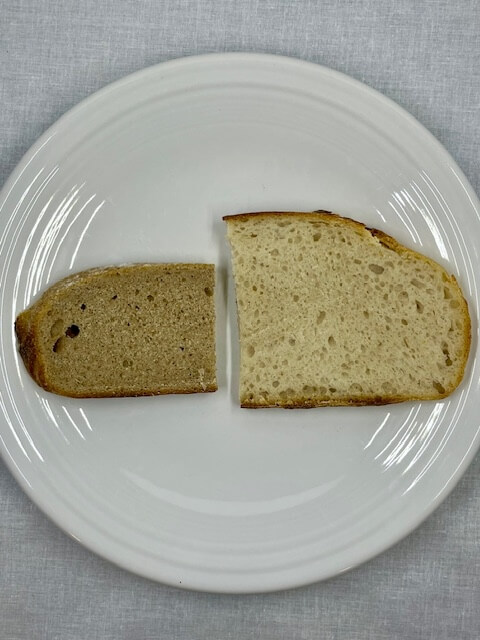
    • A fresh milled flour loaf will not be as tall and airy as a loaf made with store-bought flour.
    • This recipe is perfect for experimenting with a 50/50 blend. Use half store-bought flour and half fresh milled flour (for the perfect combination of rise/structure + flavor/nutrients).

    Recommended Products

    As an Amazon Associate and member of other affiliate programs, I earn from qualifying purchases.

    A Quick Thanks

    First things first … a big shoutout to my father-in-law, who gave me my very first sourdough crusty bread recipe.  This recipe is based on his, with a few tweaks and a sprinkle of chaos from me.  

    Also, this recipe was adapted from the brilliant Brian Langerstrom’s sourdough method.  He has a lot of great tutorials, and his techniques make sourdough feel way less intimidating. I highly recommend checking out his website for more amazing recipes.  He also does fabulous YouTube videos.

    some sentences or ideas may be from chatgpt or other AI

    Share the Post:

    6 responses to “Recipe for Sourdough Bread: Easy (optional fresh milled flour)”

    1. You have made me hungry for some toast and jam which is better than a chocolate chip cookie! Thank you for the recipe. I am eager to try it!

      • A toast to you! I fully support jam-fueled cravings … especially when they beat out chocolate chip cookies (bold move, and I respect it). Happy snacking!

      • Yay! I’m so excited for you to try it. Let me know how your loaf turns out … and don’t be afraid to get a little flour on everything. That’s part of the fun!

    Leave a Reply

    Your email address will not be published. Required fields are marked *

    Skip to Recipe