
You don’t have to break up with your store-bought flour just because a grain mill has entered your kitchen. In fact, I’m not asking you to choose sides. If you’re making the switch to fresh milled recipes, your grain mill can be the exciting new love of your baking life … while that bag of all-purpose flour sitting in your pantry still has a perfectly respectable place in the relationship. Think of it as keeping your old reliable friend around while you get to know the new one.
That’s exactly where the 50/50 method comes in. It’s an easy way to start making fresh milled recipes … without completely giving up the store-bought flour you already know and love.
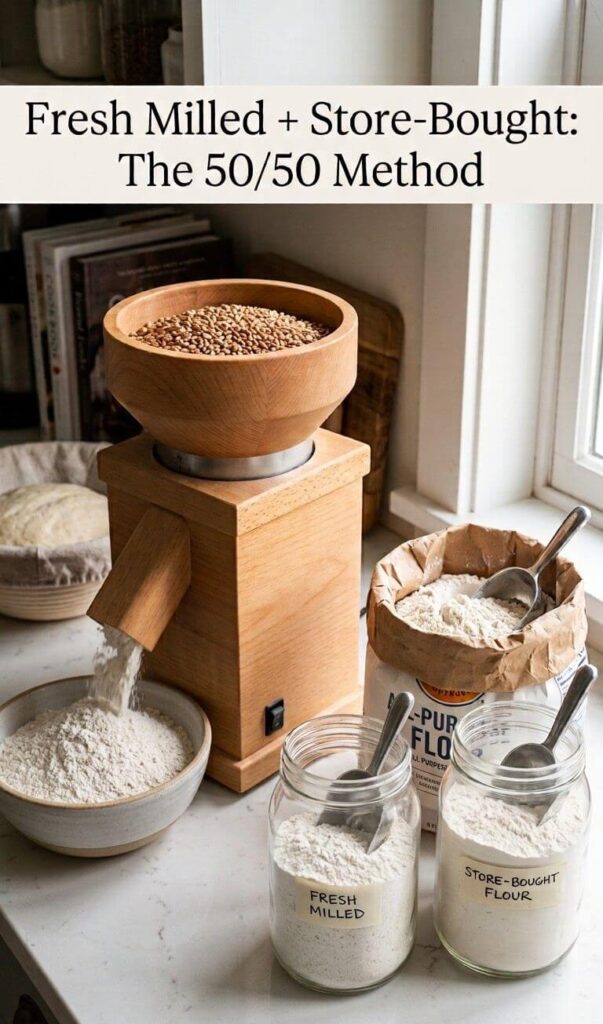
If you’re new to fresh milled recipes, this is one of the easiest ways to get started. You can take a recipe you already love … and simply use 50% fresh milled flour and 50% store-bought flour. You’ll get some of the flavor and goodness of freshly milled wheat while still keeping some of the familiar characteristics of the flour you already know. Best of all, it’s surprisingly easy.
And here’s the really good news: you’re not stuck with 50/50! This method works for just about any amount of fresh milled flour, whether you want to dip your toe in at 10% or go all the way to 100%.
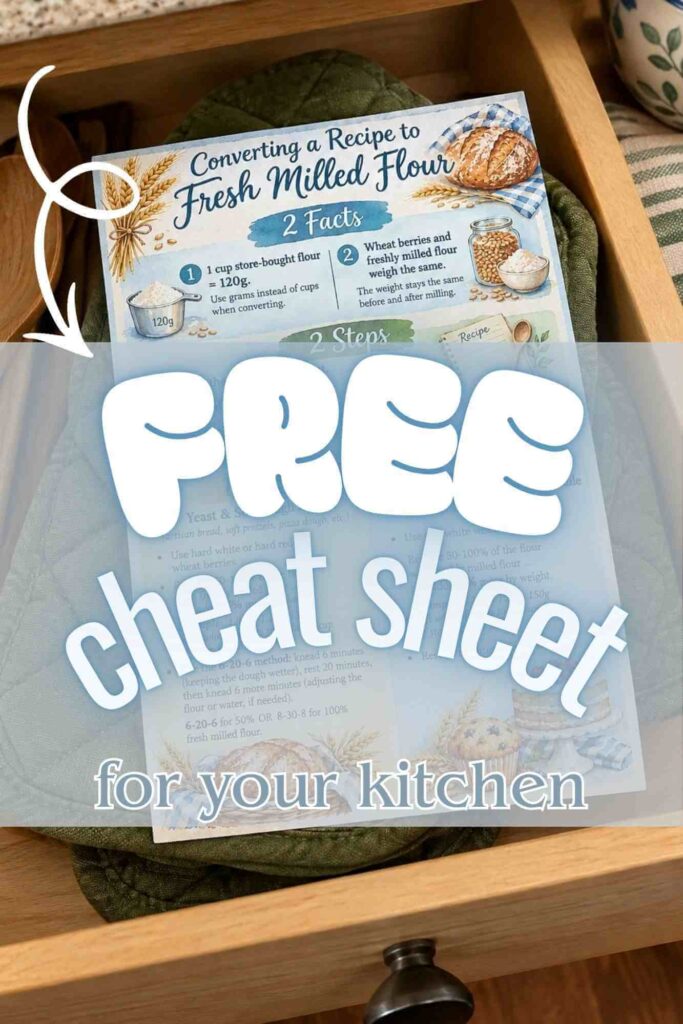
And because I know you probably don’t want to scroll back through this article every time you bake, I made you a free Freshly Milled Flour Conversion Cheat Sheet. It’s a handy 4×6-inch size … so you can tuck it in a kitchen drawer, stick it on the fridge, or hang it somewhere handy. Click here to get your free cheat sheet.
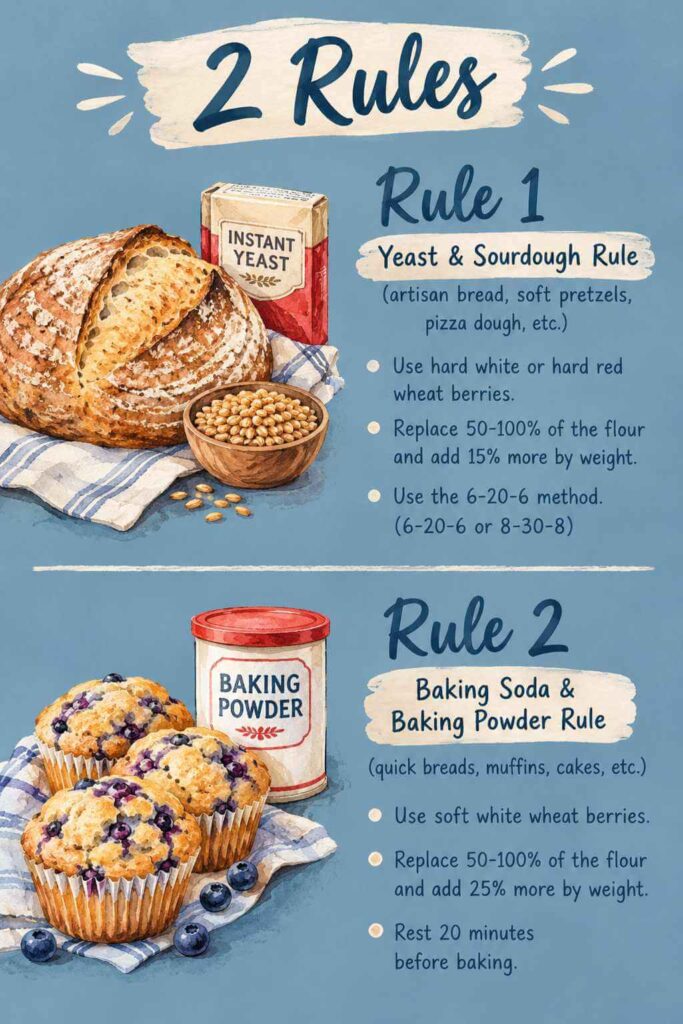
There are just 2 facts, 2 steps, and 2 rules you need to know. That’s it. Once you understand these six simple pieces, you’ll have everything you need to take a recipe and turn it into a 50/50 blend of store-bought flour and fresh milled flour.
See? Nothing scary. Just 2 facts, 2 steps, and 2 rules. Let’s break it down.
Ten Reasons to Use 50% Store-Bought Flour + 50% Fresh Milled Flour
-
You’re new to fresh milled flour. A 50/50 blend lets you ease into it without changing everything at once. Instead of jumping from zero to 100% fresh milled flour overnight, you can start with one foot in each world.
-
You’re not sure your family will like it. Half store-bought flour keeps the texture more familiar while you test the fresh-milled waters. It’s kind of like sneaking vegetables into dinner.
-
You’re not sure how fresh milled flour will behave. Using half store-bought flour makes experimenting with new recipes a little less intimidating. You can learn how the fresh flour behaves without feeling like the entire recipe is riding on your ability to understand the mysterious moods of wheat.
-
You don’t want to mess with your favorite recipes. A 50/50 swap lets you add fresh milled flour without completely reinventing the recipes you already love. After all, there’s nothing wrong with keeping Grandma’s pancake recipe exactly the way Grandma intended while giving it a little fresh-milled makeover. You can gradually inch your way to 100% if you feel like it.
-
You’re running low on wheat berries. A 50/50 blend stretches your wheat berry stash while you wait for your next delivery to arrive. Because apparently wheat berries have the same habit as toilet paper and chocolate chips … you don’t realize how much you have until suddenly you don’t have enough.
-
Your grain mill is being difficult. Sometimes the mill has other plans. Using half store-bought flour means less milling.
-
You’re baking for someone who isn’t sold on fresh milled flour. The familiar store-bought flour can help keep the texture and flavor closer to what they’re used to. It can be a nice middle ground when you’re baking for someone who thinks anything called “whole wheat” automatically means “cardboard.”
-
You’re baking several things at once. When you’re making multiple recipes, using half store-bought flour means fewer wheat berries to measure, mill, and clean up after.
-
You want to use up the flour already in your pantry. That half-empty bag of all-purpose flour isn’t going to use itself. A 50/50 blend is a great way to put it to work instead of letting it sit in the pantry until you finally discover it sometime around the next presidential election.
-
You simply want the best of both worlds. You get some of the flavor and goodness of fresh milled flour while keeping some of the familiar qualities of store-bought flour. In other words … everybody gets invited to the party.
And, honestly, I’m sure there are even more reasons to use a 50/50 mix. So if you have another reason you love blending fresh milled flour with all-purpose flour, leave a comment below and let us know.
Before You Start
There is one thing I want you to do before you start converting your favorite recipes.
Get out your kitchen scale.
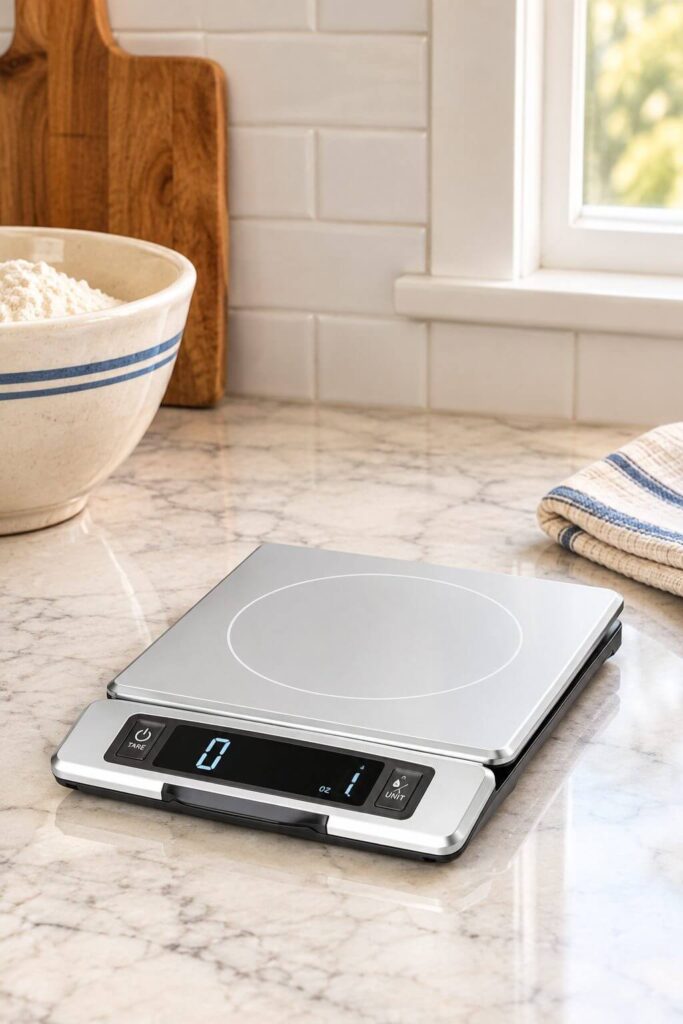
If you don’t have one … I consider a kitchen scale almost essential when baking with fresh milled flour. So, if you’ve been looking for an excuse to buy one, this is it. I am in love with mine. I’ve had it for years and years, and it still works perfectly. It’s one of those kitchen gadgets that quietly does its job without demanding attention … like the dependable friend who always shows up when you need help.
The reason a scale matters so much is that fresh milled flour behaves differently from store-bought flour, especially when you’re measuring by volume. When I used store-bought flour, I would stick my measuring cup into the bag and scoop up that white flour. Sometimes I’d get too much and wiggle the cup a little. Other times, if I was feeling particularly precise, I’d grab a knife and level off the top. Easy enough.
However, freshly milled flour is a different animal. When you grind wheat berries, the resulting flour is incredibly fluffy and airy. It hasn’t been sitting around getting compressed during processing, shipping, handling, storage … and all the other adventures flour goes through before it reaches your kitchen. Therefore, a cup of freshly milled flour can weigh considerably less than a cup of store-bought flour.
That’s why … when you’re learning how to use fresh milled flour in bread and other recipes, I strongly recommend thinking in grams rather than cups.
Two Facts You Need to Know
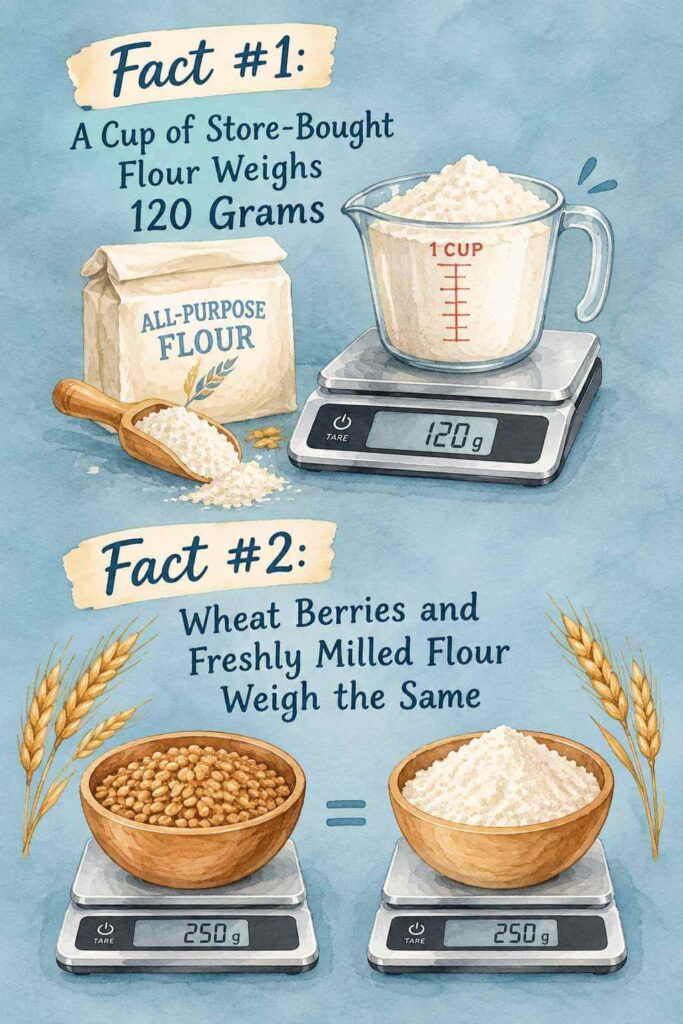
Fact #1: A Cup of Store-Bought Flour Weighs 120 Grams
For this method, we’re going to use 120 grams as the weight of one cup of store-bought flour (all-purpose or bread flour). I didn’t pull that number out of my mixing bowl. This is the standard weight used by reliable baking sources such as King Arthur baking.
So, whenever I say one cup of store-bought flour in this article, I’m going to treat that as 120 grams.
Fact #2: Wheat Berries and Freshly Milled Flour Weigh the Same
This one makes things wonderfully simple.
When you grind fresh milled flour, the amount of wheat berries you measure out will weigh essentially the same as the amount of flour you get after grinding. In other words, 250 grams of wheat berries will give you approximately 250 grams of freshly milled flour.
The wheat berries don’t magically gain or lose weight just because they went through your grain mill. They simply went from tiny little wheat nuggets to fluffy flour. And that means you can weigh the wheat berries before milling or weigh the freshly milled flour afterward.
Either way, your kitchen scale is your best friend.
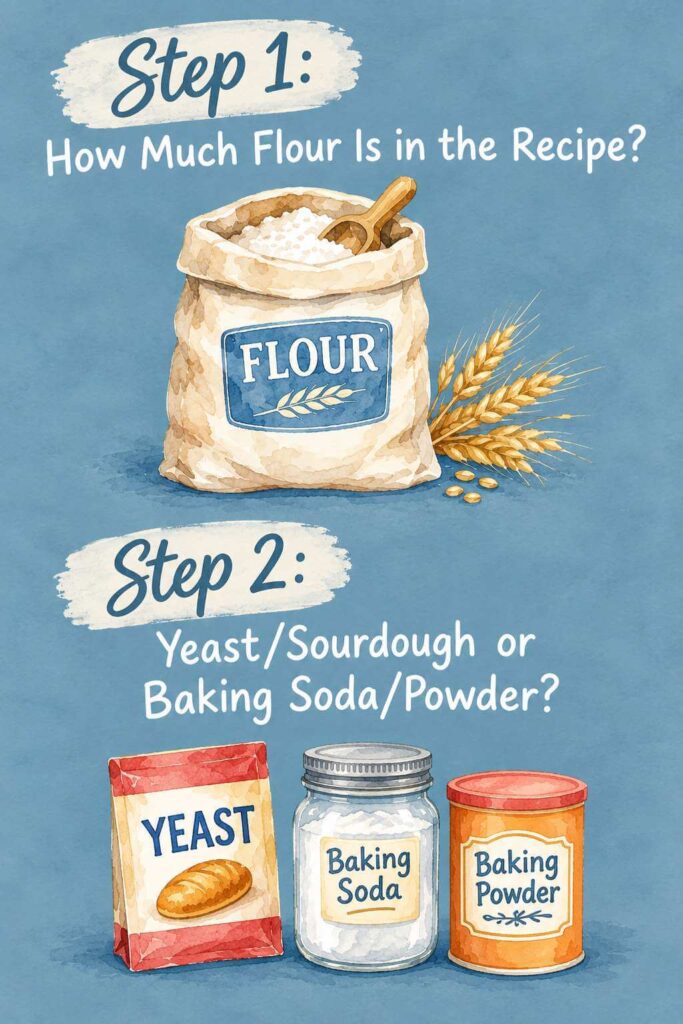
Step 1: How Much Flour Is in the Recipe?
Now grab a recipe you want to convert. For the sake of an example, let’s say it’s your Mom’s pancake recipe.
First, find the total amount of flour in the recipe because that is the major ingredient we’re going to change. Let’s say Mom’s recipe calls for two cups of flour. We’re going to divide that amount in half. So, instead of using two cups of store-bought flour, you’re going to use:
1 cup store-bought flour + 1 cup fresh milled flour
Simple, right? Well, almost.
Now we have to figure out exactly how many wheat berries you need to grind to make that one cup of fresh milled flour. That’s where the next step comes in.
Step 2: Is It a Yeast/Sourdogh Recipe or a Baking Soda/Powder Recipe?
Before you start grinding wheat … you need to figure out what kind of recipe you’re working with.
Ask yourself two questions:
- Does your recipe have yeast or sourdough starter hiding in there … doing its bubbly magic?
- Or are we working with a non-yeast recipe that usually uses baking soda or baking powder to do the leavening?
This matters because fresh milled flour behaves differently depending on the type of recipe. I have a separate rule for yeast/sourdough (rule #1) … and a different rule for baking powder/baking soda (rule #2) baked goods.
Examples of recipes made with yeast/sourdough:
- Bread — sourdough, sandwich loaves, artisan bread
- Bagels
- Pizza dough
- Cinnamon rolls
- Soft pretzels
- Focaccia
- Challah
So, in a nutshell:
Yeast or sourdough → Follow Rule 1
Baking powder or baking soda → Follow Rule 2
Easy enough.
Rule 1: Yeast/Sourdough Recipes
If you’re converting a yeast or sourdough recipe, there are three things you need to do.
-
Choose the right wheat berry.
-
Add 15% more wheat berries.
-
Give the dough a little extra kneading and resting time.
That’s it. Let’s walk through each one.
1. Choose the Right Wheat Berry
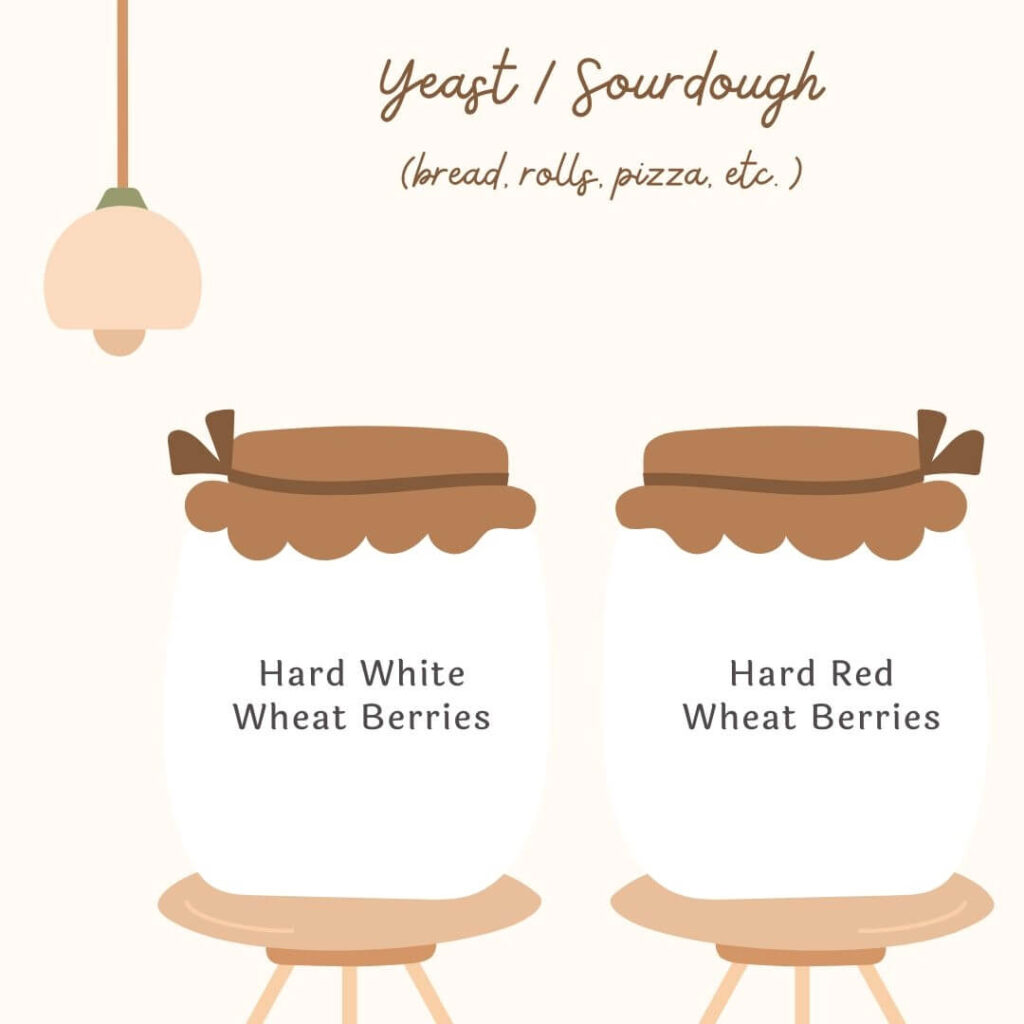
I’m going to make this part very simple. For yeast and sourdough breads, choose either hard white wheat or hard red wheat. Both are excellent choices for bread because they have the gluten-forming ability we need to give a loaf structure and help it rise nicely.
Of course, there are more options. If you want to dive deeper into the differences between wheat berries, I have another article that goes into all of that. However, when I’m making bread, I pretty much always reach for hard white or hard red. Or, if I’m feeling adventurous, I combine them. Think of it like coffee. Sometimes you want your regular cup, and sometimes you decide to mix two beans together just to see what happens.
2. Grind 15% More Wheat Berries
Now we get to the math. Don’t panic. This is the kind of math that even I can get behind because the calculator does the heavy lifting.
Let’s say your favorite sandwich bread recipe calls for four cups of flour. Because we’re making a 50/50 blend, you’re going to use:
2 cups store-bought flour and 2 cups fresh milled flour
Now we need to figure out how many wheat berries you need for those two cups of fresh milled flour. Remember our first fact? One cup of store-bought flour weighs 120 grams.
Therefore: 120 grams + 120 grams = 240 grams
So, you might think you need 240 grams of wheat berries. But we’re not quite done. Fresh milled flour needs 15% more added to it.
Why Do We Add 15% More?
The bran and germ in fresh milled flour don’t absorb liquid in exactly the same way refined store-bought flour does. Therefore, we want to add a little extra flour so we have enough fresh milled flour to absorb the liquid in the recipe. So, take those 240 grams and multiply by 1.15 (15% more):
240 × 1.15 = 276 grams
And there you have it. You need 276 grams of hard white or hard red wheat berries to make the fresh-milled half of this recipe. That’s your whole substitute right there.
And remember, because wheat berries and freshly milled flour weigh the same, you have two options. You can weigh out 276 grams of wheat berries and grind them. Or, if you already have a big batch of freshly milled flour sitting around, you can simply weigh out 276 grams of the flour. Either way works.
And one more thing: you do not have to be precise down to the last gram. If you end up with 271 grams or 280 grams, nobody is going to kick you out of the Fresh Milled Flour Club. A few grams here or there will be just fine.
3. The 6-20-6 Trick
Now comes one of my favorite tricks for working with fresh milled wheat flour bread. I call it the 6-20-6 method.
Fresh milled flour takes longer to develop gluten, and it also takes longer to absorb liquid. Therefore, instead of kneading your dough and immediately deciding it’s too wet, give the flour some time to catch up.
Here’s what you do:
Knead for 6 minutes. Keep the dough wetter than you feel comfortable with. I know. Your brain may be screaming, “This dough is too wet!” Ignore your brain for a minute. Fresh milled flour is a little like a sponge that hasn’t finished waking up. Give it some time and it will absorb more of that liquid.
Next, let the dough rest for 20 minutes. During that time, the fresh flour gets a chance to absorb the liquid.
Then knead for another 6 minutes. During that second knead, you can adjust the dough if you need to. Add a little more water or flour at a time until the dough reaches the consistency you’re looking for.
And if you are making 100% fresh milled flour bread instead of a 50/50 blend, I bump those numbers up to: 8-30-8 … Knead 8 minutes. Rest 30 minutes. Knead another 8 minutes.
4. What Else Do You Change?
Nothing. Seriously. Don’t change the amount of liquid. Keep the same cooking time. Don’t change the other ingredients. You don’t have to start second-guessing yourself halfway through the recipe.
Once you have chosen the right wheat berry, added your 15%, and given the dough the extra kneading and resting time it needs … you’re done.
Rule 1 Summary for Yeast and Sourdough
For yeast and sourdough recipes, you only need to remember three things:
-
Choose the right wheat berry. Use hard white or hard red wheat.
-
Add 15% more. Multiply the fresh-milled portion by 1.15.
-
Knead and rest a little longer. Use the 6-20-6 method, or 8-30-8 for 100% fresh milled bread.
That’s it. Those three little changes can make converting your favorite recipes much less intimidating.
Rule 2: Baking Powder or Baking Soda Recipes (non-yeast)
Now, if your recipe doesn’t contain yeast or sourdough … congratulations. You’ve entered the land of quick breads, muffins, cookies, cakes, brownies, and all the other baked goods that don’t require you to wait around for dough to rise. And thankfully, this method is just as simple. There are still three things to remember:
-
Choose the right wheat berry.
-
Add 25% more wheat berries.
-
Give the finished batter a 20-minute rest.
Let’s break it down.
1. Choose Soft White Wheat for Quick Breads
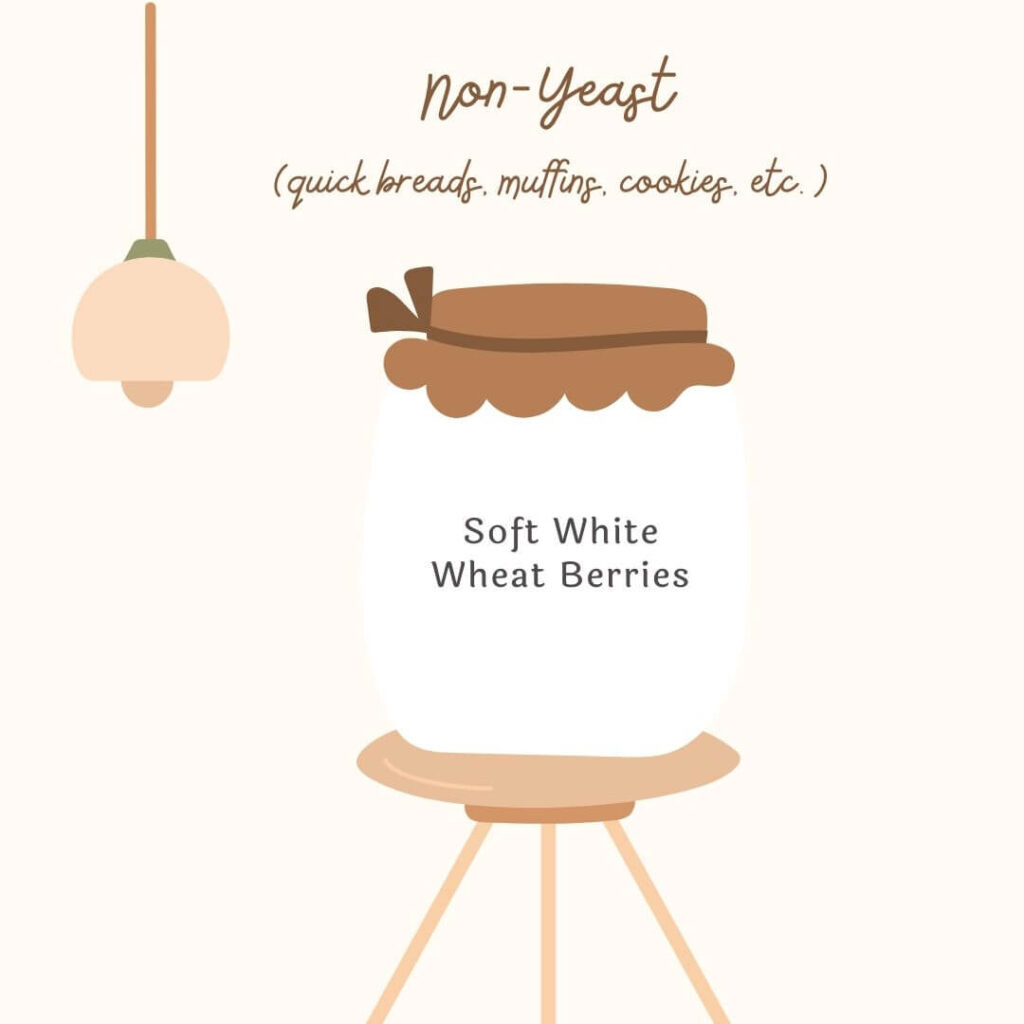
For fresh milled flour recipes such as banana bread, zucchini bread, pumpkin bread, muffins, cakes, and similar baked goods, I recommend soft white wheat berries. Soft white wheat is lower in gluten, which means less chew and more tenderness. And that’s exactly what I want in a quick bread. I want a delicate crumb, not a loaf that requires a workout to take a bite.
Of course, there are other options. If I want to experiment with ancient grains, this is often where I find it easiest to substitute some of them into a recipe. Again, I have another article that dives deeper into the differences between wheat berries if you want to explore those options.
However, when I’m making quick breads, I almost always find myself reaching for soft white wheat.
2. Grind 25% More Wheat Berries
Here’s where the formula changes. Instead of adding 15% more wheat berries like we do for yeast breads, we’re going to add 25% more for quick breads and other baking powder or baking soda recipes.
Let’s use a banana bread recipe as our example. Suppose your favorite banana bread recipe calls for 3 cups of flour. Since we’re making a 50/50 blend, you’ll use:
1½ cups store-bought flour and 1½ cups fresh milled flour
Now we need to figure out how much fresh milled flour we need to make that 1½ cups. Remember, one cup of store-bought flour weighs 120 grams. So:
1 cup = 120 grams – and – ½ cup = 60 grams
Therefore:
120 + 60 = 180 grams
So our starting number is 180 grams. But now we add 25%.
Why Do Baking Soda/Powder Recipes Need Even More Wheat Berries?
You may be wondering why we add more wheat berries to quick breads than we do to yeast breads. After all, flour is flour, right? Well … sort of.
The biggest reason is that quick breads, muffins, brownies, cakes, cookies, and similar baked goods generally have less time to absorb the liquid than yeast breads do. A yeast bread gets quite a bit of attention. We knead it. Let it rest. We knead it again. Then we let it rise. Shaping it is always fun. Sometimes we let it rise again. Basically, yeast bread gets a spa day.
Quick bread, on the other hand, gets mixed together and then headed straight for the oven. Because we aren’t giving it all of that extra kneading, rising, shaping, and resting time … the flour has less opportunity to fully absorb the liquid before baking. We are going to give the quick bread a 20-minute rest, but it still doesn’t get the extended hydration time that a yeast dough receives. Therefore, we compensate by starting with a little more fresh milled flour.
Take our 180 grams and multiply by 1.25:
180 × 1.25 = 225 grams
So you need 225 grams of soft white wheat berries.
And remember, if you already have freshly milled soft white flour sitting on your counter … just weigh out 225 grams. Or, if you haven’t milled it yet, weigh out 225 grams of wheat berries and give them a whirl through your grain mill. Either way, you end up with the same weight.
3. Give Your Quick Bread a 20-Minute Rest
Now we have one more little trick. You don’t need to knead quick breads. In fact, you don’t want to. Kneading develops gluten, and too much gluten development can make quick breads tough. And nobody wants a banana bread that requires the jaws of a Labrador to get through it.
Instead, we want that light, tender crumb that makes quick breads so wonderful. So, once all of your ingredients are mixed together, let the batter rest for 20 minutes before baking. That gives the fresh milled flour some extra time to absorb the liquid. It’s a small step, but it can make a noticeable difference.
4. What Else Do You Change?
Again, nothing. Don’t change the amount of liquid. Keep the cooking time. Don’t change anything else.
Just choose the right wheat berry, add 25% extra fresh milled flour, and give the batter its 20-minute rest.
Rule 2 Summary for Baking Powder and Baking Soda Recipes
For non-yeast recipes, remember these three things:
-
Choose the right wheat berry. Use soft white wheat.
-
Add 25% more. Multiply the fresh-milled portion by 1.25.
-
Rest for 20 minutes. Once everything is mixed together, let the batter rest before baking.
That’s it. Three simple changes, and suddenly you have a much easier way to convert your favorite recipes to fresh milled flour.
Cookie Tip: Don’t Let Your Cookies Go Full Pancake
Now, cookies deserve their own little sidebar because they have a tendency to behave like rebellious teenagers.
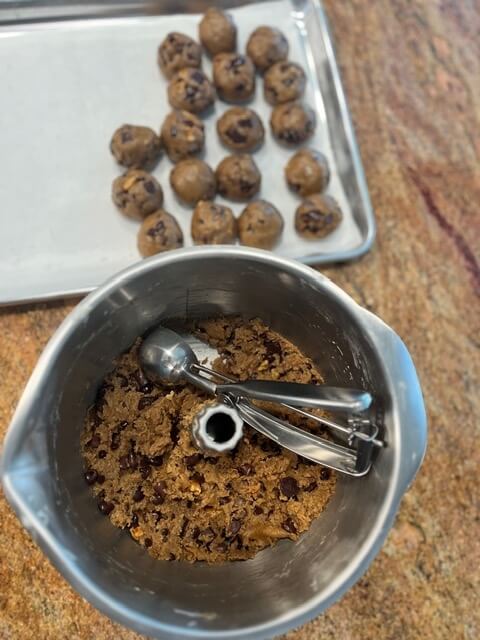
If your cookies are spreading out too much while baking, chill the dough in the refrigerator for anywhere from 2 hours to overnight before baking. The cooler temperature firms up the butter … while the extra time gives the flour more opportunity to fully hydrate. As a result, your cookies are more likely to hold their shape instead of spreading across the baking sheet and going full pancake mode.
Here’s my favorite game plan. Line a cookie sheet with parchment paper. Scoop your dough into balls. Cover them up. Then put the whole tray in the refrigerator. The next day … you can bake them whenever your sweet tooth starts making demands.
Honestly, it’s like meal prepping, except the meal is cookies and nobody is complaining.
FAQ: Got Flour Questions?
What is the 50/50 fresh milled flour method?
The 50/50 method means … replacing 50% of the store-bought flour in a recipe with fresh milled flour … while keeping the other 50% as store-bought flour. It’s an easy way to start using fresh milled flour without changing a recipe completely. Click here for a free fresh milled flour conversion cheat sheet … a handy reference to keep in your kitchen.
Why use a 50/50 flour blend?
A 50/50 blend lets you enjoy some of the flavor and benefits of fresh milled flour while keeping some of the familiar characteristics of store-bought flour. It’s also a simple way to experiment with fresh milled flour.
How much does one cup of store-bought flour weigh?
For this conversion method, use 120 grams for one cup of store-bought flour. Using grams makes the conversion much more consistent than measuring fresh milled flour by volume.
Do wheat berries and fresh milled flour weigh the same?
Yes. Milling changes the volume of the wheat, but the weight stays essentially the same. For example, 120 grams of wheat berries will produce approximately 120 grams of fresh milled flour.
How do I start converting a recipe to fresh milled flour?
First, find the total amount of flour in the recipe. Then divide it in half. One half stays as store-bought flour, and the other half becomes your fresh milled flour portion.
How do I know which fresh milled flour rule to use?
Look at the leavening in your recipe. Yeast and sourdough recipes use Rule 1, while recipes made with baking soda or baking powder use Rule 2. (see above)
What wheat berries should I use for yeast and sourdough recipes?
Use hard white or hard red wheat berries. They provide the gluten structure needed for yeast and sourdough breads, pizza dough, soft pretzels, and similar recipes.
How much extra wheat should I use for yeast or sourdough recipes?
Use 15% more wheat berries by weight for the fresh milled portion. For example … to replace one cup of flour … 120 grams × 1.15 = 138 grams of hard wheat berries.
What is the 6-20-6 method?
The 6-20-6 method means kneading the dough for 6 minutes, letting it rest for 20 minutes, and then kneading it for another 6 minutes. The rest gives the fresh milled flour time to absorb the liquid.
What wheat berries should I use for quick breads?
Use soft white wheat berries for quick breads, muffins, cakes, brownies, and similar baked goods. Soft wheat generally produces a more tender texture.
How much extra wheat should I use for baking powder or baking soda recipes?
Use 25% more wheat berries by weight for the fresh milled portion. For example … to replace one cup of flour … 120 grams × 1.25 = 150 grams of soft white wheat berries.
Do I need to knead quick bread made with fresh milled flour?
No. Quick breads should not be kneaded because developing too much gluten can make them tough. Instead, let the batter rest for about 20 minutes before baking.
Do I need to change anything else in my recipe?
No. For this 50/50 method, keep the other ingredients, liquid, baking temperature, and baking time the same.
Can I use more than 50% fresh milled flour?
Absolutely. The method can be used for 10–100% fresh milled flour. Here is an article that talks about replacing 100% of flour for fresh milled flour … same rules (just another explanation).
The Bottom Line
And that’s it! You now have the six simple pieces you need to start converting your favorite recipes to fresh milled flour: 2 facts, 2 steps, and 2 rules.
You don’t have to throw out your favorite recipes. You don’t have to memorize a complicated list of conversions. And you certainly don’t need to become a wheat-berry mathematician.
Instead, replace half of the store-bought flour with fresh milled flour, use the appropriate formula, and give the fresh flour a little extra time to do its thing.
Once you practice this method a few times, you’ll probably have that lightbulb moment where you realize, “Oh… that’s it?” Yep. That’s it. The grain mill may have looked intimidating when you first brought it home, but converting your favorite recipes doesn’t have to be.
So grab your kitchen scale, pick a recipe you already love, and give the 50/50 method a try.
Your old bag of all-purpose flour and your shiny new grain mill can live happily ever after. And honestly, I think that’s a pretty good ending to the flour love story.
Final Tidbits
Now that you know how to do the conversion, it’s time to put those wheat berries to work! If you’re wondering what to bake first … you might get some inspiration by taking a peek at my fresh milled recipes and baking guides or browse my fresh milled flour tutorials. There are plenty of recipes and ideas to help you keep that grain mill busy without turning your kitchen into a flour-covered science experiment.
And because I know you probably don’t want to pull out your phone and hunt down this article every time you want to convert a recipe. I made you that free Fresh Milled Flour Conversion Cheat Sheet. It’s a small 4×6-inch size, so it’s tiny enough to tuck into a kitchen drawer, stick on the fridge, or hang somewhere handy. Click here to get your free cheat sheet and keep the 2 facts, 2 steps, and 2 rules right where you bake.
And if you try this method, I’d love to hear how it goes! Leave a comment below, tag me on Instagram @hopethiswerksdiy, come hang out with me on Facebook, or wander over to YouTube and say hello. I’ll be cheering you on from my kitchen … probably covered in flour and wondering where I put my kitchen scale.
Want to make sure you never miss a fresh milled recipe, baking tip, or kitchen experiment? Subscribe here, and I’ll send you my favorite pancake recipe as a little thank-you for joining me.
Until next time … may your grain mill keep humming, your dough behave itself, and your fresh milled flour adventures turn out better than you expected. Happy baking!
Charts & Summaries
| Recipe Type | Wheat Berry | Fresh-Milled Amount | Rest / Knead | What Else Changes? |
|---|---|---|---|---|
| Yeast & Sourdough | Hard white or hard red | Add 15% more wheat berries to the fresh-milled portion. |
6-20-6 Knead 6 min → Rest 20 min → Knead 6 min For 100% fresh milled: 8-30-8 |
Nothing else. Keep the recipe's liquid, ingredients, and baking time the same. |
| Quick Breads, Muffins, Cakes, Cookies & Other Non-Yeast Bakes | Soft white | Add 25% more wheat berries to the fresh-milled portion. |
Rest 20 minutes Do not knead. |
Nothing else. Keep the recipe's liquid, ingredients, and baking time the same. |
Example: The recipe calls for 4 cups of flour.
2 cups store-bought flour + 2 cups fresh milled flour.
1 cup store-bought flour = 120 grams.
Yeast/sourdough = multiply the fresh-milled portion by 1.15.
Baking powder/soda = multiply the fresh-milled portion by 1.25.
Yeast/sourdough → hard white or hard red.
Quick breads/non-yeast → soft white.
Wheat berries and the flour produced from them weigh essentially the same.
Yeast/sourdough → use 6-20-6.
Quick breads → rest 20 minutes. Do not knead.
Like what you found here? You can help keep me stocked with wheat berries, keep my grain mill spinning, and possibly fund my ongoing battle with flour on absolutely everything. Click this link to chip in. Thanks for being part of the Hope This Werks crew!





2 responses to “Fresh Milled Recipes: The Easy 50/50 Method with Store-Bought Flour”
This answered so many of my questions. I feel like I can do this now. I even printed the cheat sheet. Thank you!
You got this! After you do it a few times … you are going to be surprised at how easy it is.