
Welcome to

Hope this Werks

Fresh milled. Real Food. Pure energy.

The Best Fresh Milled Flour Biscuits (or store flour)

Updated: July 19, 2026

Have you ever had one of those foods that can instantly make a house feel like home? For me, it’s biscuits. There is just something magical about pulling a pan of golden, buttery fresh milled flour biscuits (or store-bought flour) out of the oven.

Have you ever noticed how certain recipes seem to pop up everywhere at once? One person mentions them, then another … and before you know it, you’re convinced the universe is trying to tell you something. That’s exactly what happened with these fresh milled flour biscuits.

One of my favorite things about blogging is that my family and friends have become my unofficial brainstorming committee. Last week alone, three different people suggested that I write a fresh milled flour biscuit recipe (along with a store-bought flour version).

The funny part? I had already started writing this very blog post.

I couldn’t help but laugh because it felt like perfect timing. Apparently, biscuits were on everyone’s mind that week … including mine. So, naturally, I took it as a sign that it was finally time for my favorite biscuit recipe to make its debut.

Whether you’re baking with freshly milled flour or sticking with store-bought flour, I’ve got you covered. I’ll walk you through both versions so everyone can pull a tray of warm, flaky biscuits out of the oven.

Now, I should probably warn you … I have very high standards when it comes to biscuits.

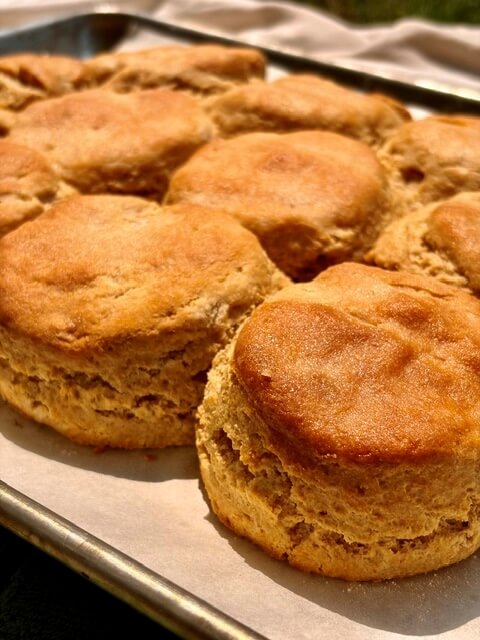
fresh milled flour biscuits on a baking tray

My Biscuit Bucket List

I’ve been chasing the perfect biscuit for years. I want biscuits that are:

  • Mile-high
  • Wonderfully fluffy inside (dense biscuits simply aren’t welcome in my kitchen)
  • Made with just a few simple ingredients
  • Crispy and beautifully golden on the outside
  • Foolproof enough that they turn out every single time
  • Easy to make ahead for busy mornings and holidays

In other words, I want the kind of biscuit that makes everyone reach for a second one before they’ve even finished the first.

If that sounds like your kind of biscuit too, then pull up a chair. We’re about to make some fresh milled flour biscuits (or store-bought flour)  together.

KTBC = Keep That Butter Chilly

Before we measure a single cup of flour, there’s one biscuit secret you absolutely need to know. Actually … it’s so important that I gave it its own little acronym.

KTBC = Keep That Butter Chilly

If you remember only one thing from this entire post, let it be this.

Cold butter is the secret behind tall, flaky biscuits. It’s just as important for biscuits as it is for pie crust … and once you understand why, the whole biscuit-making process suddenly makes a lot more sense.

Why does keeping the butter cold matter for fresh milled flour biscuits?

Think of those little pieces of butter as tiny balloons hiding throughout your dough.

When the biscuits slide into a hot oven, the water inside the cold butter quickly turns into steam. That steam gently pushes the layers of dough apart, creating those gorgeous flaky layers that everyone hopes for. Meanwhile, as the butter melts, it leaves behind tiny pockets of air throughout the biscuit. Those little pockets are what make the inside light, soft, and tender instead of heavy and dense.

On the other hand, if your butter gets warm before the biscuits ever reach the oven, it melts right into the flour. Instead of creating flaky layers, it coats the flour particles too early, making it much harder for the dough to build the structure needed for a tall biscuit. The result? Instead of sky-high biscuits, you end up with flat little hockey pucks. And around here, we’re aiming for fluffy clouds … not hockey pucks.

How do you KTBC … fresh milled flour biscuits?

Fortunately, keeping your butter chilly isn’t difficult. It just takes a few simple habits.

  • Start with butter straight from the refrigerator. Don’t leave it on the counter while you gather your ingredients.
  • If your kitchen is warm, cut the butter into cubes and pop it back into the refrigerator for a few minutes before using it.
  • If you’re using a food processor, chilling the bowl beforehand is a wonderful bonus during the summer months.
  • Work efficiently so your hands don’t have time to warm the dough.
  • If the dough starts feeling soft or sticky, simply refrigerate it for 15–30 minutes before continuing.
  • Chill your cut biscuits before baking for an extra layer of insurance against melted butter.
  • Always use cold milk instead of warm milk to help keep everything nice and chilly.

What should you avoid?

Just as importantly, there are a few things you don’t want to do.

  • Don’t use softened or room-temperature butter. Save that for cookies.
  • Don’t process the butter until it completely disappears into the flour. You want visible little pieces of butter throughout the mixture.
  • Don’t knead biscuit dough like bread dough. Too much handling develops gluten and warms the butter.
  • Don’t leave your shaped biscuits sitting on a warm countertop while the oven finishes preheating.
  • Don’t use warm milk. Cold or slightly cool milk helps keep everything chilled.

Think of biscuit dough like an ice cream cone on a summer afternoon. The longer it sits in the heat, the faster things go downhill. Keep everything cold, and your biscuits will reward you with beautiful flaky layers every single time.

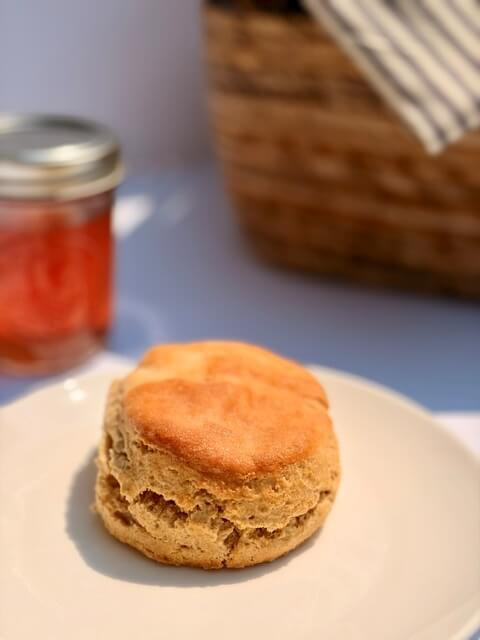
fresh milled flour biscuits on a white plate with jam in the background

Choosing the Best Mixing Method for Fresh Milled Flour Biscuits

Now that we’ve all agreed to KTBC (Keep That Butter Chilly), let’s talk about the different ways you can mix your biscuit dough.

The truth is, there isn’t just one “right” way to make fresh milled flour biscuits (or with store-bought flour). Several methods work beautifully. However, some do a better job than others at keeping your butter cold … and by now, you know that’s the secret to tall, flaky biscuits.

Here are my three favorite methods, in order from favorite to least favorite.

Food Processor (My Favorite … for Making Fresh Milled Flour Biscuits)

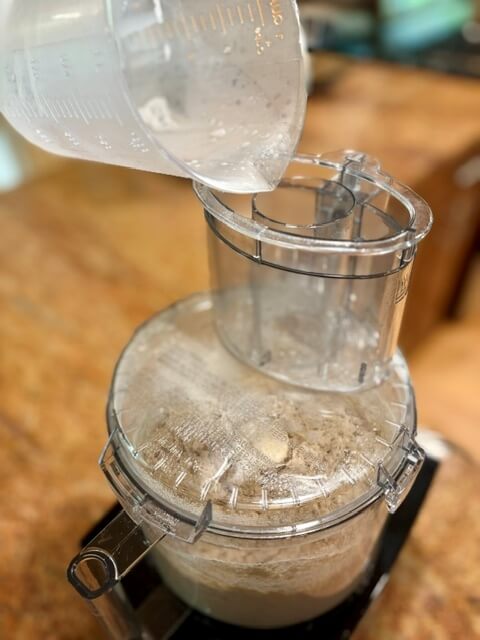
If you’ve spent much time in my kitchen, you’ve probably noticed that I have a bit of a crush on my food processor. Whenever I’m making fresh milled flour biscuits, it’s the first thing I reach for. I simply add the ingredients, give everything a few quick pulses, and let it do the hard work for me. Better yet, it mixes everything together without warming the butter with my hands.

It’s quick, easy, and consistently gives me beautiful biscuits. Honestly, it makes me look far more talented than I probably deserve.

Large Bowl and Pastry Cutter (or Two Forks)

If you don’t have a food processor, don’t worry. A large mixing bowl and a pastry cutter work wonderfully too. This method takes a little more time, but it’s still excellent at keeping those little pieces of butter cold while you work them into the flour.

No pastry cutter? Two forks can get the job done as well. It might require a bit more patience, but you’ll still end up with delicious, flaky biscuits.

Large Bowl and Your Hands (My Least Favorite … for Making Fresh Milled Flour Biscuits)

Now I know what some of you are thinking.

“But my grandma always made biscuits with her hands!”

The difference is that grandmas have years … often decades … of biscuit-making experience. They’ve made biscuits so many times that they can work quickly, confidently, and almost without thinking. Before the butter has a chance to warm up, they’re already sliding a pan of biscuits into the oven.

I, however, am not that grandma. I’ve tried making biscuits this way more than once, and let’s just say my results were … less inspiring.

I took too long.

My hands warmed the butter.

The butter blended right into the flour instead of staying in little cold pieces.

And instead of pulling beautiful, fluffy biscuits out of the oven, I ended up with biscuits that could have doubled as hockey pucks.

So if you’re a biscuit-making ninja … like Grandma, go for it.

As for me, I’ll happily let my food processor do the heavy lifting while I keep my butter nice and chilly.

food processor filled with fresh milled flour and butter for biscuits

Choosing the Right Flour for Fresh Milled Flour Biscuits

Let’s talk about the ingredient that gives these biscuits their heart … the flour.

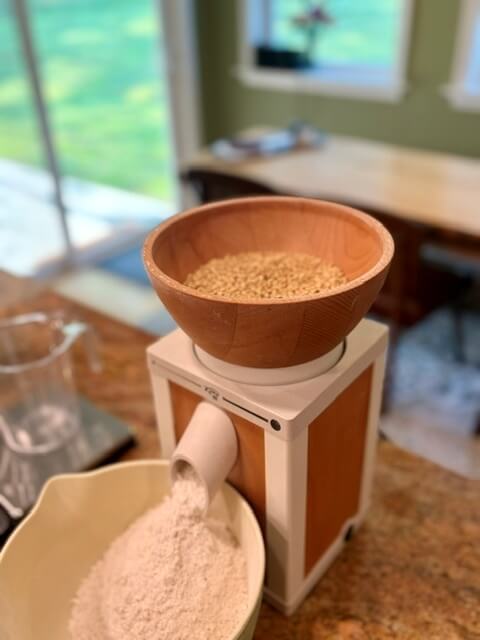
If you’re making these fresh milled flour biscuits, the very first thing you’ll want to do is mill your wheat. I start with 600 grams of soft white wheat berries and mill them on a fine setting.

At this point, you might be wondering … “Can I use hard wheat instead?” That’s a great question because not all wheat is created equal.

One of my favorite grain sayings is: “Yeast and sourdough like it hard. Baking powder and baking soda like it soft.” It’s a simple way to remember which wheat works best for different recipes.

Think of hard wheat as the dependable construction worker. It’s strong, sturdy, and perfect for building lofty sandwich bread and chewy artisan loaves because it develops lots of gluten.

Soft wheat, on the other hand, is more like a cozy quilt. It isn’t trying to build a skyscraper … it just wants to create tender, delicate baked goods. That’s exactly what we want for fresh milled flour biscuits.

Why Soft White Wheat Makes Better Biscuits

Since this recipe relies on baking powder instead of yeast, soft white wheat gives you the best chance at creating those light, fluffy biscuits with beautifully tender layers.

If you’re interested in learning more about choosing the right wheat for different recipes, I have an entire guide that walks through the different wheat varieties and when to use each one.

Team Store-Bought Flour, You're Welcome Here Too

Not everyone mills their own flour, and that’s perfectly okay. I promised this recipe would work for everyone.

If you’re making the store-bought version, simply use 4 cups (480 grams) of all-purpose flour.

One flour you don’t want to reach for is bread flour. Save that for recipes where you actually want lots of gluten development, like sandwich bread, pizza dough, or artisan loaves. Biscuits are looking for tenderness, not chewiness.

If you run across White Lily Flour, you’ve stumbled across a Southern favorite. There’s a reason generations of biscuit bakers swear by it. White Lily has a lower protein content than most all-purpose flours, which means it develops less gluten. Less gluten equals a softer, lighter biscuit with a wonderfully delicate crumb. In other words, it’s practically made for biscuits.

Meet the Supporting Cast

Now it’s time to bring all of the dry ingredients together.

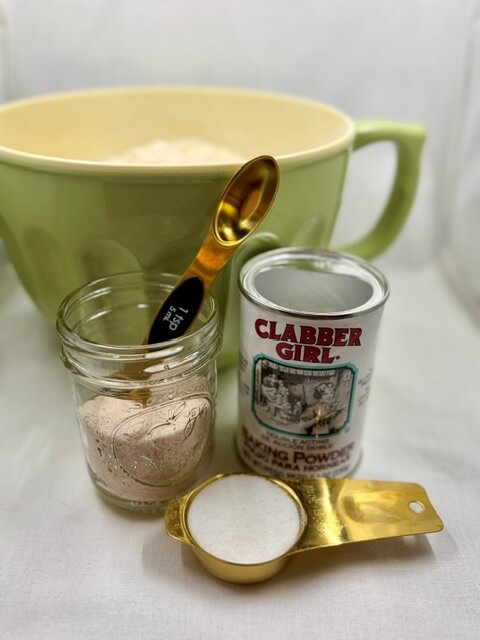
Add the following ingredients to your food processor or large mixing bowl:

  • Flour
  • 3½ tablespoons baking powder
  • 2 scant tablespoons sugar
  • 2 teaspoons salt

Then give everything a quick mix until it’s evenly combined.

Let’s take a closer look at what each ingredient is doing, because every one of them has an important job.

Baking Powder: The Lift Behind Fresh Milled Flour Biscuits

If butter is the secret to flaky layers, baking powder is the reason your biscuits reach for the sky.

As soon as baking powder meets moisture and heat, it starts creating tiny bubbles throughout the dough. Those bubbles expand in the hot oven and give biscuits their beautiful rise.

Unlike yeast, baking powder doesn’t need time to ferment and develop. It’s ready to go almost immediately, which is why you’ll want to get your biscuits into the oven soon after making them. (PS … I don’t store the dough in my fridge overnight.)

Think of baking powder as the sprinter of the baking world. It doesn’t warm up … it simply hears the starting gun and takes off running.

Sugar: The Quiet Team Player for Fresh Milled Flour Biscuits

You might not expect to find sugar in a biscuit recipe, but don’t worry … these aren’t dessert biscuits.

A small amount of sugar quietly works behind the scenes by balancing flavors, encouraging beautiful golden browning, and helping keep the biscuits tender.

It doesn’t make them taste sweet. Instead, it makes them taste more like … well … the very best version of a biscuit.

Salt: The Flavor Cheerleader of Fresh Milled Flour Biscuits

Salt may seem like a small ingredient, but it has a very important job. Without it, biscuits can taste surprisingly flat. Salt enhances the buttery richness, balances the tiny bit of sugar, and brings out the wonderfully nutty flavor of freshly milled wheat. It’s a little like the conductor of an orchestra. You don’t always notice it, but without it, everything feels slightly off.

Once your dry ingredients are evenly mixed, we’re finally ready for my favorite ingredient of all … Butter.

Butter Makes It Better

Let’s be honest … has butter ever made anything worse?

For this recipe, you’ll need 12 tablespoons of cold butter (that’s 1½ sticks).

Remember our little mantra? KTBC … Keep That Butter Chilly. Your butter should still be nice and cold when you reach this step. Before adding it to your flour mixture, dice the butter into small cubes.

Why? Imagine trying to stir a giant ice cube into a glass of lemonade. It would take forever to break apart. The same thing happens with butter. Smaller pieces distribute much more quickly and evenly throughout the flour, which means less mixing … and less mixing means your butter stays cold. That’s exactly what we’re after.

Using a Food Processor

If you’re using a food processor (my favorite method), add about one-quarter of the diced butter at a time. Give it a few quick pulses before adding the next batch. Continue until all of the butter has been incorporated.

The goal isn’t to completely blend the butter into the flour. Instead, you’re looking for little pea-sized pieces scattered throughout the mixture. Those tiny pockets of butter are what create the flaky layers later in the oven.

Mixing by Hand

If you’re using a large bowl and pastry cutter, add the butter a handful at a time rather than dumping it all into one big pile. The little butter cubes have an annoying habit of sticking together like toddlers squishing around a soccer ball as they are learning how to play soccer. If they start clumping together, simply toss a little flour over them as you add them to the bowl. That thin coating of flour helps keep each piece separate so the butter stays evenly distributed throughout the dough.

Regardless of which mixing method you choose, resist the temptation to keep mixing until everything looks perfectly smooth.

Smooth isn’t the goal.

Little visible pieces of butter are.

If your mixture looks slightly shaggy with small butter pieces throughout, you’ve done it exactly right.

Bring On the Moisture

Now it’s time to bring the dough together. Pour in your cold milk. Yes … I’m seeing a pattern too:

Cold butter.

Cold milk.

Chilly dough.

KTBC strikes again.

Mix everything together just until the flour is moistened and a rough, shaggy dough forms. That’s it. As tempting as it is to keep stirring until everything looks perfectly smooth, don’t do it. Overmixing develops gluten, and gluten is wonderful for bread … but not so wonderful for tender biscuits.

Think of biscuit dough like introducing two friends. You simply want them to meet, shake hands, and become acquainted. You don’t need them to become best friends.

Want to Use Sourdough Discard? This is also the perfect time to use up a little sourdough discard. Simply stir it into the dough along with the milk. It’s an easy way to add a little extra flavor to your biscuits.

Milk vs. Buttermilk … in Fresh Milled Flour Biscuits

Let’s talk about buttermilk for a minute because I know someone is wondering…

“Shouldn’t biscuits always use buttermilk?”

The answer is … not necessarily.

Buttermilk makes an excellent one-to-one substitute for regular milk … and if I happen to have some in my refrigerator, I’ll happily use it. The problem is … I usually don’t. Rather than creating a recipe that requires a special trip to the grocery store, I wanted one that I could make with ingredients I almost always have on hand.

Many biscuit recipes call for buttermilk because its acidity helps relax gluten … creating a softer, more delicate biscuit. Additionally, recipes made with baking soda need an acidic ingredient like buttermilk, yogurt, sour cream, lemon juice, or vinegar to activate the baking soda.

This recipe is different.

Since we’re using baking powder (versus baking soda) … which already contains both the acid and the base … it doesn’t need buttermilk to create lift. That’s why these biscuits bake up beautifully with regular milk.

If you have buttermilk, use it.

If you don’t … don’t make a special trip to the store. Your biscuits will be absolutely delicious.

Let Fresh Milled Flour Biscuits Rest

If you’re using freshly milled flour, there’s one extra step that’s worth every minute. Let the dough rest for 30 minutes before moving on. Freshly milled flour takes a little longer to absorb moisture than store-bought flour. Giving it time to hydrate allows the bran and germ to fully soften, which creates a more tender biscuit.

Since we’re still following our KTBC philosophy, I simply place the entire food processor bowl (or mixing bowl) into the refrigerator while the dough rests. That way, the flour hydrates while the butter stays nice and cold.

If you’re making the store-bought flour version, you can skip this resting period and move right on to the next step.

Now that our dough is fully hydrated, it’s time to create those beautiful flaky layers.

Build Those Flaky Layers

This is where ordinary biscuit dough starts becoming something special.

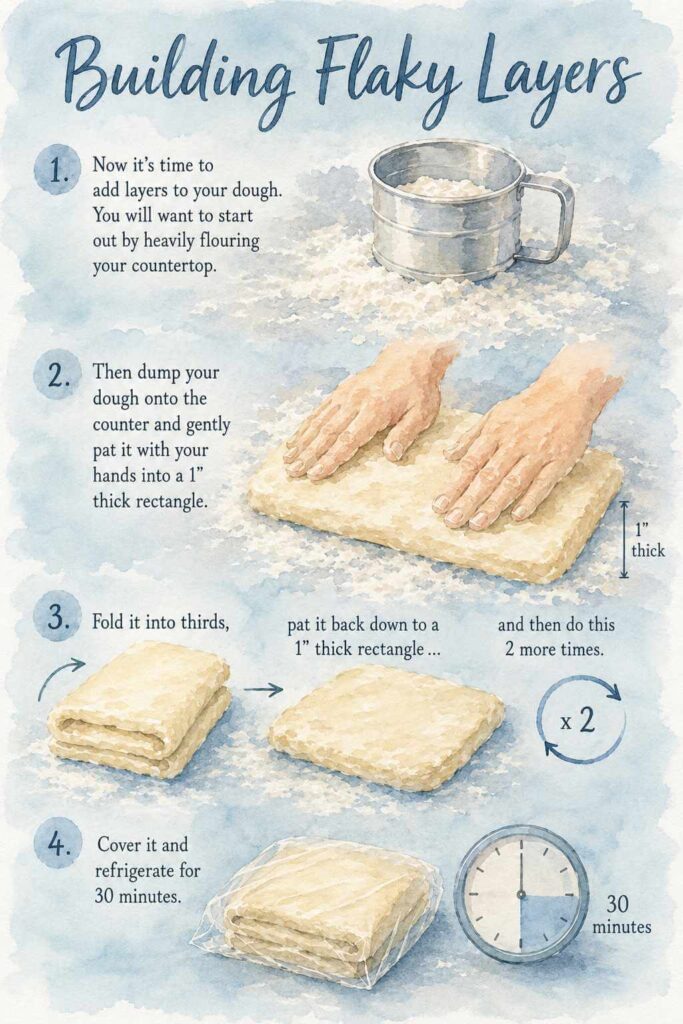
Start by generously flouring your countertop. Don’t be shy here. A well-floured surface keeps the dough from sticking and makes the whole process much more enjoyable.

Gently turn the dough out onto the counter and use your hands to pat it into a rectangle that’s about 1 inch thick. Notice I said pat, not roll. We’re still treating this dough gently.

Now fold the dough into thirds, almost like you’re folding a business letter before sliding it into an envelope.

Then gently pat it back into a 1-inch rectangle.

Repeat that folding process two more times.

That’s it.

You just created the layers that will become those gorgeous flaky biscuits everyone loves.

Why Fold Biscuit Dough?

You might be wondering …“Is all this folding really necessary?”

I think it absolutely is. Every time you fold the dough, you’re stacking thin layers of butter and dough on top of one another. Think of it like making a stack of blankets. One blanket by itself isn’t very impressive. However, when you fold blanket after blanket on top of each other, you suddenly have lots of cozy layers.

Biscuits work the same way.

When those cold butter pieces hit the hot oven, they release steam that gently pushes those layers apart. That’s what creates the tender, pull-apart texture we’re after.

Without the folds, you’ll still have biscuits.

With the folds, you’ll have biscuits that make people stop and ask, “How did you get them so flaky?”

I’ll take the flaky ones every single time.

fresh milled flour biscuits chart about how to build flaky layers

From Blob to Beautiful

Now it’s finally time to shape your fresh milled flour biscuits. First, gently pat your dough into a rectangle that’s about 1 inch thick. Now, I know what you’re probably thinking. “Isn’t that a little thick?” Actually … yes. It is. And that’s exactly the point.

Most biscuit recipe instructions will tell you to roll your dough to about ½ inch thick. You absolutely can do that if you prefer. Just remember that thinner biscuits bake more quickly, so you’ll need to shorten the baking time a bit.

As for me? I’m firmly on Team Mile-High Biscuit.

Fun Fact: Biscuits will generally double in height in the oven. A 1″ thick dough will become a 2″ thick cooked biscuit.

There’s just something magical about splitting open a tall biscuit that’s packed with flaky layers. They’re perfect for breakfast sandwiches, they hold up beautifully under sausage gravy, and, quite honestly, they just make people smile when they see them.

Story Time About Fresh Milled Flour Biscuits

My love affair with tall biscuits actually started years ago during a trip my husband and I took to Savannah, Georgia. We stumbled across the cutest little bakery one morning and ordered breakfast. They served enormous biscuit sandwiches that practically needed their own zip code. Every biscuit was unbelievably tall, buttery, and flaky.

They were so good that we went back the next morning. And then we went back again. By the end of the trip, we’d accidentally created a vacation tradition that revolved entirely around biscuits. Ever since then, I’ve been trying to recreate that same bakery-style experience at home with these fresh milled flour biscuits.

Then, just recently, my husband and I were traveling through Maryland and stopped at a well-known breakfast chain. We ordered one of their breakfast bowls, and it came with a biscuit on the side.

Friends…

That poor biscuit never stood a chance.

It was tiny.

It was dry.

And also flavorless.

It tasted like it had been manufactured somewhere far away and simply happened to arrive on my plate. I took one bite … that was one bite too many.

Meanwhile, I couldn’t help but think about how much money that restaurant makes serving biscuits that nobody is going to remember (at least fondly). So here’s my little pep talk for you … if a huge chain restaurant can build a business serving nasty biscuits, imagine what your family and friends are going to think when you pull a tray of homemade biscuits with freshly milled flour (or store flour) out of your oven.

Trust me …They’re going to remember those biscuits. They’re going to ask you for the recipe. And they’re probably going to grab a second one before they’ve even finished the first.

Now … enough storytelling.

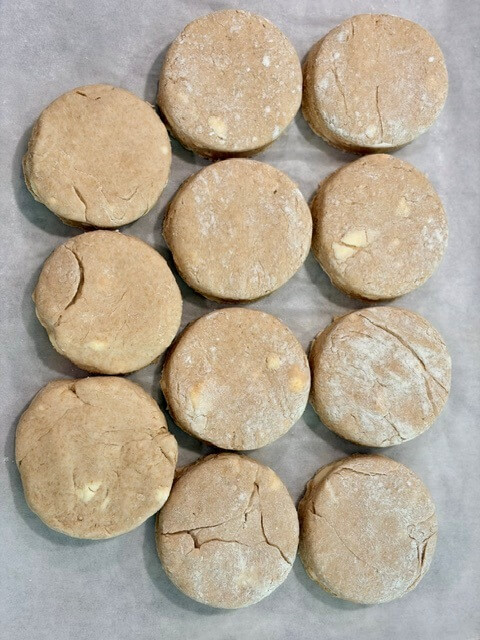
a tray of fresh milled flour biscuits that are cut in a circle in the background is the 3" cutter

Cut Your Fresh Milled Flour Biscuits Like a Pro

Let’s get back to shaping these beauties.

Once your dough is about 1 inch thick, it’s time to cut your biscuits. Be sure to flour your biscuit cutter first so it releases cleanly from the dough.

One little detail that many people overlook is using a sharp biscuit cutter rather than a dull one. Think about cutting wrapping paper with old scissors versus brand-new scissors. One slices cleanly. The other crushes everything in its path.

Your biscuit cutter works exactly the same way. A clean cut keeps all of those flaky layers free to separate while they bake.

Biscuit Cutter Options

I often reach for a 3-inch round biscuit cutter because I love the classic look. However, don’t feel like you have to make circles. In fact, one of my favorite ways to shape biscuits is into hearty squares. That’s exactly how our favorite bakery in Savannah made theirs … and I’ve loved square biscuits ever since. Besides, square biscuits have a bonus. There’s no dough scraps to re-roll, which means less handling and an even more tender freshly milled flour biscuit.

If you decide to make square biscuits, simply use a bench scraper or sharp knife to cut even portions. However, there’s one important trick. Every single edge needs to be a fresh cut. Ask me how I know. One time I thought I could simply trim the dough into squares while leaving the outside edges untouched.

Technically, they looked like biscuits. Practically? Not so much.

Those outside edges of the biscuits didn’t rise nearly as well because the sealed edges acted like tiny walls, preventing the flaky layers from separating. Remember what’s happening inside your dough. As those little pieces of cold butter melt, they release steam. That steam is trying to push every layer upward. Freshly cut edges give the layers somewhere to go. Sealed edges tell the steam, “Sorry…we’re closed today.” 

Don’t Sabotage Your Fresh Milled Flour Biscuits with a Glass

While we’re talking about cutting biscuits, let’s discuss one shortcut I’d recommend skipping. It might be tempting to grab a drinking glass or mason jar if you don’t own a biscuit cutter. Technically, they’ll cut a circle. However, they won’t give you the best biscuits with freshly milled flour.

For starters, I have absolutely no idea how people get the dough back out if it gets stuck inside the glass. More importantly, though, the thick rim of a glass tends to compress the outer edge of the dough. Imagine taking a beautiful book and gluing all of the pages together. The pages are still there. They just can’t open anymore.

Your biscuit layers behave the same way.

When the edges get smashed together, those delicate layers can’t separate properly in the oven. Instead of rising into beautiful, flaky biscuits with freshly ground flour, the biscuits often spread outward because the steam has nowhere else to go.

A simple biscuit cutter leaves a much cleaner edge and gives your biscuits the best opportunity to rise nice and tall.

Never Twist Your Cutter When Making Fresh Milled Flour Biscuits

There’s one final biscuit habit that’s surprisingly hard to break.

*Don’t twist your biscuit cutter.*

For some reason, twisting feels incredibly satisfying. Maybe it’s because we’re used to twisting cookie cutters, opening jars, or using a corkscrew. Whatever the reason, your hands naturally want to give that cutter a little spin. Resist the temptation.

Instead, press the cutter straight down into the dough. Then lift it straight back up. That’s it.

Twisting compresses the edges of the dough and seals together all of those flaky layers you worked so hard to build. Think of it like pinching the end of a drinking straw shut. Air can’t move through it anymore. The same thing happens inside your biscuit. Open edges invite the steam to lift the layers upward. Sealed edges force the biscuit to spread sideways instead.

After all of the effort you’ve put into creating those beautiful buttery layers, don’t let one little twist undo your hard work. A straight cut is one of the easiest ways to help your fresh-milled flour biscuits bake up tall and flaky.

Buddy Baking

After you cut your biscuits, place them on a parchment-lined baking sheet so that they’re just barely touching each other. Notice I didn’t say to spread them several inches apart like cookies. Instead, let them become little baking buddies.

As biscuits bake, they naturally want to spread in every direction. However, when they’re just barely touching, they give each other a little support.

Think about standing in a crowded elevator. Nobody has much room to lean sideways, so everyone naturally stands a little straighter.

Your biscuits behave the same way. Instead of sprawling outward across the baking sheet like they’re relaxing on a beach towel, they encourage one another to grow upward.

The result is taller, fluffier biscuits.

The Chill Before the Thrill

I know what you’re thinking.

“Another 30-minute rest? Didn’t we already do that?”

We did. However, this second rest has a completely different job to do. After you’ve cut out your biscuits, place them on a parchment-lined baking sheet, cover them, and pop them back into the refrigerator for another 30 minutes.

Remember our little motto? KTBC … Keep That Butter Chilly!

This second trip to the refrigerator is really just another way of protecting all the hard work you’ve already put into these biscuits with freshly milled flour (or store-bought flour).

Even though you’ve handled the dough gently … every fold, pat, and cut warmed it just a tiny bit. Butter doesn’t need much encouragement before it starts softening.

Think about carrying a stick of butter around the grocery store on a hot summer day. It may still look like butter when you get home, but it’s definitely not as firm as it was when you first picked it up. Your biscuit dough is no different.

This quick chill gives every little piece of butter a chance to firm back up before it heads into the hot oven. And that’s exactly what we want. Because the colder the butter is when it hits the oven, the more dramatic those beautiful flaky layers become.

Fresh Milled Flour Biscuits Become More Tender During This Rest

The butter isn’t the only thing getting a little break. Your gluten is relaxing, too.

Now, don’t worry … you haven’t overworked your dough. However, every time you folded it to build those gorgeous layers, you stretched the gluten just a little.

Imagine spending the afternoon helping a friend move furniture. Your muscles would probably appreciate a chance to sit down before running a marathon. Gluten feels the same way.

Here’s another bonus.

This second rest helps all those beautiful layers settle into place before baking. During this short rest, the layers you’ve carefully folded stay distinct and organized. Then, once they hit the hot oven, the steam from those tiny pieces of cold butter can push each layer upward instead of sideways. The result? Taller. Flakier. More tender. Exactly the kind of biscuits we’re after.

So go ahead and let your biscuits enjoy one last little nap in the refrigerator.

Meanwhile, you have the perfect opportunity to get your oven ready. Because once these beauties come out of the fridge … It’s finally time to bake.

Turn Up the Heat

While your fresh milled flour biscuits are enjoying their final nap in the refrigerator, it’s the perfect time to preheat your oven to 425°F.

If you’re used to baking cookies, cakes, or brownies at 350°F, this might feel a little … aggressive. You might even find yourself wondering, “Is 425°F really necessary?” Actually, it is. In fact, this is another big secret to making tall, flaky biscuits.

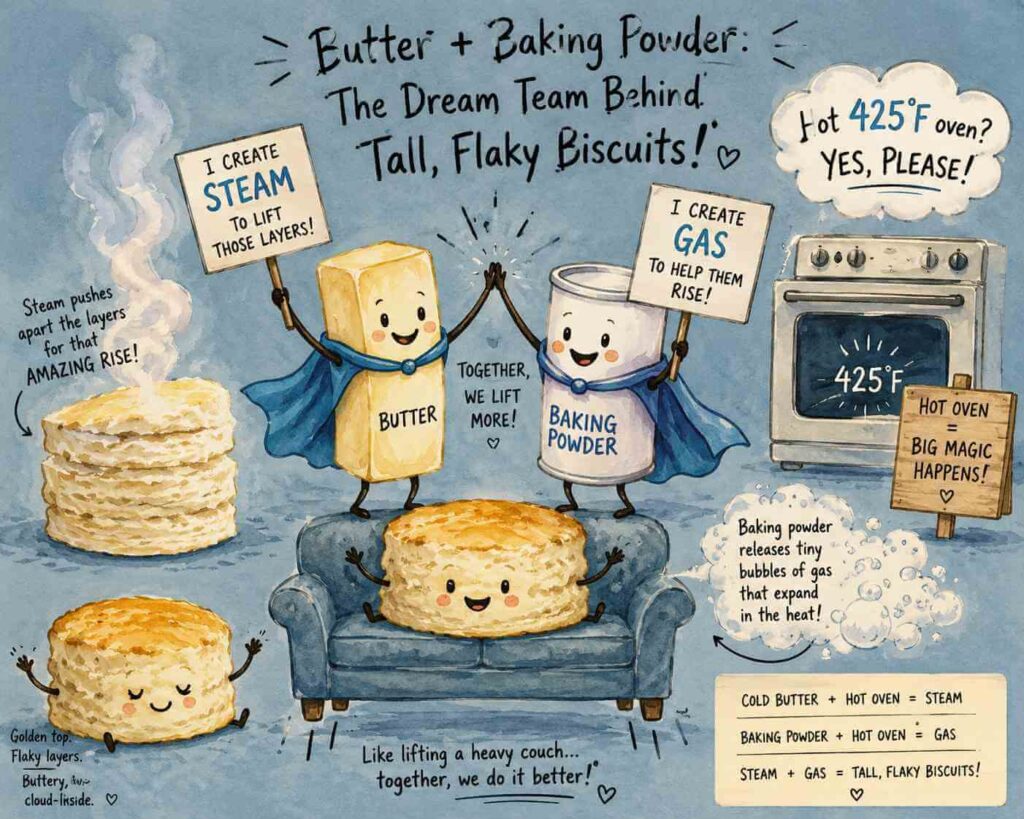
Remember all the work you’ve done to keep your butter cold? Now it’s time for that cold butter to finally do its job. The moment your biscuits hit a hot 425°F oven, something pretty amazing happens. Instead of slowly melting into the dough, the water trapped inside those tiny pieces of butter turns into steam almost immediately. That steam begins pushing apart every layer you carefully created during the folding process. The faster it creates steam, the more power it has to lift those delicate layers before the butter has a chance to simply melt away.

Meanwhile, your baking powder has been waiting patiently for its big moment. As soon as the dough reaches that hot oven, the baking powder gets busy producing tiny pockets of carbon dioxide throughout the biscuits. Those little bubbles expand rapidly in the heat, giving your biscuits another boost upward.

It’s almost like the butter and the baking powder become teammates. The butter creates steam. The baking powder creates gas. Together, they work like two people lifting the same heavy couch. Each one has an important job, but together they accomplish much more than either could do alone.

There’s another reason we bake at a higher temperature … It also gives them those gorgeous golden tops. The higher temperature encourages beautiful browning while keeping the inside soft, tender, and full of flaky layers. It’s the best of both worlds. A lightly crisp exterior. A buttery, cloud-like interior.

A funny watercolor illustration about butter and baking powder working together at high heat to rise fresh milled flour biscuits well.

Bake Those Beauties

Slide the baking sheet into your preheated 425°F oven and bake your biscuits for 18–22 minutes, or until they’re beautifully golden brown and wonderfully tall. Every oven has its own personality, so don’t be surprised if yours finishes a minute or two earlier … or decides to take its sweet time. That’s completely normal.

Rather than watching the clock alone, let your biscuits tell you when they’re ready. Look for beautifully golden tops. The sides should be set, and your kitchen should smell like a cozy bakery that somehow wandered into your house.

Remember when we talked about making your biscuits about 1 inch thick? That’s one of the reasons they need a slightly longer baking time. If you decide to roll your dough to ½ inch thick instead, don’t forget to reduce the baking time. Thinner biscuits simply don’t need as long in the oven.

a tray of fresh milled flour biscuits in the oven and golden brown

Optional, But Yummy

Now, technically, you can skip this next step. Your biscuits will still be absolutely delicious. But… I never skip it. The moment my biscuits come out of the oven, I brush the tops with melted salted butter. (PS – This is my favorite brush!)

Why? Because butter somehow manages to make butter even better. It gives the tops a gorgeous glossy finish, adds one more layer of rich buttery flavor, and leaves just the tiniest hint of salt that makes every bite even more irresistible.

And let’s be honest … Has anyone ever complained that something had just a little too much butter? I certainly haven’t.

I say grab the pastry brush … your taste buds will thank you.

The Gift of Frozen Biscuits

Let’s pretend the holidays have arrived. Your family has requested biscuits and gravy for breakfast, everyone is sleeping soundly, and you have absolutely no desire to wake up before the sun … or the roosters. Good news! You don’t have to.

One of my favorite things about these fresh milled flour biscuits is that they’re wonderfully make-ahead friendly. Whether you’re planning for Christmas morning, a busy weekend, or just trying to make your future self very happy … you have two great options.

Make Ahead (Unbaked) Fresh Milled Flour Biscuits

This is my favorite option because nothing beats the smell of freshly baked biscuits filling the house.

Once you’ve cut out your biscuits, place them individually on a parchment-lined baking sheet so they aren’t touching each other. Slide the entire baking sheet into the freezer and let the biscuits freeze until they’re completely solid. Once they’re frozen, transfer them to a freezer-safe bag or airtight container. 

They’ll happily hang out in the freezer for up to 3 months. (And if you’re the kind of person who plans for the holidays three months in advance … I’m genuinely impressed. Teach me your ways!)

When you’re ready to bake them, there’s no need to thaw them first. Simply place the frozen biscuits on a baking sheet so they’re barely touching, just like you would with fresh dough, and bake them as directed. The only adjustment you’ll need is to add a few extra minutes to the baking time.

Make Ahead (Baked) Fresh Milled Flour Biscuits

Need an even quicker breakfast?

Go ahead and bake the biscuits exactly as directed. Once they’ve cooled completely, place them in a freezer-safe bag or airtight container and freeze them for up to 3 months.

When you’re ready to enjoy them, you have two easy options … you can thaw them overnight in the refrigerator, or if you’re short on time (which, let’s be honest, happens to all of us), simply reheat them straight from the freezer in a 350°F oven for 10–15 minutes, or until they’re warmed through.

They’ll taste like you planned ahead … even if you’re usually more of a “figure it out tomorrow” kind of person.

FAQ: The Biscuit Hotline

Can I use hard white wheat instead of soft white wheat for fresh milled flour biscuits?

Yes, you can … but I highly recommend soft white wheat whenever possible.

Hard white wheat has more protein, which means it develops more gluten. While that’s wonderful for bread, it can make biscuits a little firmer and less tender. Soft white wheat produces the light, fluffy texture that most people expect from fresh milled flour biscuits.

Why do my fresh milled flour biscuits turn out dense?

Dense biscuits usually happen for one of three reasons:

  • The butter became too warm before baking.
  • The dough was overmixed, developing too much gluten.
  • Too much flour was added while shaping the dough.

Remember my favorite tip … KTBC (Keep That Butter Chilly). Cold butter and gentle handling are two of the biggest secrets to tall, fluffy biscuits.

Why do I need to let fresh milled flour biscuit dough rest?

Freshly milled flour needs a little extra time to absorb moisture.

Allowing the dough to rest for about 30 minutes gives the bran and germ time to fully hydrate. As a result, the dough becomes easier to handle, and the finished biscuits have a softer, more tender crumb.

If you’re using store-bought flour, you can skip this first resting period.

Can I make these biscuits with store-bought flour?

Absolutely! This recipe works beautifully with 4 cups (480 grams) of all-purpose flour if you don’t mill your own flour. I included both versions because I wanted everyone to be able to enjoy this recipe, whether you’re baking with freshly milled flour or store-bought flour.

Can I use buttermilk instead of regular milk in my fresh milled flour biscuits?

Yes! Buttermilk is an easy 1:1 substitute for the milk in this recipe.

Since this recipe uses baking powder instead of baking soda … regular milk works perfectly. However, if you already have buttermilk in your refrigerator, feel free to use it for an extra hint of tangy flavor.

Why didn’t my fresh milled flour biscuits rise very much?

There are several possible reasons:

  • Your baking powder may be old.
  • The butter may have softened before baking.
  • You twisted the biscuit cutter instead of pressing straight down.
  • The edges of the biscuits became sealed instead of remaining open.
  • The oven wasn’t fully preheated before baking.

Every one of these little details helps create those tall, flaky layers.

What can I do with fresh milled flour biscuits?

A better question might be … what can’t you do with them? Enjoy them with butter and jam, honey, or apple butter, pile them high with eggs and bacon for breakfast sandwiches, smother them in sausage gravy, serve them alongside soup or chili, pair them with fried chicken, turn them into strawberry shortcake, or simply toast the leftovers with a little butter the next morning.

fresh milled flour biscuits on a white plate with other breakfast food

Can I freeze fresh milled flour biscuits?

Yes! In fact, they freeze beautifully. You can freeze them either before or after baking.

Unbaked biscuits: Freeze the cut biscuits on a baking sheet until solid, then transfer them to a freezer-safe bag for up to 3 months. Bake directly from frozen, adding a few extra minutes to the baking time.

Baked biscuits: Let them cool completely before freezing for up to 3 months. Reheat from frozen at 350°F for 10–15 minutes or thaw overnight in the refrigerator.

Why do you recommend baking fresh milled flour biscuits at 425°F?

A hot oven gives biscuits their best chance to rise tall. The high heat quickly turns the cold butter into steam before it has time to melt into the dough. That steam creates the flaky layers, while the baking powder gets to work immediately, helping the biscuits rise upward instead of spreading outward.

Hot oven = happy biscuits!

Can I make these fresh milled flour biscuits without a food processor?

Absolutely. A food processor is my favorite method because it’s quick and helps keep the butter cold, but it isn’t required. A pastry cutter works wonderfully, and two forks can also get the job done.

I personally avoid mixing with my hands because they warm the butter too quickly … but if you’ve mastered Grandma-level biscuit skills, go right ahead!

What’s the biggest secret to making the best fresh milled flour biscuits?

If I had to choose just one tip, it would be this:

KTBC … Keep That Butter Chilly

Cold butter creates steam in the oven, and that steam creates beautiful flaky layers. Pair that with gentle handling, a hot oven, and fresh baking powder, and you’ll be well on your way to making extraordinary biscuits every single time.

Can I substitute fresh milled flour for all-purpose flour in any biscuit recipe?

The short answer is … yes, but it’s usually not as simple as swapping one flour for the other.

Freshly milled flour behaves differently from store-bought flour because it still contains the bran, germ, and natural oils from the whole grain. As a result, it absorbs more liquid, takes longer to fully hydrate, and can create a denser texture if the recipe isn’t adjusted.

When converting a traditional biscuit recipe, you’ll often need to make a few changes, such as adding a little more liquid, allowing the dough to rest so the flour can fully hydrate, and choosing the right type of wheat. For biscuits, I recommend using soft white wheat berries because it produces a lighter, more tender crumb than hard wheat.

The good news is that once you understand a few simple principles, converting your favorite recipes becomes much easier. In fact, I’ve put together a complete guide that walks you through exactly how to convert recipes from store-bought flour to freshly milled flour, so you can confidently adapt your family’s favorite recipes.

A Little Gift for Your Pantry

If you’ve been around here for very long, you know I almost always like to send you home with a little something extra. Think of it as my way of saying, “Thanks for hanging out with me in the kitchen today.”

Many moons ago, there was one box that always had a permanent home in my pantry … Bisquick. Back then, it was my go-to for making biscuits … actually, I used it in all kinds of recipes.

Now? Let’s just say I’ve been spoiled by homemade biscuit mix. Honestly, the thought of making biscuits from a box these days makes me cringe just a little. Once you’ve tasted homemade fresh milled flour biscuits, it’s hard to go back.

The funny thing is, I still have several family recipes that call for Bisquick … things like sausage balls, zucchini pizza, and a few other old favorites. So instead of keeping a box in my pantry just for those recipes, I decided to make my own homemade version. I’m happy to report that it works beautifully (and it’s so much healthier and tastier).

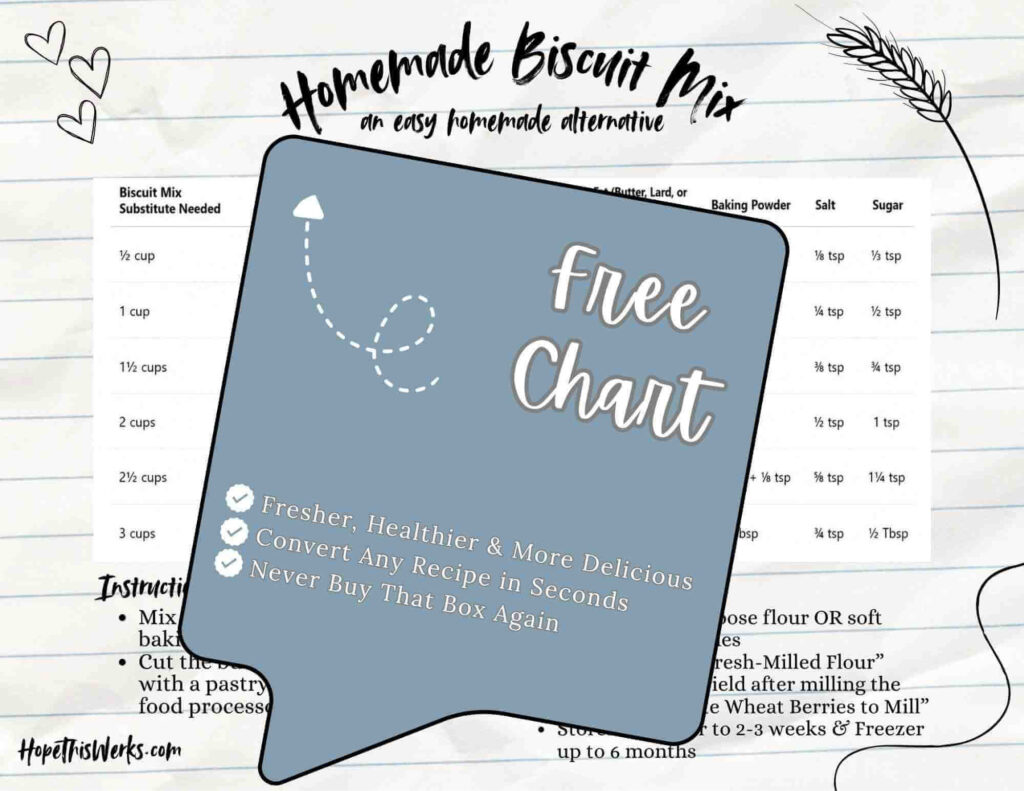
Whether you’re baking with freshly milled flour or store-bought flour, this homemade Biscuit Mix substitute is simple to make, tastes so much better than the boxed version, and can be used anywhere a recipe calls for Bisquick.

I have a feeling once you try it … that yellow box might quietly disappear from your pantry too. Enjoy!

One Last Thing Before You Butter That Biscuit

Before we wrap things up, I have to give a huge shout-out to my son-in-law. When he joined our family, he brought along something I wasn’t expecting … a deep appreciation for biscuits.

Honestly, before I met him, I had never heard anyone list biscuits among their favorite foods. Donuts? Sure. Pizza? Absolutely. Ice cream? Of course. But biscuits?  That was a first.

His love for biscuits has become a bit contagious around here. We talk about them often. In fact, one day he joked that a biscuit wouldn’t make a very good tattoo because it would probably just look like a funny little blob. I have to admit … he’s probably right.

Still, his enthusiasm has inspired our whole family to appreciate what a truly great biscuit can be. And once you discover just how versatile they are, it’s easy to understand why they’re one of his favorite foods.

Fresh milled flour biscuits can be:

  • Dipped in honey, maple syrup, or apple butter for a simple sweet treat. (My son-in-law almost always reaches for the honey.)
  • Slathered with butter and your favorite jam for an unforgettable breakfast.
  • Turned into a hearty breakfast sandwich with eggs, bacon, sausage, and cheese.
  • Smothered in homemade sausage gravy for classic biscuits and gravy.
  • Served alongside soup or chili to soak up every last delicious bite.
  • Paired with fried chicken for a comforting Southern-inspired meal.
  • Split and topped with fresh berries and whipped cream for an easy strawberry shortcake.
  • Filled with ham, pulled pork, brisket, or chicken to make irresistible mini sliders.
  • Used instead of pie crust as the topping for chicken pot pie.
  • Toasted the next morning with a little butter until the edges are golden and crisp.

Not bad for a humble little biscuit.

So go ahead and give these fresh milled flour biscuits (or with store flour) a try. Once you’ve made them a time or two, you’ll wonder why you ever bought canned biscuits. Before you know it, you’ll be pulling tall, flaky biscuits out of the oven that are sure to impress your family, your friends…and maybe even yourself.

Before You Go...

If you enjoyed this fresh milled flour biscuit recipe, I hope you’ll stick around for a while! My goal is to help you feel confident baking with freshly milled flour, whether you’re making everyday favorites or trying something completely new.

While you’re here, be sure to check out my other recipes, tutorials, and baking guides. If you’re just getting started with fresh milled flour, don’t miss my guide on converting your favorite recipes from store-bought flour to freshly milled flour … it’ll save you a lot of trial and error in the kitchen.

Oh, and don’t forget to grab your free healthier (and much tastier!) homemade Biscuit Mix substitute! Your taste buds will thank you, and that lonely box of Bisquick in your pantry might start wondering if it’s ever invited to dinner again.

If you make these biscuits, I’d absolutely love to hear how they turned out! Leave a comment below and tell me your favorite way to enjoy them. Are you “Team Honey” like my son-in-law … or do you head straight for biscuits and gravy?

You can also tag me on Instagram (@hopethiswerksdiy), join me over on Facebook, or come say hi on YouTube. Seeing your creations is one of my favorite parts of blogging, and it truly makes my day.

And if you’d like more fresh milled flour recipes delivered straight to your inbox, be sure to subscribe! As a little thank-you, I’ll send you my printable recipe for what my family lovingly calls the Best Pancakes on Earth.

Until next time…

May your biscuits be tall, your butter stay chilly, and your kitchen always smell like something wonderful is baking.

Yield: 11 Large Biscuits

Biscuits with Fresh Milled Flour

fresh milled flour biscuits on a baking tray
5.0 Stars (1 Review)

These fresh milled flour biscuits are tall, flaky, buttery, and unbelievably tender. They're simple to make ... and perfect for breakfast, dinner, or smothering with your favorite jam.

Prep Time 20 minutes
Cook Time 15 minutes
Additional Time 1 hour
Total Time 1 hour 35 minutes

Ingredients

Optional

  • ¼ cup (65g) sourdough discard (not required ... just a great way to use up a little discard)
  • 1 tablespoon melted butter ... to brush on top of baked biscuits

Instructions

    1. Flour Power First:Mill those wheat berries into beautiful fresh flour! (Pro tip: mill a little extra so you have plenty for dusting your countertop later.) Then add the fresh milled flour, baking powder, sugar, and salt to a food processor (or large bowl). Give it a quick whirl to mix everything together.
      600g finely ground soft white wheat berries, 3½ tbsp baking powder, 2 tbsp sugar, 2 tsp salt
    2. Butter Make It Better: Cut butter into chunks ... add to flour and pulse 5 or 6 times, just until the butter roughly combines (or cut it in by hand with a pastry cutter or fork.) Don't overmix!
      12 tablespoons cold butter
    3. Add Milk: Pour in the milk (and sourdough discard, if using) and pulse just until a shaggy dough comes together.
      2 cups cold milk, optional: ¼ cup sourdough discard
    4. Let It Rest: Cover and refrigerate for 30 minutes to give the fresh milled flour time to fully hydrate.
    5. Build Those Flaky Layers: Turn the dough onto a well-floured surface and gently pat it into a 1" thick rectangle. Fold it into thirds, pat it back down, and repeat 2 more times.
    6. Shape the Biscuits: Gently pat the dough into a rectangle about 1" thick. Cut out biscuits using a sharp, floured biscuit cutter (I love a 3" cutter for big, fluffy biscuits). Avoid using a glass or mason jar (they pinch the edges and sabotage that beautiful rise). And remember: don't twist! A straight-down cut keeps the edges open so your biscuits can reach their full fluffy potential.
    7. Chill Time: Place the biscuits on the parchment-linedbaking sheet so they're just barely touching. Cover and refrigerate for another 30 minutes.
    8. Turn Up the Heat: While they chill, heat your oven to 425°F.
    9. Bake Those Beauties: Bake for 18-22 minutes ... or until they're tall, golden brown, and irresistible.
    10. Optional, But Yummy: Brush the tops of the baked biscuits with melted butter.

Notes

  • No biscuit cutter? Use a sharp knife and cut squares ... just make sure every edge is freshly cut for the tallest rise.
  • Cold butter = flaky biscuits! Those little butter pockets create steam in the oven, helping your biscuits rise tall and stay tender.
  • Make Ahead (Unbaked): Freeze (individually) for up to 3 months. Bake straight from the fridge or freezer, adding a few extra minutes.
  • Make Ahead (Baked): Freeze for up to 3 months. Reheat at 350°F until warm.
  • Storage: Store in an airtight container for up to 2 days ... although warm biscuits have a sneaky way of disappearing. Freeze any survivors for up to 3 months.

Recommended Products

As an Amazon Associate and member of other affiliate programs, I earn from qualifying purchases.
Yield: 11 Large Biscuits

Biscuits with Store-Bought Flour

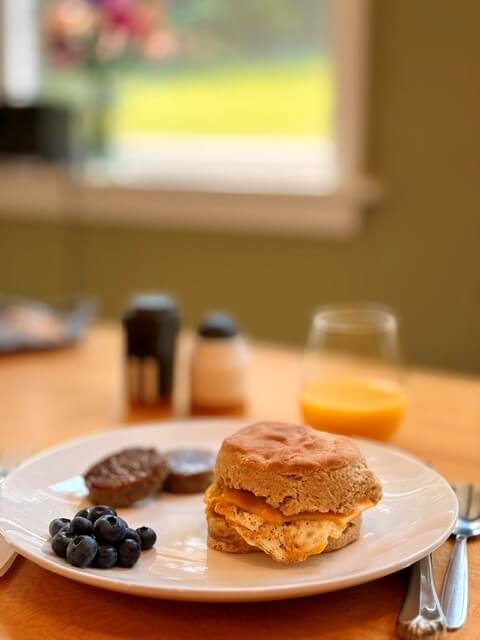
fresh milled flour biscuit made into an egg sandwich on a white plate
5.0 Stars (1 Review)

These easy homemade biscuits are tall, buttery, flaky, and tender ... and perfect for breakfast, dinner, or smothering with your favorite jam.

Prep Time 20 minutes
Cook Time 15 minutes
Additional Time 1 hour
Total Time 1 hour 35 minutes

Ingredients

Optional

  • ¼ cup (65g) sourdough discard (not required ... just a great way to use up a little discard)
  • 1 tablespoon melted butter ... to brush on top of baked biscuits

Instructions

    1. Flour Power First: Add the flour, baking powder, sugar, and salt to a food processor (or large bowl). Give it a quick whirl to mix everything together.
      4 cups all-purpose flour, 3½ tbsp baking powder, 2 tbsp sugar, 2 tsp salt
    2. Butter Make It Better: Cut butter into chunks ... add to flour and pulse 5 or 6 times, just until the butter roughly combines (or cut it in by hand with a pastry cutter or fork.) Don't overmix!
      12 tablespoons cold butter
    3. Add Milk: Pour in the milk (and sourdough discard, if using) and pulse just until a shaggy dough comes together.
      2 cups cold milk, optional: ¼ cup sourdough discard
    4. Build Those Flaky Layers: Turn the dough onto a well-floured surface and gently pat it into a 1" thick rectangle. Fold it into thirds, pat it back down, and repeat 2 more times.
    5. Shape the Biscuits: Gently pat the dough into a rectangle about 1" thick. Cut out biscuits using a sharp, floured biscuit cutter (I love a 3" cutter for big, fluffy biscuits). Avoid using a glass or mason jar (they pinch the edges and sabotage that beautiful rise). And remember: don't twist! A straight-down cut keeps the edges open so your biscuits can reach their full fluffy potential.
    6. Chill Time: Place the biscuits on the parchment-lined baking sheet so they're just barely touching. Cover and refrigerate for another 30 minutes.
    7. Turn Up the Heat: While they chill, heat your oven to 425°F.
    8. Bake Those Beauties: Bake for 18-22 minutes ... or until they're tall, golden brown, and irresistible.
    9. Optional, But Yummy: Brush the tops of the baked biscuits with melted butter.

Notes

  • No biscuit cutter? Use a sharp knife and cut squares ... just make sure every edge is freshly cut for the tallest rise.
  • Cold butter = flaky biscuits! Those little butter pockets create steam in the oven, helping your biscuits rise tall and stay tender.
  • Make Ahead (Unbaked): Freeze (individually) for up to 3 months. Bake straight from the fridge or freezer, adding a few extra minutes.
  • Make Ahead (Baked): Freeze for up to 3 months. Reheat at 350°F until warm.
  • Storage: Store in an airtight container for up to 2 days ... although warm biscuits have a sneaky way of disappearing. Freeze any survivors for up to 3 months.

If this post made you smile, help me keep my grain mill spinning and my apron permanently dusty … tip me with this link. Thanks, you’re the best!

Fresh Milled Flour Biscuits Reference Guide

Troubleshooting Guide for Fresh Milled Flour Biscuits
Problem Likely Cause Quick Fix
Dense biscuits Butter became too warm Keep the butter cold and refrigerate before baking.
Flat biscuits Twisted cutter or warm dough Cut straight down and chill the biscuits before baking.
Dry biscuits Too much flour Measure carefully and add flour only as needed.
Sticky dough Fresh milled flour hydrates slowly Lightly flour your counter instead of adding lots of flour.
Tough biscuits Overmixed dough Mix only until combined and handle gently.
Uneven rise Uneven thickness Pat dough to an even 1-inch thickness.
Ingredient Purpose for Fresh Milled Flour Biscuits
Ingredient Why It's Used
Fresh milled flour Provides flavor, nutrition and structure.
Butter Creates flaky layers through steam.
Baking powder Helps the biscuits rise.
Milk Hydrates the dough.
Salt Enhances flavor.
Sugar Adds light sweetness and encourages browning.
Quick Answers for Fresh Milled Flour Biscuits
Question Answer
Best wheat? Soft white wheat makes the most tender biscuits.
Can I freeze the dough? Yes. Freeze unbaked biscuits for up to 3 months.
Can I freeze baked biscuits? Yes. Cool completely before freezing.
Why is my dough sticky? Fresh milled flour absorbs moisture more slowly than store-bought flour.
Do I need to rest the dough? Yes. Resting hydrates the flour and improves texture.
Best baking temperature? 425°F.
Can I use buttermilk? Yes. It produces a tangier flavor and tender crumb.
Key Takeaways for Fresh Milled Flour Biscuits
✔ Fresh milled flour needs time to fully hydrate.
✔ Keep the butter as cold as possible.
✔ Fold the dough to create flaky layers.
✔ Chill the biscuits before baking.
✔ Bake at 425°F for the best rise.
✔ Press the biscuit cutter straight down—don't twist.

Fresh Milled Flour Biscuits Troubleshooting

Problem Fix
Biscuits do not rise Keep butter cold, check baking powder freshness, and keep dough about 1 inch thick.
Dense or heavy biscuits Avoid overmixing and allow fresh milled flour time to hydrate before adding more flour.
Sticky dough Let dough rest briefly, then add flour slowly only if needed.
Biscuits spread Chill shaped biscuits before baking to keep butter cold and layers intact.
Strong wheat flavor Try a milder wheat variety or blend wheat berries for a balanced flavor.
Dry biscuits Reduce extra flour and adjust moisture slightly if dough feels too dry.
Fresh Milled Flour Biscuits at a Glance
Feature Details
Recipe Type Homemade biscuits
Flour Options Freshly milled soft white wheat or all-purpose flour
Texture Tall, flaky, tender
Difficulty Beginner-friendly
Rest Time 30 minutes (fresh milled flour only)
Make Ahead Yes
Freeze Friendly Yes (baked or unbaked)
Best Served With Honey, jam, sausage gravy, soup, breakfast sandwiches

Share the Post:

4 responses to “The Best Fresh Milled Flour Biscuits (or store flour)”

  1. Amazing! One inch high of rolled out dough! That would be so fun. I love biscuits too, but they were always a flop. Bet it was the warmish butter. Thanks Winnie

Leave a Reply

Your email address will not be published. Required fields are marked *

Skip to Recipe