
Welcome, fellow kitchen warriors, to the grand spectacle that is the Cast Iron Pan Strip Drama! Today, we embark on an epic journey of grease, grime, and black gunk as we take on the Herculean task of stripping a cast iron pan. Don your aprons, grab a scrub brush, and prepare for the ride of your life!
YOU can EASILY be great at stripping a cast iron pan that has bunches of gunk on it. By gunk, I mean chunks of black stuff and clumps of old seasoning. By stripping it, I mean making the piece look like the day it was born by bringing it back to bare metal. It is surprisingly easy and very gratifying!

Act 1: The Horror Unveiled (the need for stripping your cast iron pan)
It starts innocently enough. You’re rummaging through the dark corners of your kitchen, searching for that elusive cookie sheet, when BAM! There it is. The pan. The one you inherited from your great-aunt’s cousin’s neighbor. The one that looks like it’s been through the apocalypse and back. It’s covered in what can only be described as a crusty, blackened mess—a sight so terrifying it could scare the seasoning off a brand-new pan.
But fear not, brave soul! You have the power to restore this hunk of metal to its former glory. All it takes is a bit of elbow grease, a touch of madness, and some protective eyewear. (Seriously, this is not the time to be cavalier about safety.)
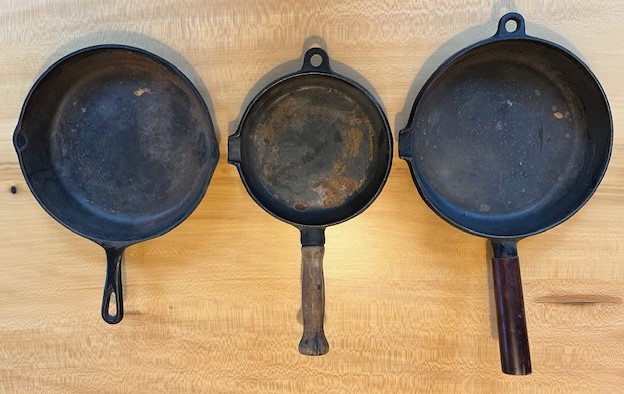
My personal story began with gifts from my favorite Aunt. She gifted me … not one, not two, but three cast iron pans. How lucky am I!
When possible, I love to know the history of my cast iron pieces. The smallest cast iron pan Aunt Mary gifted me was the first pan she received when she was married in 1975. My Uncle gave it to her. He didn’t know how good of a cook she would become … nice move Uncle! The other two cast iron pans came from my Aunt and Uncle’s camp in upstate New York. She couldn’t count how many eggs and bacon were cooked in those pans.
Since I was giving the three cast iron pans a new life with me, I decided they needed new costumes. Time to get rid of the old seasoning.
Caution: Evil Villain (danger in stripping a cast iron pan)
Let me start with a warning. You are going to be using lye. Lye is caustic. You can easily hurt any part of your body. I am talking skin, eyes, toes, and belly button. (I am not sure why lye would be near your belly button, but don’t let it be!) Be sure to wear gloves, eye protection, shoes that cover your toes, a long-sleeve shirt, etc. If you come over to my house while I am doing projects, I often disregard safety rules. When I work with lye, a whole new side of Winnie appears. I follow every safety rule.
There are many opinions and a variety of ways to strip cast iron pans. This way is the easiest for me. The method below is one option. I am not saying that I am a cast iron expert. There is a very cool electrolysis tank method. It is very techy. Anyone who can do this is next level in my book.
Now back to the Cast Iron Pan Strip Drama…
Act 2: The Great Scrub-A-Dub-Dub in a Lye Bath
Lye will release the organic matter from your cast iron pans. Gunk is organic matter. (Are you impressed with my scientific knowledge?)
You will want to put your cast iron pan in a lye bath. I used a clean drywall bucket. Another idea could be a 5-gallon bucket. I filled it ¾ full with water. Next, I sprinkled lye into the water. You can purchase an inexpensive bottle of lye on Amazon. I hear you should not pour water into lye (versus pouring the lye onto the water). The rumor is that it causes a chemical reaction. I have never tried it. I was too scared to do this science experiment.
How much lye did I use? Well, let me remind you that I wasn’t being very scientific-y with this process. I just sprinkled a bunch in the water. A more acceptable answer is that 1 pound of 100% lye can be used in 5 gallons of water. You can use more or less lye, the ratio will not hurt the cast iron.
Next, I stirred the water/lye mixture with a stick I found in the yard. I didn’t mention this previously, but I worked on the cast iron pans outside. I didn’t want the spills and any accidents (if there were going to be any) inside my house.
Act 3: The Chemical Warfare (of stripping a cast iron pan)
I gently put my three cast iron pans in the water/lye mixture. Two of the pans had wooden handles I removed before plummeting them into the chemical. I tied a rope around those pans for ease of retrieval.
Then I left the pans outside in the drywall bucket for a week. You may leave them in there for 2 days or 2 weeks or ???. The length of time depends on how much gunk is on your pans. If you don’t know how long to leave them in the lye, check the pans after a day or two and see how they are doing. When you check them, don’t forget your safety equipment. If gunk is still stuck on your pans, put them back in the lye mixture for a few more days.
Act 4: The Sword Fight (with a plastic scraper)
After a week, take the pans carefully out of the solution. Your solution will look pretty horrifying, like dark swamp grog. Channel your inner gladiator and grab a plastic scraper. Use your scraper to combat the gunk. You will find that the gunk slides right off. No elbow grease is required. If the gunk is sticking to the pan, put it back in the water/lye mixture.

A cardboard box was a great solution to catch all the gunk so I didn’t have to clean up the grass. Extra newspapers worked like rags to wipe off the remaining gunk. I loved that I could throw those away.
Your pan is now starting to resemble something that you might actually cook with, instead of a medieval torture device.
Act 5: It’s Raining, It’s Pouring
I used my garden hose to rinse off the cast iron pans.
Caution: Remember that this solution is caustic. If you are doing this outside, rinse the pans where animals won’t walk. You don’t want to hurt their itty bitty little feet.

Act 6: A Toast with Vinegar
It was time for the cast iron to come back inside. I gave it a thorough soapy wash.
Next, I stuck it in a vinegar bath in my kitchen sink. The bath was a mixture of water and a bunch of glugs (maybe 1/4 of a cup) of distilled white vinegar. This helps with rusty spots. I let it soak in the sink for half an hour. Then I washed it off again.
Now it was time to dry. You can air-dry it. If you want it to dry faster, then you can put it on a stovetop burner.
Act 7: The Phoenix Rises (reseasoning your stripped cast iron pan)
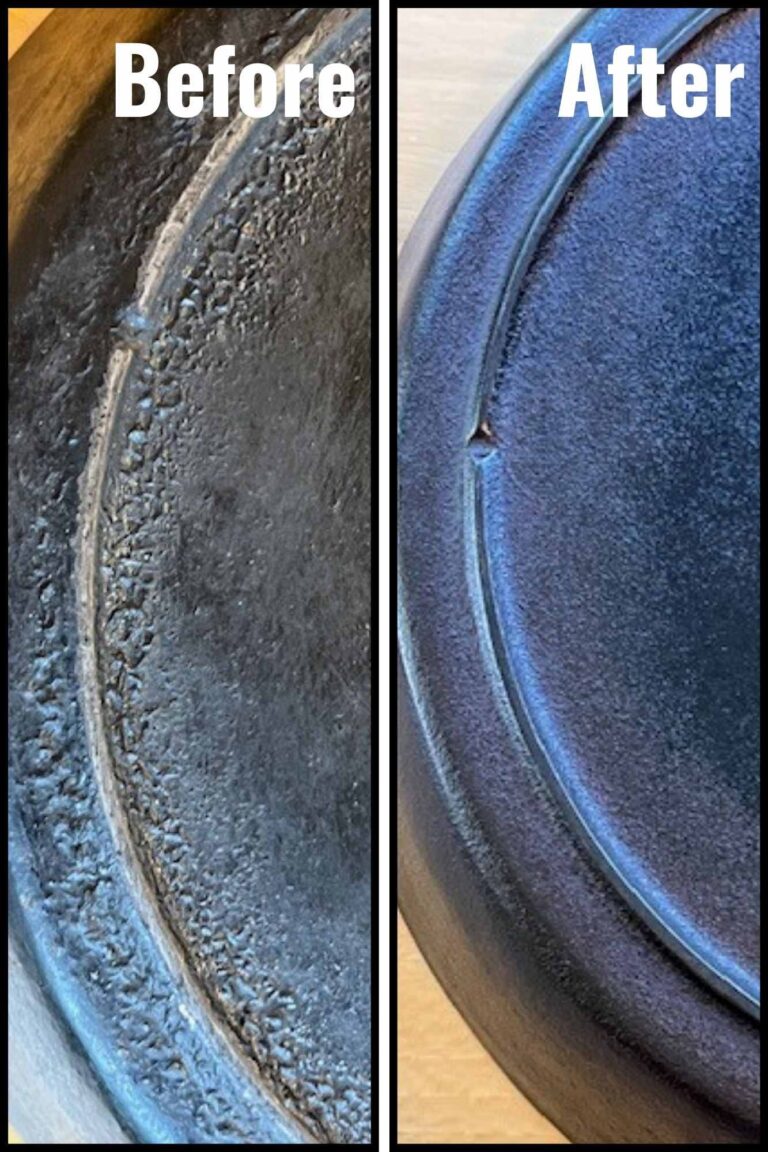
At last, the grime is gone, and you’re left with a bare, beautiful cast iron pan. It’s like the unveiling of a masterpiece—a work of art that you’ve painstakingly restored to its original glory.
Now comes the reseasoning part:
- There are many oil options (flaxseed, grapeseed, coconut, vegetable, canola, shortening, etc.) to season your cast iron pan. You want to use an oil that has a high smoke point. I have been using this recipe for a few years.
- Lightly coat your entire pan with oil (including the handle and the whole outside).
- Gently wipe off the oil with a cotton rag. This will make the coating very thin. The goal is to have many thin coats of polymerized oil on top of each other.
- Place the pan upside down in the oven. I put a piece of aluminum foil in the bottom of the oven to catch any oil drips.
- Cook the pan at 450 degrees for one hour.
- Let the pan fully cool.
- Lightly coat the pan again. Wipe the pan off. Put the pan upside down in the oven. Cook the pan. Let the pan cool.
- Do it again. Lightly coat the pan. Wipe the pan off. Put the pan upside down in the oven. Cook the pan. Let the pan cool.

It takes three sessions in the oven at high temperatures for proper polymerization.
Your pan now has a beautiful black patina. You can be done seasoning your pan after three coats of oil. You may put more coats on your pan if you would like. Extra coats will help your pan be more nonstick.
Act 8: Handles
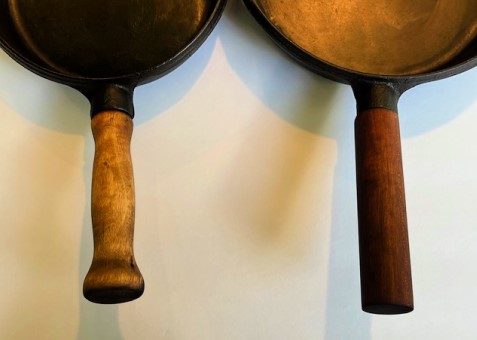
Since I had two wooden handles, Duke (my husband) refinished the handles. One of the handles had a crack that he filled with epoxy. He sanded both handles. Then he applied five coats of Danish oil.
I recently restored teak chairs. The process of using Danish oil will be very similar if you want to check out the step-by-step instructions.
Curtain Call: A Round of Applause
Congratulations, you’ve successfully stripped a cast iron pan! You’ve battled the crust, endured the gunk, and emerged victorious. Take a bow, you’ve earned it. And maybe a cookie. So go forth and cook with confidence, knowing that you’ve conquered one of the great kitchen challenges. And next time you see that crusty old pan, you won’t run in fear. You’ll smile, because you know you’ve got this!

Some sentences or ideas may be from chatgpt.


One response to “The Stripping of a Cast Iron Pan: A Tale of Pan Redemption”
I can’t believe what a difference you can make to an old cast iron pan. I will try to find one at a second hand store and give this a try.