
My favorite sewing project of all time is a boxed cushion. Why, you may ask? It turns out perfectly every time. Boxed cushions are easy to make. They enable you to get the exact cushion size you need. You get to pick the material that completes your desired look (this is the most fun part).

Boxed Cushion Musings...
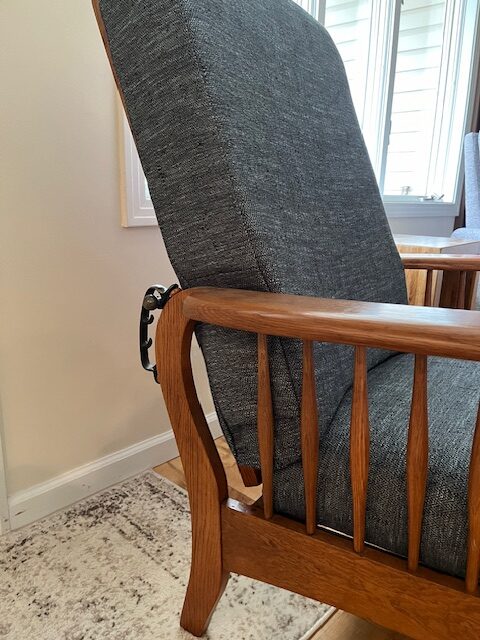
I have made this boxed cushion cover many times. My favorite time was for a Morris chair from my great-great-grandmother. The chair was in pieces in a box in the basement. My father had every intention of restoring it but never had the chance. I began restoring it and realized there were a few missing pieces. I was lucky to find someone local to do most of the work for me (we don’t own a lathe … yet). The restoration ended up being more expensive than I had anticipated. The furniture restorer offered to have his friend make box cushions to finish the chair. I was able to say “Thanks, but no thanks.” I saved hundreds of dollars by making the cushions to finish the project.
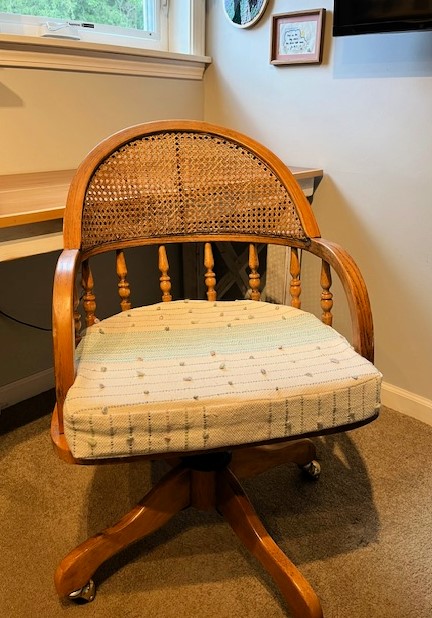
Besides making the boxed cushions for the Morris chair, I have also made them for desk chairs, a couch (in our van that we converted into a camper), and many other projects. Making a boxed cushion isn’t rocket science, but it might require a sense of humor (mistakes will happen). If you mess up, don’t worry! Fabric can be forgiving, and so should you. Remember, every mistake is just a design choice waiting to happen.
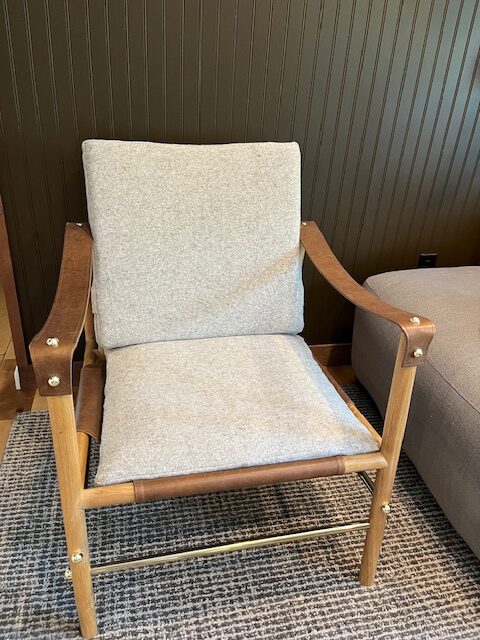
The most recent boxed cushion I made was for a chair I purchased from Anthropologie. Unfortunately, it was not the most comfortable chair. We bought it for its good looks. On Christmas day, my mother was sitting in the chair and asked for a pillow to put behind her back. Lightbulb moment … I need to make a set of box cushions so it is good looking AND comfortable.
Disclaimer: I am NOT a professional seamstress, nor an upholsterer. Sometimes I like to call myself “Jane of all trades and master of none.” I find things that “werk” for me and want to share them with you. Hopefully this werks for you too!
Let’s dive into how to make a boxed cushion …
Decide on what cushion you are going to use.
You have three options for cushions:
- Use an existing cushion. Of course, this is the cheapest.
- Spruce up an existing cushion. Existing cushions can be overhauled by covering them with Dacron batting. (This post contains affiliate links, which means I make a small commission at no extra cost to you.)
- Buy new cushions. Cushions are surprisingly expensive. If I need to save money, I will wait for a sale or coupon from Joann Fabrics. The foam at Joann Fabrics is not the highest quality, but it will get the job done. If I need the chair to be extra special (like the Morris chair), I buy a foam cushion from an online store specializing in cushions.
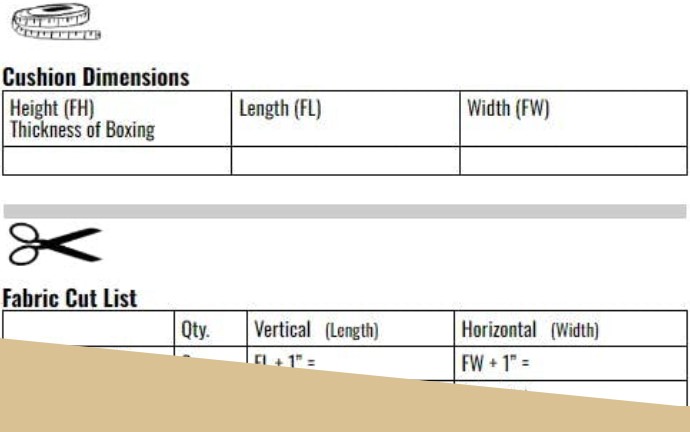
Measure your cushion.
- Measure the thickness of the cushion. (I always subtract ½” from the actual boxing height. For example, if it is 4” wide foam, then I will use the measurement of 3 ½”. This will make sure it is a tight fit.)
- Measure the length of the cushion (belly out / vertical).
- Measure the width of the cushion (hand to hand / horizontal).
- Jot those numbers down … they are your winning lottery numbers … fingers crossed.
We took the cushion measurements so we can make a cover. A cushion cover has three parts:
- Face Panels
- Boxing
- Zipper Panel
- There is an optional fourth part: welting. I don’t usually use welting, but it can make a lovely addition. I am going to leave welting out of the instructions because it makes the project a smidge more difficult.
I adapted a spreadsheet from The Workroom Channel on YouTube. This spreadsheet will help you calculate the dimensions of each piece you need. If you would like to download the spreadsheet, you will want to click here.
Make a cut diagram of your pieces.
- Years ago I found a YouTube video that was very helpful (the same video I just mentioned above regarding the spreadsheet … from The Workroom Channel). I highly recommend watching this.
- Figure out how to lay out your pieces for the most efficient use of fabric. You can use a piece of graph paper if you need extra help.
Pick out your fabric for your boxed cushion.
This is the fun part. I had a wave of creativity flowing over me when I picked fabric for my Anthropologie chair. Duke and I are in love with wool. I decided to use a wool blanket that I found on Amazon.
If you end up going a more traditional fabric route, then you want to purchase a fabric that will be durable. You don’t want to do all of this work making a cushion and have it fall apart because it can’t hold up to repeated use.
Upholstery fabric is rated by “rub counts.” Rub count is a method for determining the strength of the fabric. It indicates how much wear and tear the material can withstand before it starts to look different. As long as my cushion will not be subjected to heavy usage, I aim for a rub count starting at 15,000 (the higher the number = the stronger the fabric). The fabric will endure 15,000 rubs before it starts to look different.
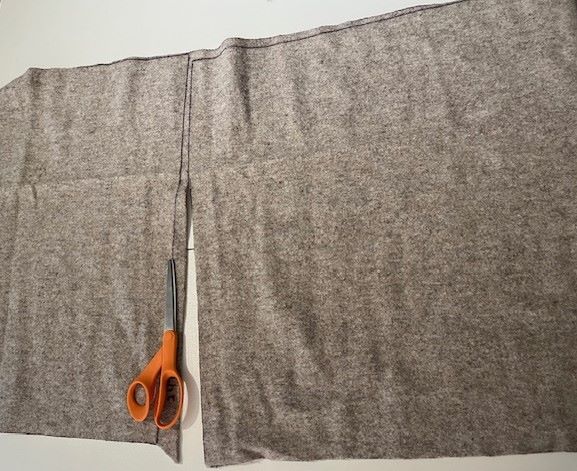
Cut out the pieces for your boxed cushion.
- Draw your pieces onto your piece of fabric (that you calculated using the spreadsheet). I recommend using a piece of chalk. I used a sharpie … that works too.
- Cut all of your pieces.
- Label each piece on the back of the fabric. You will thank yourself later!
- Note: You will need to know the dimensions of your fabric to make a cut diagram … and you will need to have a cut diagram to know how much fabric to purchase …(which came first, the chicken or the egg?)
Sewing your boxed cushion.
This is where the magic begins, folks!
Make the zipper panel.
The Workroom Channel on YouTube has an excellent video about the zipper panel. My instructions will make more sense if you watch this video.
- Cut the zipper longer than the actual panel (about 6” extra would work). I buy bulk zipper by the yard. (#ad) This is a cheaper option than running to your local store to pick up a very long zipper. You don’t need the ends to be finished, because you will enclose them into a pocket in your cushion.
- You have cut two zipper panels with ½” seam allowances.
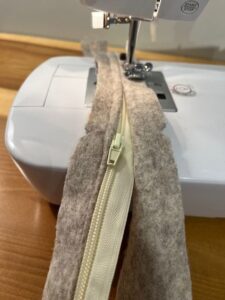
- Use a zipper foot on your sewing machine.
- Start sewing a few stitches on the zipper (just to get the stitching started), then fold the zipper panel in half (lengthwise). Lay the material so that it hits in the middle of the zipper. Sew close to the zipper and stitch to the end. Add the other zipper panel on the other side of the zipper the same way.
- Run the zipper up and down to make sure you did not accidentally stitch over the zipper. If you did, it is not a problem. Take out those few stitches and restitch that area.
- Put a little piece of scrap fabric over the ends of the zipper and stitch over the top. This ensures that the zipper cannot be pulled all the way off.
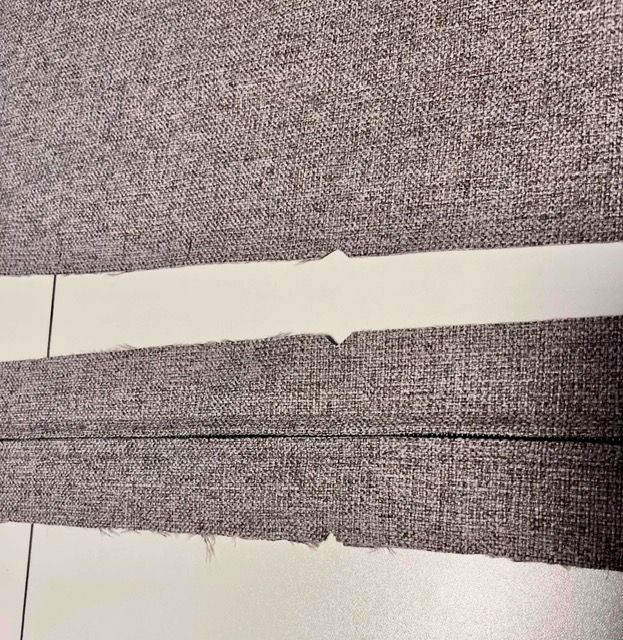
Notch
Fold each piece (face panels, boxing, zipper panel) in half and notch the center of the piece. This will help you keep all of the pieces lined up. This will make more sense if you watch the videos linked above.
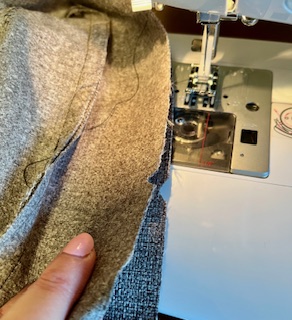
Boxing
- Take one of the face panels and the boxing. Match the center front notch of the face panel to the center front notch of the boxing (right sides together). Start at the center front notches and begin sewing with a ½” seam.
- When you get to the corner, find the pivot point and clip around the corner (being sure to not cut too deeply).
- At the pivot point for the corner, turn all of your fabric. Restack your fabric and begin stitching again down the next side.
- Continue stitching ⅓ of the way down the side, and then stop. This will leave a long tail.
- Flip the fabric around. Go back to the center front notches of the face panel and the boxing. Start stitching in the other direction. Repeat the instructions … go across the front, around the corner, and ⅓ down the side.
Zipper
- You will similarly add the zipper panel.
- Take one of the face panels and the zipper panel. Match the center front notch of the face panel to the center front notch of the zipper panel (right sides together). Start at the center front notches and begin sewing with a ½” seam.
- When you get to the corner, find the pivot point and clip around the corner (being sure to not cut too deeply).
- At the pivot point for the corner, turn all of your fabric. Restack your fabric and begin stitching down the next side.
- Continue stitching ¼ of the way down the side, and then stop. This will leave a long tail.
- Flip the fabric around. Go back to the center front notches of the face panel and zipper panel. Start stitching in the other direction. Repeat the instructions … go across the front, around the corner, and ¼ down the side.
Join the Boxing and Zipper Panel for the Boxed Cushion
- Are you feeling like a sewing wizard yet?
- With the right sides together, place the boxing panel on the bottom and the zipper panel on the top.
- Sew the boxing and zipper panels together. Trim off the extra zipper tail, if needed.
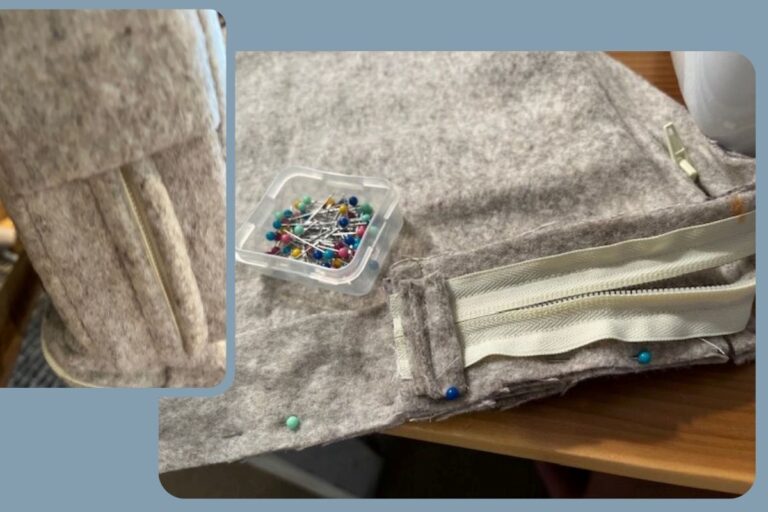
- Layer the boxing/zipper panel on top of the face panel. They will layer/fold upon themselves. Make sure the zipper is flat and does not fold (the boxing will fold). Now stitch the edges together. (Essentially, you are making a pocket for the zipper.)
- Make the zipper pocket on the other side now too.
- Refer back to the video if this section is difficult to understand.
Bottom Panel
- You will now attach the bottom panel like you did the top panel. Start at “Boxing” and work your way through all of the steps.
- Make sure that your notches line up throughout.
Insert Foam into your Boxed Cushion Cover
- Turn your cover right side out … stand back and admire your handiwork!
- I have a trick I have been using for years. If your cushion will fit into a garbage bag or a dry cleaning bag, place your cushion inside the bag. Then insert a vacuum cleaner hose into the opening of the bag and try to seal the bag around the hose. Turn the vacuum on to suck out the air. Once the air is removed, turn the vacuum off. This will shrink your cushion helping you easily squeeze it into the cover. You will have to work quickly because the cushion wants to expand. After you get the cushion positioned in the cover, remove the garbage bag.
- Adjust the cushion in the cover. Zipper it up.
- Done! Time to do a little victory dance…
Trust me … once you make your first boxed cushion cover, you will want to make many more. People online bemoan the cost of having cushions made for an amazing mid-century modern chair, their grandma’s couch, or their amazing find at a second-hand store. Now you are empowered to transform your own piece of furniture.
Don’t forget to click this link if you want a copy of the spreadsheet that will help you calculate the dimensions of the pieces you need. If you have any funny sewing mishaps, we’d love to hear about those in the comments below.
Also, if you are in the mood for another fun DIY adventure, check out this guide on how to whip up your own homemade tallow balm … your skin will thank you!
Until next time, keep those needles threaded and your spirits high! Happy sewing!


4 responses to “Boxed Cushion Pattern (any size!)”
Hi there! I’m at work surfing around your blog from my new iphone!
Just wanted to say I love reading through your blog and look forward
to all your posts! Carry on the superb work!
Thank you so much for your kind words! I’m so glad you’re enjoying the blog … and that you’re checking it out from your new iPhone, no less! Your encouragement truly means a lot and keeps me inspired to keep creating. Thanks for being here!
These cushions are amazing and so comfy! Thank you for sharing!
So happy to hear you’re loving the cushions! Comfort is key, right? 😄