
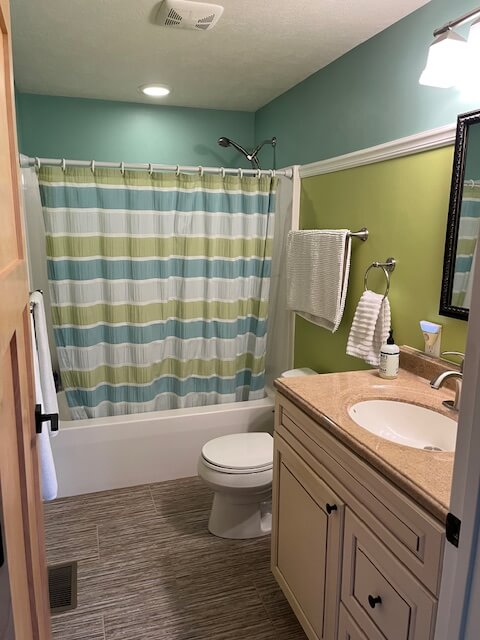
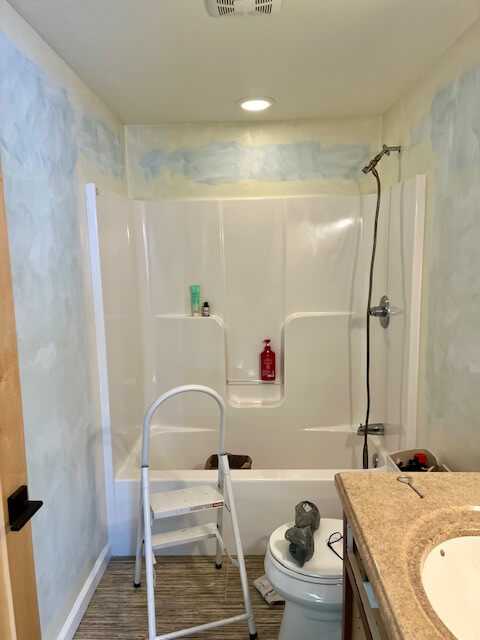
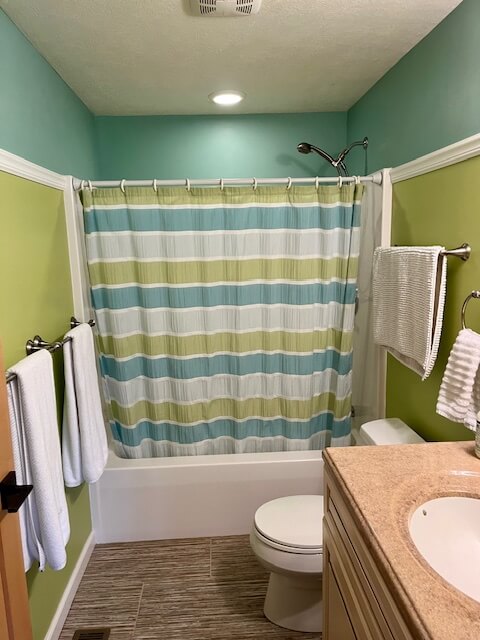
My daughter has been “subtly” hinting for years that we needed a bathroom remodel. Apparently, the wall color made people look like they had food poisoning, and the whole space screamed … “Help! I’m trapped in 2001!” She wasn’t wrong. But honestly, I had about a thousand other things I’d rather do than tackle a bathroom remodel on a budget.
Eventually, I caved. And let me tell you … she was right! The newly remodeled bathroom (done on a budget, of course) is amazing. It cost me less than $300, it was surprisingly easy, and best of all …no more zombie complexions! If you’ve been putting off a bathroom remodel on a budget, consider this your sign. It’s totally worth it!

I am going to break this down for you step-by-step to make it as easy as possible. Follow along, and before you know it, you will have a spa-worthy retreat without the hefty price tag!
Step 1: DREAM (a.k.a. procrastinate with Pinterest)
Dream by doing things such as … Start a Pinterest board, scroll for hours, and convince yourself you’re basically an interior designer now. Ask friends for ideas, then ignore the ones that sound like too much work. Walk around home improvement stores for inspiration, all the while racking up steps on your fitness tracker.
Step 2: TAKE BEFORE PICTURES (or at least try to) of your bathroom remodel on a budget
Before photos are crucial for that satisfying side-by-side comparison. Unfortunately, my success rate for actually taking them before a project starts is roughly 10%. Do as I say, not as I do.
Step 3: CLEAN OUT the BATHROOM
Remove everything that isn’t nailed down … trash cans, candles, tissues, the 17 mostly-empty bottles of shampoo you’ve been meaning to throw out. It’s a small room, and you’ll need every bit of space to maneuver.
Step 4: TAKE EVERYTHING OFF the WALLS (avoid some common DIY mistakes)
Pictures, towel racks, outlet covers, light fixtures … strip it all. And for your sanity, label the screws and pieces. Trust me, future-you will be grateful when you’re not playing a frustrating game of “Which Screw Belongs Where?” when you are finishing your bathroom remodel on a budget.
At this point, you’ll be tempted to cut corners:
- “I’ll just paint around that.” Don’t. You will get paint on it, it will take oodles longer to paint around it, and it might get dinged/bent during the remodel. Take it off the wall!
- “I’ll just use what I already have.” Maybe! But take it down anyway … you’ll probably replace more than you expect. Your towel rack was probably wobbly from years of use anyway (if you keep it, you will be thankful you rehung it). I’m not saying that you have to throw this stuff in the trash can immediately. Get a big box (we all have plenty of Amazon boxes we can use) and put everything in it. Save everything to see if you end up reusing it.

Extra Notes ...
Toilet Note: Good news! Most toilets do not need to be removed. Simply lift off the tank lid (don’t drop it … no worries, I did not just jinx you). This gives you just enough wiggle room to squeeze your paintbrush behind the toilet as far as humanly possible. Now, let’s be honest … there will be a tiny, unreachable square right in the middle. No matter how hard you try, you won’t get to it. But don’t stress! Once you put the tank lid back on, it disappears like magic. No one will ever know… unless they start inspecting behind your toilet, and at that point, you have bigger concerns.
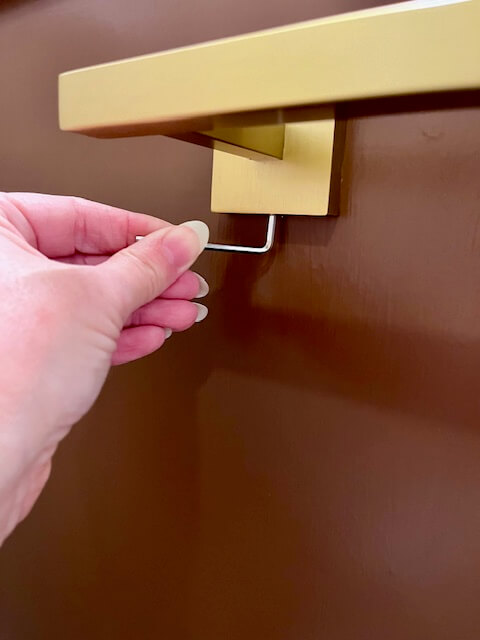
Cabinet Note: If you’re painting your sink base cabinet, now’s the time to take off the doors and remove the drawers. Go ahead and unscrew the hinges and knobs … trust me, painting around them is a one-way ticket to regret.
Step 5: PATCH the WALLS (a.k.a. Spackle, Sand, Repeat Forever)
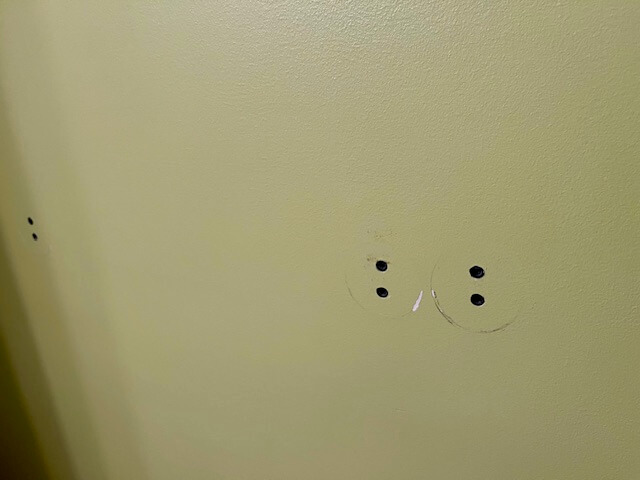
This will be the part of your bathroom remodel on a budget that requires the most patience. Remove from the walls all nails and screws. Pound drywall anchors into the wall (you want a flush surface for spackling).
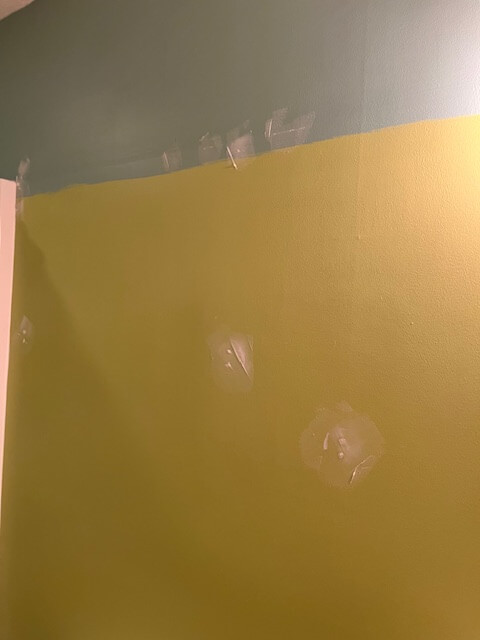
Now, spackle like your life depends on it. Wait for it to dry, sand it, and then do it all again. And one more time for good measure. Is it excessive? Yes. But nothing haunts you like a lumpy wall. Said another way … do the following 3 steps – 3 times (I always regret it when I am lazy at stop after 2 times):
- Spackle the walls and the cabinet
- Wait until spackle is completely dry
- Sand the spackle

Step 6: PICKING a PAINT COLOR (cue existential crisis) for your bathroom remodel on a budget
Remember, you started this bathroom remodel on a budget with a dream (refer back to Step 1). Now you’re standing in the middle of the room questioning everything. Will navy blue make it trendy or cave-like? Should you paint the room with the colors in that fancy shower curtain you fell in love with at the bougie boutique? Which color should I pick out of the wallpaper to paint the other walls?
Since you have been pondering this bathroom while you readied it for its makeover, NOW it is time to decide what color you are painting the walls.
Pro tip: Buy sample paint. My daughter recently painted her entire house and learned that colors look wildly different at different times of the day, on different walls, and if you first need to prime under the color. Test first, cry less later. (Not sure this is a catchy saying … I tried.)
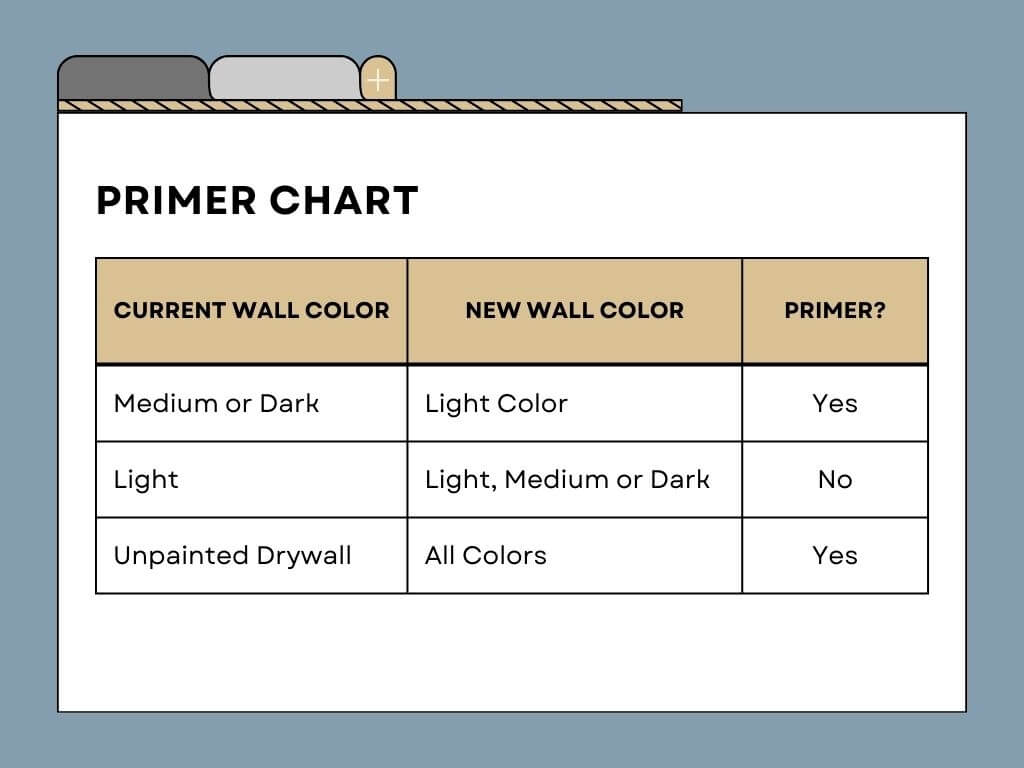
Step 7: PRIMER (to prime or not to prime ... that is the question)
Do you need to prime the walls? If you’re covering a dark color with a light color … yes. Your drywall has never been painted … yes. If you’re lucky and already have light-colored walls, you get to skip this step. Congratulations!
You will only need one coat of primer. Probably. If you’re painting over a deep red, I’m sending you my thoughts and prayers. I once painted over a deep red dining room and had to do three coats of primer just to stop it from bleeding through. It was a nightmare (ugh!).
Cabinet Notes: If you’re painting your sink base cabinet … guess what? It needs primer too. If it’s never been painted before, you’ll want to lightly sand it first—just enough to help the paint stick. After sanding, wipe it down, and then it’s go-time with the primer. Unlike walls, cabinets always need primer, no matter what color you’re painting them. Trust me, skipping this step is a one-way ticket to chipping, peeling, and regret.
Step 8: PAINTING … the moment of truth for your bathroom remodel on a budget
This is the part where the magic happens. Start by “cutting in” with a brush along the edges, then go to town with a roller. You will need two coats of paint. Remember to let the first coat dry completely before doing the second one … patience, young grasshopper.
This is always my favorite part of a room renovation. It is the first glimpse into what the final project is going to look like … exciting to see if your spackle job looks good … thrilling to unveil what a whole wall of the color looks like … and your mind starts thinking of all the final details you can add to the room.
Step 9: BATHROOM FIXTURES (What should I splurge on vs. save on?)
Time to reinstall the towel racks, toilet paper holder, robe hooks, light fixture, drawer pulls, etc. If you decided to swap out the faucet, good luck … you’re in for a mini plumbing adventure.
So, where should you splurge and where can you save?
Splurge on:
- Faucets & Showerheads – These get used every single day, so invest in something durable and stylish. Cheap ones tend to leak, corrode, or look outdated fast.
- Lighting – Good lighting can completely change the vibe of your bathroom. Consider spending a little extra on modern, well-lit fixtures. Nobody wants to get ready in a dim, shadowy space.
- Vanity Hardware (Handles & Knobs) – Small but mighty, high-quality hardware can make even a budget vanity look expensive. Plus, cheap ones tend to chip and discolor quickly.
Save on:
- Toilet Paper Holders – These don’t take much wear and tear, so you can find stylish budget-friendly options.
- Mirrors – Instead of an expensive “bathroom” mirror, check the home decor section for cheaper options. Or DIY a frame around your existing mirror for a high-end look.
- Robe Hooks – Unless you’re hanging up a 50-pound wet towel daily, you don’t need to drop a lot of cash on these.
Prioritize spending where it matters and save where you can—it’s all about balance!
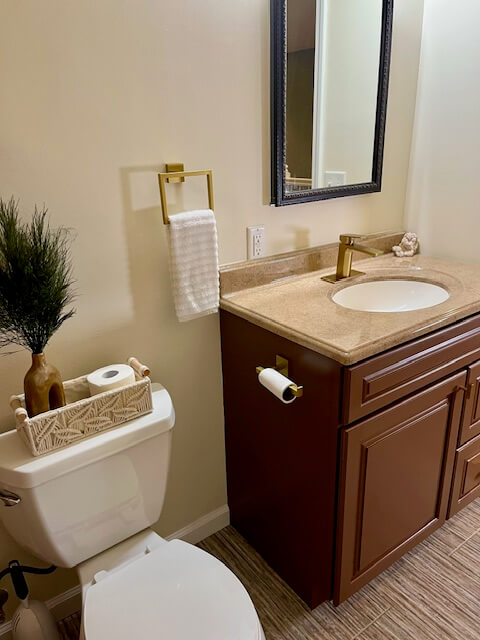
Step 10: DECORATE … the fun part of your bathroom remodel on a budget
Now that the hard work is done, it’s time to bring in the finishing touches that make your bathroom feel less like a gas station restroom and more like a spa retreat.
Budget-Friendly Decor Ideas:
- Plants – Even if you don’t have a green thumb, adding a plant (real or faux) instantly makes the space feel fresher. Try easy-care options like snake plants or a little succulent on the counter.
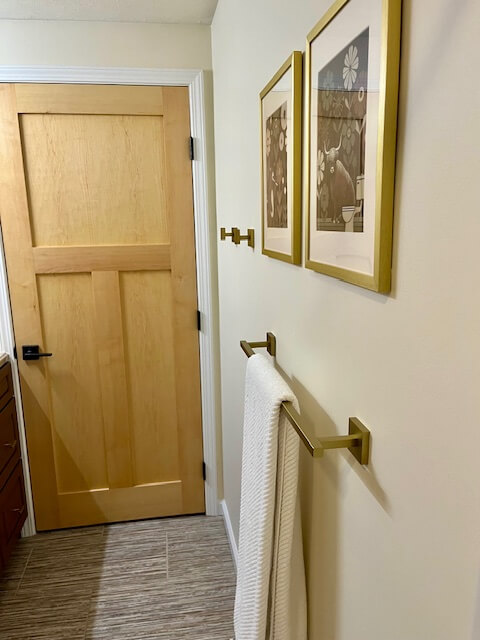
- Wall Art – Ditch the boring blank walls! Framed prints, small gallery walls, or even DIY artwork can add personality without breaking the bank. For my bathroom remodel on a budget, I wanted a funny bathroom picture. I used AI to create a mid-century modern flower picture with a bear in the middle … brushing his teeth. This was free and I love it!
- Baskets & Storage – Woven baskets are great for organizing towels, toilet paper, and toiletries while adding texture and warmth to the space. Check discount stores or even repurpose ones you already have.
- Candles & Diffusers – Nothing says “I have my life together” like a good-smelling bathroom. A candle or essential oil diffuser makes the room feel like a spa (and helps with bathroom odors—let’s be real).
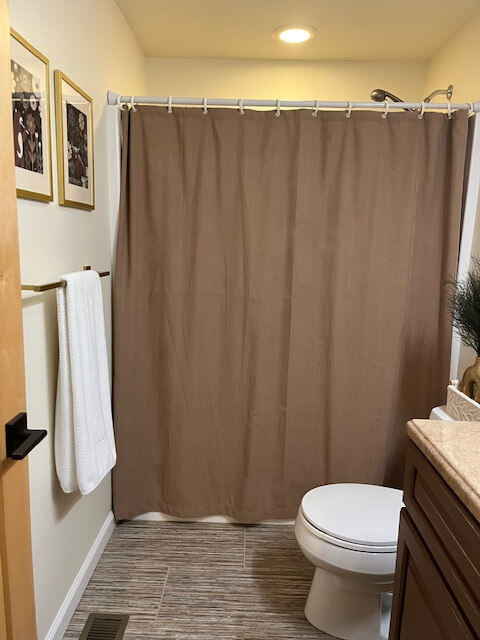
- Shower Curtain Swap – A stylish shower curtain can totally transform the look of your bathroom for under $30. Go for a clean, modern print or a luxurious waffle-textured fabric for a high-end feel.
With just a few simple (and affordable) upgrades, you can turn your bathroom remodel on a budget into a space that feels fresh, stylish, and enjoyable to use.

Step 11: TAKE AFTER PICTURES … The grand finale of your bathroom remodel on a budget
You’re finally done! Now, remember those before pictures you took? (Or didn’t?) Take after pictures and admire your hard work. Bask in the glow of your newly updated bathroom and wonder why you didn’t do this sooner.
How much did my bathroom remodel on a budget actually cost?
If you’re wondering whether a bathroom remodel on a budget is really possible, let me assure you—it absolutely is! I managed to give my outdated bathroom a total refresh for under $300. Yes, you read that right. No big contractor bills, no massive renovations … just some smart shopping, DIY elbow grease, and budget-friendly upgrades. Here’s what my remodel cost me:
Bathroom Refresh Budget Breakdown: (As an Amazon Associate, I earn from qualifying purchases.)
- $0 – Primer (already had it)
- $0 – Spackle (already had it)
- $60 – Sherwin Williams Paint (Crisp Linen #6378)
- $70 – Gold Vanity Light
- $45 – Towel Bar Set
- $55 – Gold Faucet
- $30 – Shower Curtain (Dark Brown) – Love it!
- $10 – Cabinet Knobs
- $15 – Picture Frames
- $5 – Mats for Pictures (Hobby Lobby)
- $5 – Prints (Walmart)
$295 – Total
Under $300 for a brand-new bathroom! Cheap, easy, and relatively quick … so why did I wait so long?! If you’ve been putting off your own bathroom remodel on a budget, take it from me: You don’t need thousands of dollars to make a big impact.
Conclusion of my Bathroom Remodel on a Budget
Don’t be like me … dragging your feet for years while your bathroom screams, “Help! I’m stuck in the early 2000s!” If your bathroom needs a facelift, just go for it! It’s cheaper than you think and easier than you expect. The satisfaction of walking into a fresh, modern space that you transformed? Absolutely worth it.
Not only did I save a ton of money by doing this remodel on a budget, but I also learned that small, affordable changes can make a massive impact. A little paint, some updated fixtures, and a few stylish touches turned my outdated bathroom into a space I actually enjoy being in (instead of just rushing in and out).
So, if you’ve been staring at your own outdated bathroom, waiting for the “perfect time” to update it … this is your sign! You don’t need a huge budget or expert-level skills. Just a little effort, some creativity, and maybe a tiny bit of patience for drying paint.
If you decide to start a bathroom remodel … I would love to hear about your progress in the comments!
Click here to check out our other DIY projects.
Some sentences or ideas maybe from chatgpt.


One response to “Bathroom Remodel on a Budget (under $300)”
I feel inspired. I have a powder room that is asking for a makeover.