


Yield: One Dozen Cinnamon Rolls
Cinnamon Rolls with Fresh Milled Flour & Sourdough
5.0 Stars (1 Review)
Soft, fluffy cinnamon rolls made with freshly milled flour and active sourdough starter ... packed with a rich, gooey cinnamon swirl. Includes overnight, make-ahead, and freezer options because sleep is important too.
Ingredients
Levain
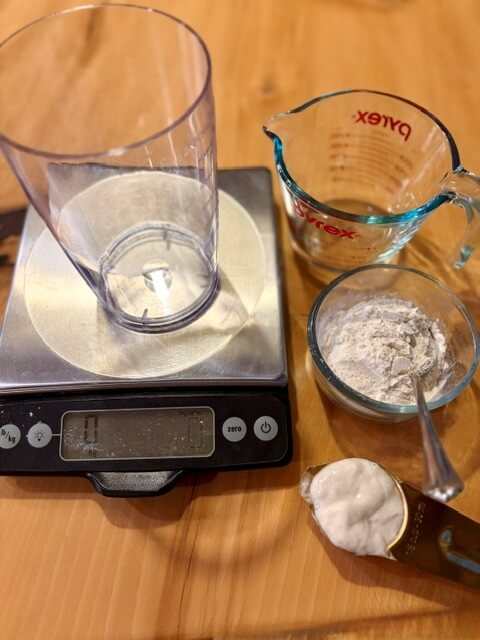
- ¼ cup (50g) sourdough starter
- ⅓ cup (100g) water
- ¾ cup (100g) flour
Dough
- 1 cup warm whole milk (about 90°-100°F)
- ½ cup (100g) white granulated sugar
- Levain
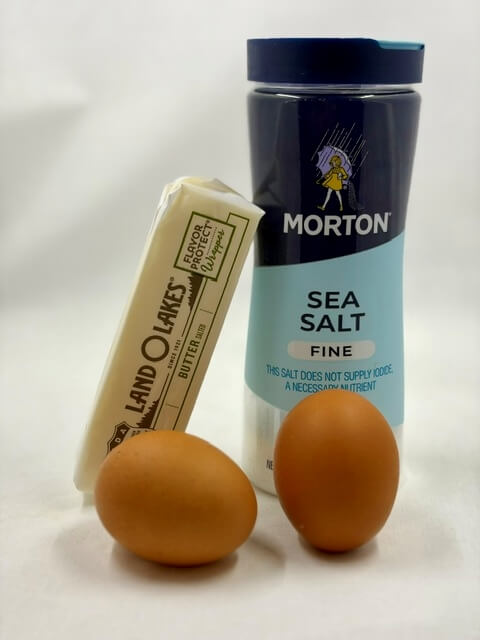
- ⅓ cup butter, melted
- 2 eggs, room temperature
- 1 teaspoon salt
- 3 cups (620g) hard white wheat berries, finely ground (plus 1½T/25g more for filling if you're feeling efficient)
Filling
- ½ cup butter, melted
- 1¼ cups (250g) packed brown sugar
- 3 (20g) tablespoons ground cinnamon
- Pinch of salt
- 1½ tablespoons (25g) hard white wheat berries, finely ground (after ground = 2½ tbsp of flour)
Frosting
- 4 oz. cream cheese, softened
- ¼ cup butter, softened
- 3 cups (340g) powdered sugar
- 1 teaspoon vanilla extract
- ¾ teaspoon ground cinnamon
- Pinch of salt
- 1-4 tablespoons milk or heavy cream
Instructions
- Levain: The night before, mix all the ingredients together until it looks like a thick batter. Cover it up and let it hang out on the counter for 12ish hours.
2 tbsp (25g) sourdough starter, 3 tablespoons (50g) water, 6 tbsp (50g) flour - Let's Start: In your mixing bowl, add warm milk, sugar, and active sourdough starter. Stir until combined. If you want the yeast version of the recipe - click here.
1 cup milk, ½ sugar, sourdough levain - More Yummies: Mix in melted butter, eggs, and salt until combined.
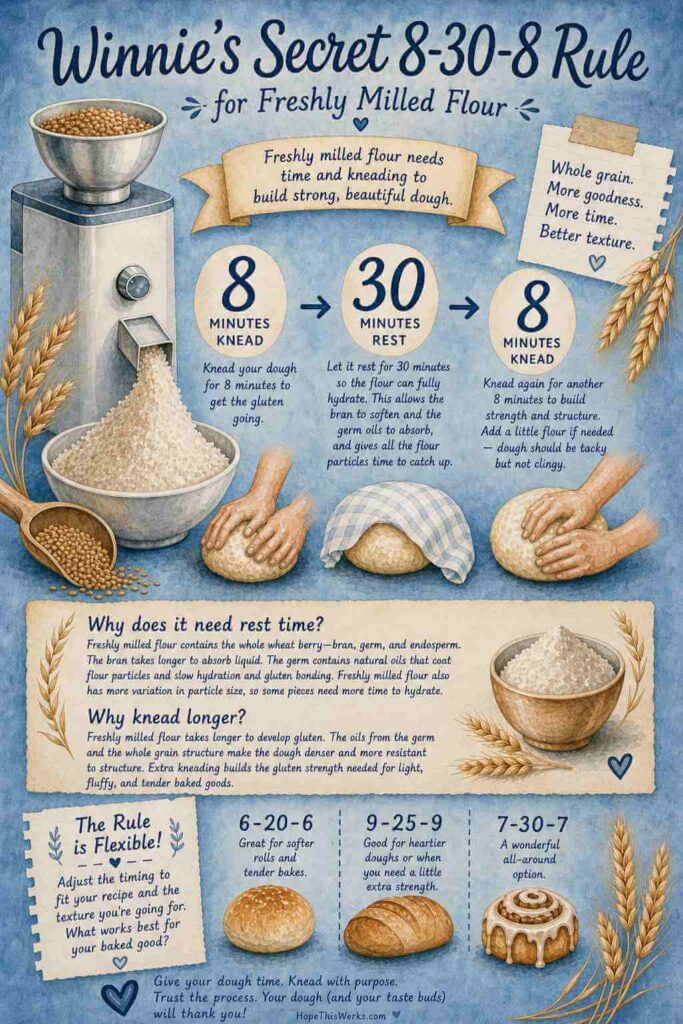
⅓ cup butter, 2 eggs, 1 tsp salt - Flour Power: Slowly add the freshly milled flour. Stop when the dough is still very soft and a little sticky (not a rock, not pancake batter). You may not need all of it ... go by how it looks, not just the measurement. Knead 8 minutes → rest 30 minutes (it’s hydrating, not being lazy) → knead another 8 minutes. Add a little more flour at this point if needed ... goal is “tacky but not clingy” to your finger.
3 cups (620g) hard white wheat berries, finely ground (+25g for later) - Stretch-and-Folds: Cover up your dough and pop that mixed dough into a warm, cozy spot ... let it hang out for 20 minutes. Do a set of strength-building folds: grab one side, stretch it up, and tuck it in like you’re making a dough burrito. Repeat on all sides (north, west, south, east). Cover it back up and return it to its warm nap zone for another 20 minutes. Do a total of 3 to 8 sets of stretch and folds, spaced 20 minutes apart. The goal is to pass the window pane test.
- First Rise (Bulk): Cover and let rise in a warm spot until almost doubled. Depending on your kitchen temperature and how ambitious your starter feels, this usually takes about 4–8 hours (the timing largely varies and depends on kitchen vibes).
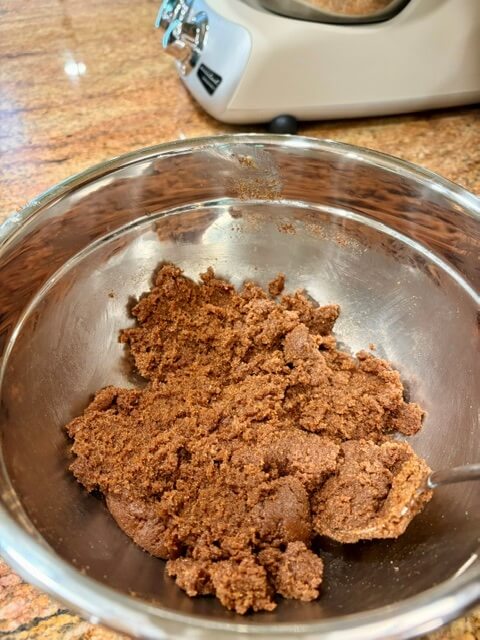
- Make the Filling: Put melted butter in a medium bowl. Mix in brown sugar, cinnamon, salt, and flour until it becomes a thick, spreadable paste. Set aside. Try not to eat it.
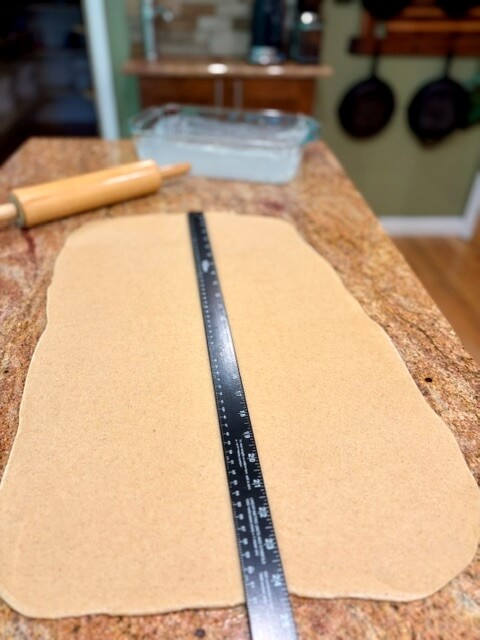
½ cup butter, 1¼ cups brown sugar, 3 tbsp cinnamon, pinch salt, 2½ tbsp flour - Roll It Out: Lightly spritz the counter with oil. Punch dough down (emotionally satisfying step). Place dough on the counter and roll it into a 15” x 24” rectangle.
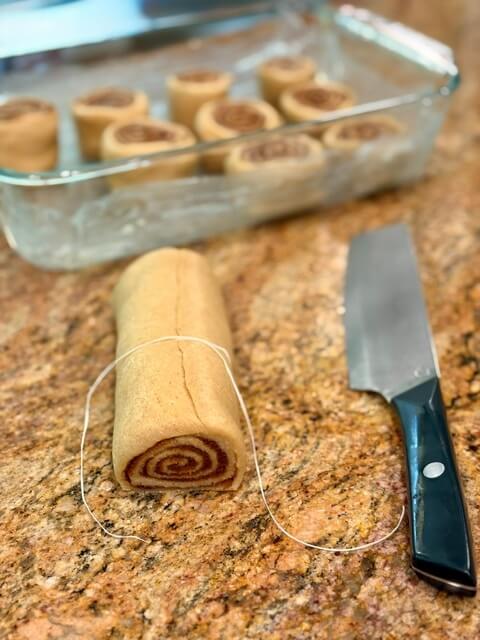
- Fill: Spread filling evenly, leaving a ½” clean edge on one long side so it can seal it. Roll tightly (think: cinnamon roll burrito). Cut into 12 pieces (with sharp knife or dental floss) ... about 2 inches each.
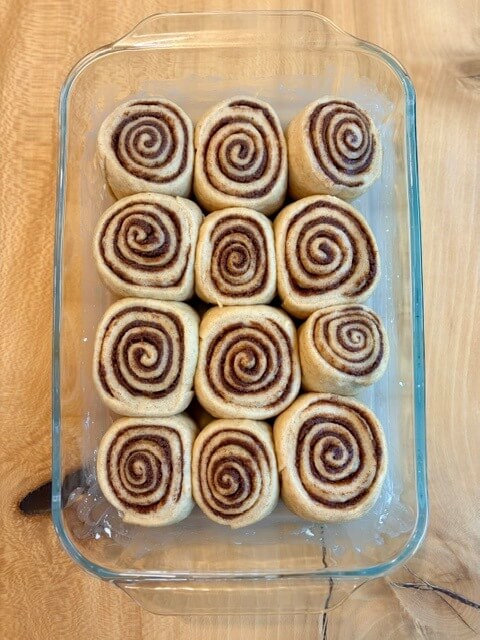
- Second Rise: Place rolls in a generously buttered 9x13 pan. Cover. Let rise for 2-4 hours, until puffy, lightly touching, and doubled again (time varies greatly ... depending on how much your sourdough feels like partying). See "Notes" below for overnight & freezer options.
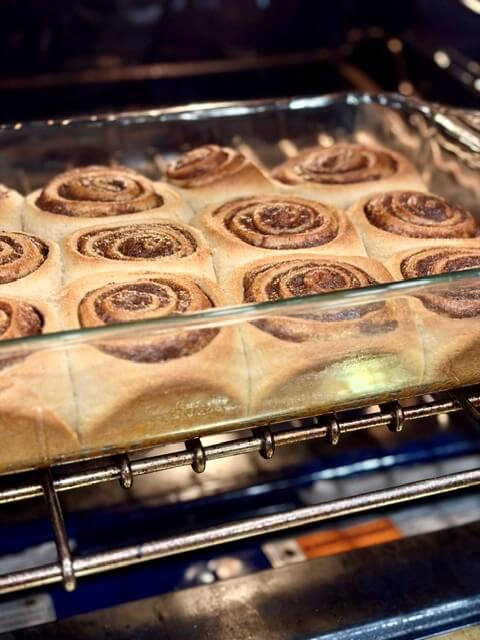
- Bake: Bake at 350° for about 30ish minutes until golden brown. If you like being precise, the center of the bread should hit 180–185°.
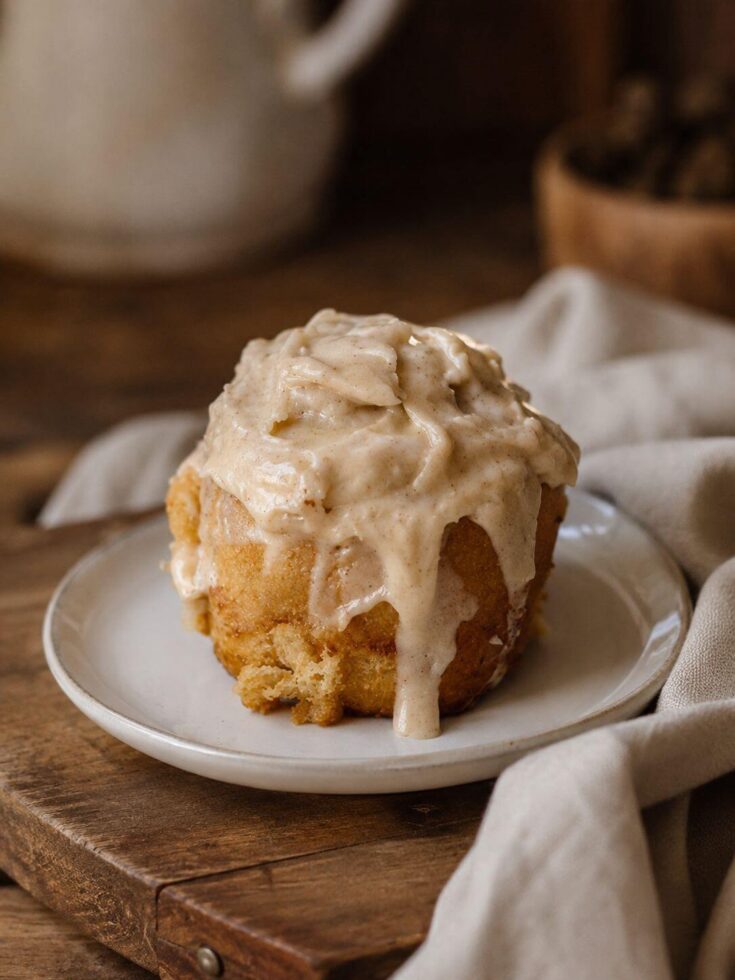
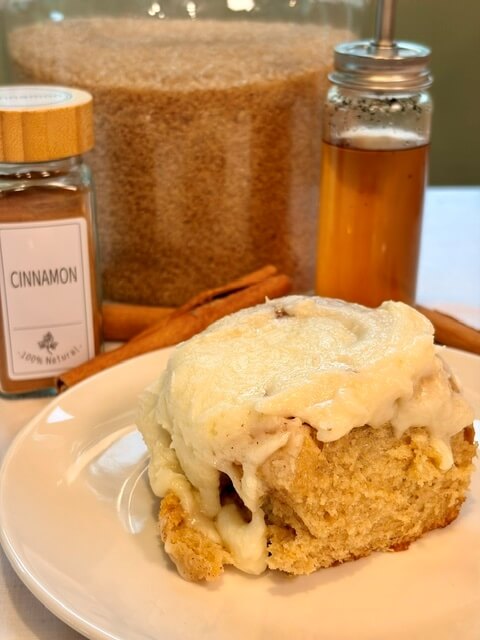
- Frosting: Beat cream cheese and butter for 2 minutes. Scrape the bowl, then beat 2 more minutes until light and dreamy. Add powdered sugar, vanilla, cinnamon, and salt. Mix it up. Scrape bowl. Splash in milk if needed to loosen things. Beat 2 more minutes at medium-high speed until fluffy. Or click here for my favorite buttercream frosting recipe.
4 oz cream cheese, ¼ cup butter, 3 cups powdered sugar, 1 tsp vanilla, 1 tsp cinnamon, Pinch of salt, Milk - Frosting Strategy: Glaze with part of the frosting when they are hot so it melts in, then use the rest of the frosting once cooled so it actually stays on the rolls instead of becoming a puddle.
- Eat (Yay!): Grab one while it’s warm, pull it apart dramatically, admire your swirls, and take a bite. Try to share… or don’t. I won’t tell.
Notes
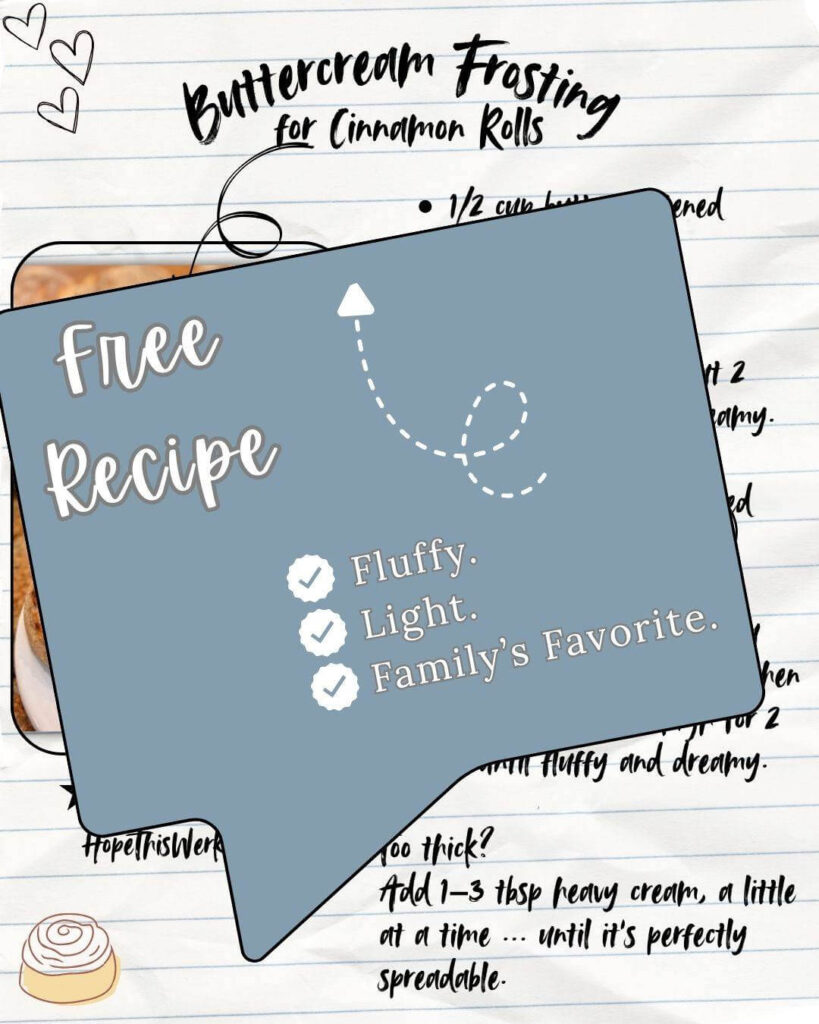
- Buttercream Frosting Instead of Cream Cheese? Oh, I've got you. Click here for the FREE recipe ... because in my house, buttercream wins. It’s light, dreamy, and disappears suspiciously fast … almost like someone keeps “taste testing” it.
- Reheat? Put them in the microwave for 30 seconds. I stand there and watch, and as soon as the frosting starts to move ... I pull it out and eat!
- Overnight Option / Make Ahead? Absolutely. Make the rolls the day before and place them in your 9x13 pan ... let them do a partial second rise before refrigerating (about 30-60 minutes, or just until they look slightly puffy) ... then cover tightly. Put them in your fridge overnight. Next morning, pop them into a cold oven, set it to 350°, and let them warm up with the oven (they’ll finish rising like overachievers). Once the oven hits 350°, bake for 30 minutes until golden and glorious. Note: Your starter basically decides the schedule here. Some starters are Olympic athletes. Others need emotional support and a nap.
- Freeze Unbaked? Yes. Let rolls do their second rise in the pan until about 75% puffy, then freeze. When ready to bake, move them to the counter 12-14 hours before (shorter if your house is warm). In the morning → turn oven to 350° → bake 30 minutes once preheated.
- Freeze Cooked? Sure thing. Freeze them baked and unfrosted ... then thaw, warm briefly in the oven for a few minutes, and frost while cozy. OR freeze them fully frosted and ready to grab when the craving hits.
- Storage? If (somehow) you have leftovers, store them in an airtight container in the fridge for 3–4 days ... cream cheese frosting needs to stay chilled. When you’re ready to enjoy one, just pop it in the microwave for 30 seconds until it’s soft, warm, and gooey again.
- Same Day Timeline-ish? Night before make levain → 8:00 AM Mix dough → 8:15 AM First knead → 8:23 AM Dough rest → 8:53 AM Second knead → 9:00 AM Rest dough → 9:30 AM Stretch & Fold #1 → 10:00 AM Stretch & Fold #2 → 10:30 AM Stretch & Fold #3 → 11:00 AM Stretch & Fold #4 (continue with more sets if dough still needs strength) → 11:00 AM–5:00 PM First rise → 5:00 PM Roll, fill, and shape → 5:30 PM–8:00 PM Second rise → 8:00 PM Bake → 8:35 PM Frost and pretend you’re sharing.
- Overnight Timeline-ish? Night before make levain → 8:00 AM Mix dough → 8:15 AM First knead → 8:23 AM Dough rest → 8:53 AM Second knead → 9:00 AM Rest dough → 9:30 AM Stretch & Fold #1 → 10:00 AM Stretch & Fold #2 → 10:30 AM Stretch & Fold #3 → 11:00 AM Stretch & Fold #4 (continue with more sets if dough still needs strength) → 11:00 AM–5:00 PM First rise → 5:00 PM Roll, fill, and shape → 5:30 PM–6:00 PM Partial Second rise → 6:30 PM Fridge overnight → 8:00 AM Put in cold oven → 8:15 AM Bake → 8:45 AM Frost and eat.
Yield: One Dozen Cinnamon Rolls
Cinnamon Rolls with Store Flour & Sourdough
5.0 Stars (1 Review)
Soft, fluffy cinnamon rolls with a rich, gooey filling and a dough you can count on every time. Made with simple pantry ingredients and easy-to-follow steps, plus make-ahead and overnight options for stress-free baking.
Ingredients
Levain
- ¼ cup (50g) sourdough starter
- ⅓ cup (100g) water
- ¾ cup (100g) flour
Dough
- 1 cup warm whole milk (about 90°-100°F)
- ½ cup (100g) white granulated sugar
- Levain
- ⅓ cup butter, melted
- 2 eggs, room temperature
- 1 teaspoon salt
- 4½ cups (540g) bread flour
Filling
- ½ cup butter, melted
- 1¼ cups (250g) packed brown sugar
- 3 (20g) tablespoons ground cinnamon
- Pinch of salt
- 2½ tbsp of flour
Frosting
- 4 oz. cream cheese, softened
- ¼ cup butter, softened
- 3 cups (340g) powdered sugar
- 1 teaspoon vanilla extract
- ¾ teaspoon ground cinnamon
- Pinch of salt
- 1-4 tablespoons milk or heavy cream
Instructions
- Levain: The night before, mix all the ingredients together until it looks like a thick batter. Cover it up and let it hang out on the counter for 12ish hours.
2 tbsp (25g) sourdough starter, 3 tablespoons (50g) water, 6 tbsp (50g) flour - Let's Start: In your mixing bowl, add warm milk, sugar, and active sourdough starter. Stir until combined. If you want the yeast version of the recipe - click here.
1 cup milk, ½ sugar, sourdough levain - More Yummies: Mix in melted butter, eggs, and salt until combined.
⅓ cup butter, 2 eggs, 1 tsp salt - Flour Power: Slowly add the flour. Stop when the dough is still very soft and a little sticky (not a rock, not pancake batter). You may not need all of it ... go by how it looks, not just the measurement. Knead for 8 minutes. Add a little more flour at this point if needed ... goal is “tacky but not clingy” to your finger.
4½ cups bread flour - Stretch-and-Folds: Cover up your dough and pop that mixed dough into a warm, cozy spot ... let it hang out for 20 minutes. Do a set of strength-building folds: grab one side, stretch it up, and tuck it in like you’re making a dough burrito. Repeat on all sides (north, west, south, east). Cover it back up and return it to its warm nap zone for another 20 minutes. Do a total of 3 to 8 sets of stretch and folds, spaced 20 minutes apart. The goal is to pass the window pane test.
- First Rise (Bulk): Cover and let rise in a warm spot until almost doubled. Depending on your kitchen temperature and how ambitious your starter feels, this usually takes about 4–8 hours (the timing largely varies and depends on kitchen vibes).
- Make the Filling: Put melted butter in a medium bowl. Mix in brown sugar, cinnamon, salt, and flour until it becomes a thick, spreadable paste. Set aside. Try not to eat it.
½ cup butter, 1¼ cups brown sugar, 3 tbsp cinnamon, pinch salt, 2½ tbsp flour - Roll It Out: Lightly spritz the counter with oil. Punch dough down (emotionally satisfying step). Place dough on the counter and roll it into a 15” x 24” rectangle.
- Fill: Spread filling evenly, leaving a ½” clean edge on one long side so it can seal it. Roll tightly (think: cinnamon roll burrito). Cut into 12 pieces (with sharp knife or dental floss) ... about 2 inches each.
- Second Rise: Place rolls in a generously buttered 9x13 pan. Cover. Let rise for 2-4 hours, until puffy, lightly touching, and doubled again (time varies greatly ... depending on how much your sourdough feels like partying). See "Notes" below for overnight & freezer options.
- Bake: Bake at 350° for about 30ish minutes until golden brown. If you like being precise, the center of the bread should hit 180–185°.
- Frosting: Beat cream cheese and butter for 2 minutes. Scrape the bowl, then beat 2 more minutes until light and dreamy. Add powdered sugar, vanilla, cinnamon, and salt. Mix it up. Scrape bowl. Splash in milk if needed to loosen things. Beat 2 more minutes at medium-high speed until fluffy. Or click here for my favorite buttercream frosting recipe.
4 oz cream cheese, ¼ cup butter, 3 cups powdered sugar, 1 tsp vanilla, 1 tsp cinnamon, Pinch of salt, Milk - Frosting Strategy: Glaze with part of the frosting when they are hot so it melts in, then use the rest of the frosting once cooled so it actually stays on the rolls instead of becoming a puddle.
- Eat (Yay!): Grab one while it’s warm, pull it apart dramatically, admire your swirls, and take a bite. Try to share… or don’t. I won’t tell.
Notes
- Buttercream Frosting Instead of Cream Cheese? Oh, I've got you. Click here for the FREE recipe ... because in my house, buttercream wins. It’s light, dreamy, and disappears suspiciously fast … almost like someone keeps “taste testing” it.
- Reheat? Put them in the microwave for 30 seconds. I stand there and watch, and as soon as the frosting starts to move ... I pull it out and eat!
- Overnight Option / Make Ahead? Absolutely. Make the rolls the day before and place them in your 9x13 pan ... let them do a partial second rise before refrigerating (about 30-60 minutes, or just until they look slightly puffy) ... then cover tightly. Put them in your fridge overnight. Next morning, pop them into a cold oven, set it to 350°, and let them warm up with the oven (they’ll finish rising like overachievers). Once the oven hits 350°, bake for 30 minutes until golden and glorious. Note: Your starter basically decides the schedule here. Some starters are Olympic athletes. Others need emotional support and a nap.
- Freeze Unbaked? Yes. Let rolls do their second rise in the pan until about 75% puffy, then freeze. When ready to bake, move them to the counter 12-14 hours before (shorter if your house is warm). In the morning → turn oven to 350° → bake 30 minutes once preheated.
- Freeze Cooked? Sure thing. Freeze them baked and unfrosted ... then thaw, warm briefly in the oven for a few minutes, and frost while cozy. OR freeze them fully frosted and ready to grab when the craving hits.
- Storage? If (somehow) you have leftovers, store them in an airtight container in the fridge for 3–4 days ... cream cheese frosting needs to stay chilled. When you’re ready to enjoy one, just pop it in the microwave for 30 seconds until it’s soft, warm, and gooey again.
- Same Day Timeline-ish? Night before make levain → 8:30 AM Mix Dough and Knead → 9:00 AM Rest dough → 9:30 AM Stretch & Fold #1 → 10:00 AM Stretch & Fold #2 → 10:30 AM Stretch & Fold #3 → 11:00 AM Stretch & Fold #4 (continue with more sets if dough still needs strength) → 11:00 AM–5:00 PM First rise → 5:00 PM Roll, fill, and shape → 5:30 PM–8:00 PM Second rise → 8:00 PM Bake → 8:35 PM Frost and pretend you’re sharing.
- Overnight Timeline-ish? Night before make levain → 8:30 AM Mix Dough and Knead → 9:00 AM Rest dough → 9:30 AM Stretch & Fold #1 → 10:00 AM Stretch & Fold #2 → 10:30 AM Stretch & Fold #3 → 11:00 AM Stretch & Fold #4 (continue with more sets if dough still needs strength) → 11:00 AM–5:00 PM First rise → 5:00 PM Roll, fill, and shape → 5:30 PM–6:00 PM Partial Second rise → 6:30 PM Fridge overnight → 8:00 AM Put in cold oven → 8:15 AM Bake → 8:45 AM Frost and eat.


4 responses to “Easy SOURDOUGH Cinnamon Rolls (fresh milled or store flour)”
YES PLEASE! Any tricks on how to get these extra extra tangy from the sourdough?? Thanks!
Yep! A longer cold ferment is the secret. More time in the fridge = more sourdough sass.
I can’t wait to try your tricks to get the filling to stay in the rolls, and also to try oil on the counter instead of flour.
Yesss! The oil trick makes the dough so much happier … and keeping the filling inside the rolls instead of escaping into the pan feels like a tiny baking victory. Hope you love them!