
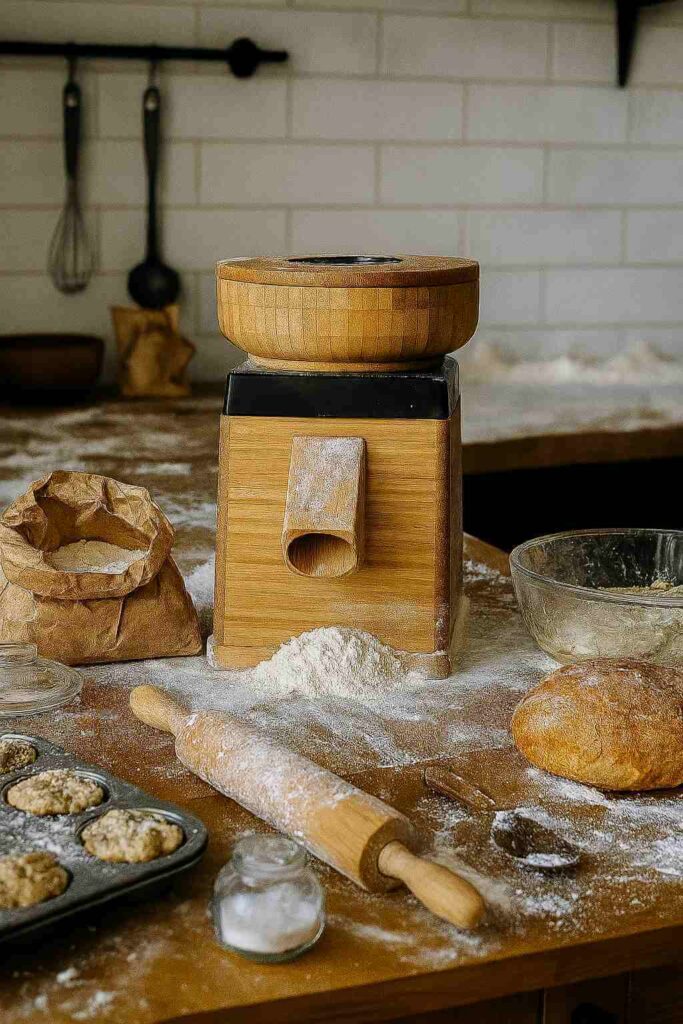
Picture this: you finally bought that shiny grain mill. You lugged home a massive bag of wheat berries, feeling smug and homesteader-y. But now? Your “bread” could double as a doorstop, your spouse calls the texture “weird,” and you’re secretly reaching for store-bought flour like a culinary traitor. Don’t toss your mill out the window! Troubleshooting freshly milled flour is a rite of passage. There’s a learning curve, but I’m here to hold your hand (figuratively … mine’s covered in flour). I’ll walk you through the 4 most common problems, step-by-step, and I bet one of these fixes will save your loaves.
Heads up: there’s a lot of info packed into this article. Don’t worry, though … there’s a handy decision tree waiting at the bottom to give you a quick, clear summary.
#1 - When Bread is Too Dense
Ah yes, the classic brick loaf. Dense bread is the #1 complaint for home bakers using freshly milled flour. Bread becomes dense when there isn’t enough gas in the dough … or when gas escapes like a tiny flour-covered fugitive (Good Gas = Big Rise). Here’s how to turn that brick back into bread:
Grind Those Wheat Berries Finer (troubleshooting freshly milled flour)
If you’re battling dense bread, one of the easiest troubleshooting freshly milled flour tricks is simply grinding your wheat berries finer. The grind size has a massive effect on how much water the flour absorbs and how strong your gluten can get.
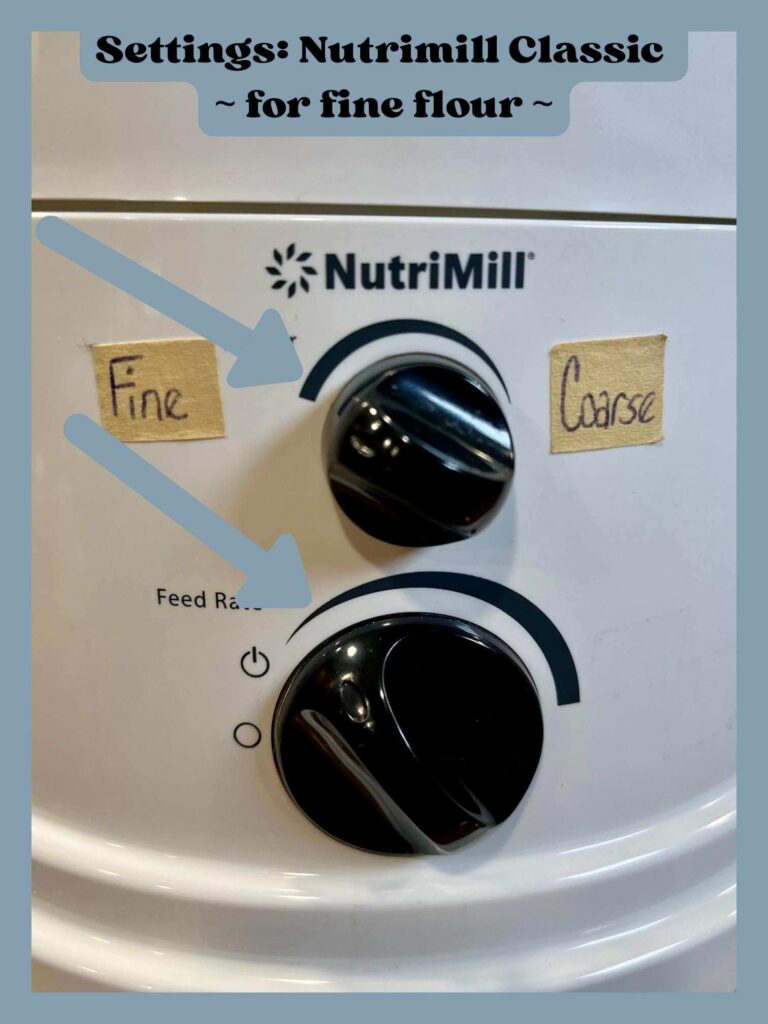
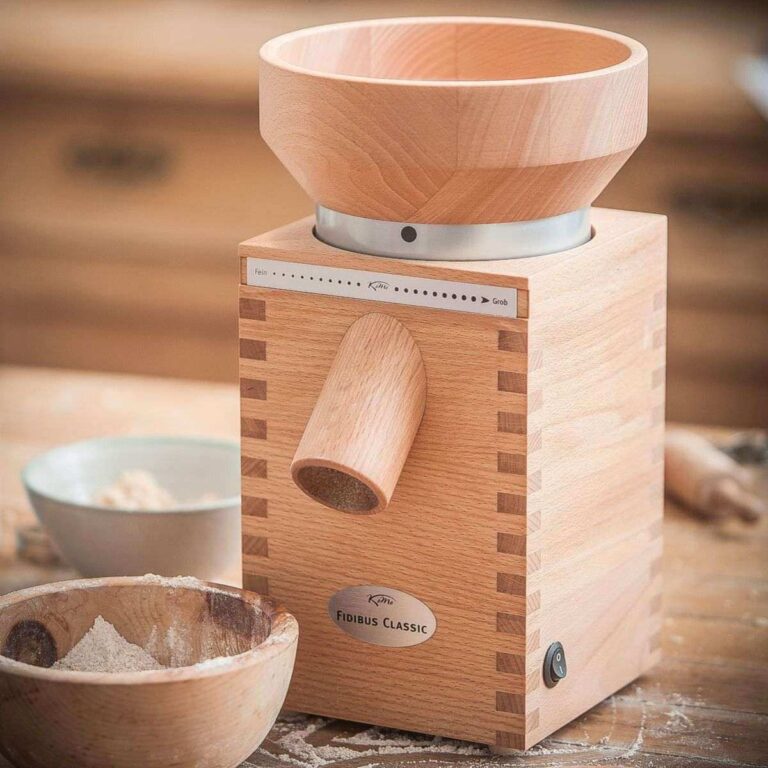
- Impact/Steel Burr Mills: I grind on almost the finest setting with my Nutrimill Classic … even for bread flour. Some people insist the finest setting is just for pastry flour, but I like my flour silky-fine and my loaves light, so I say go for it.
- Stone Mills: Now let’s talk about stone mills. Here’s where I break the rules: I grind right at the first squeak of the stones. That’s the setting where the stones just barely start singing. Technically, the manufacturer suggests backing off one notch from the squeak to preserve your stones and prevent “glazing” … but I like my flour as fine as possible, so I don’t always back it off.
Important Note: If you are grinding large batches of grain, break them into smaller sessions. This keeps the stones cooler and reduces your chances of glazing.
Side Note: In my experience, impact/steel burr mills grind wheat berries just a smidge finer than stone mills … like the difference between sandpaper grit #220 and #320. Not huge, barely noticeable in the dough.
Pro Trick: Have a stone mill? You can re-mill your flour by running it through the mill a second time. This gives you a more consistent particle size and improves gluten development. But do NOT try this with impact or steel burr mills unless you want to spend the weekend fixing a broken mill.
Check Your Mill (troubleshooting freshly milled flour)
If your flour still feels off (and you are using a stone mill), your stones might be “glazed” … basically coated in starch from grinding too long, too hot, oily grains, or wet items. This makes them as smooth as a dinner plate and useless at grinding.
Fix: Run a few cups of rice or field corn through your mill to de-glaze (this helps remove the fused starch from the stones).
Prevent It: Don’t grind wet or oily grains, and give your mill breaks during marathon grinding sessions. Your mill deserves a nap too.
Is It Your Yeast Or Sourdough? (troubleshooting freshly milled flour)
If your leavener is deader than disco, your dough won’t rise.
Yeast Users: Get a fresh batch. Seriously, just buy new yeast.
Sourdough Bakers:
- If your sourdough isn’t active enough, feed it a couple of extra times before baking. No extra time? No problem … just add a pinch of yeast along with your starter to give it a boost.
- Also, check the gluten. While you’re doing stretch-and-folds (or your fancy coil folds), try the windowpane test. If the dough stretches thin without tearing, your gluten network is strong enough to trap gas and give your bread a beautiful rise.
Choose the Right Grain (troubleshooting freshly milled flour)
Not all wheat berries are created equal:
- Yeast/Sourdough Baked Goods (bread, rolls, pizza, etc.): Use hard red or hard white (high protein … 10-14% = strong gluten).
- Non-Yeast Baked Goods (cakes, muffins, pancakes, etc.): Use soft wheat (lower protein … 5-9% = tender crumb).
- Ancient Grains: Fun to experiment with, but they’re quirky and not always ideal for tall loaves. It’s best to start using these with non-yeast baked goods.
| Grain Type | Protein % | Best Use |
|---|---|---|
| Hard Red / Hard White | 10–14% | Bread, rolls, pizza (yeast/sourdough) |
| Soft Wheat | 5–9% | Cakes, muffins, pancakes (non-yeast) |
| Ancient Grains | Varies | Best in non-yeast baked goods |
Want to dive deeper into which wheat berry works best for each type of bread, muffin, or cookie? I wrote a whole guide just for you … check it out here and become a wheat-choosing pro.

Ingredients Matter (troubleshooting freshly milled flour)
Sometimes the culprit isn’t your mill … it’s what you’re putting in the dough.
- Salt: Remember, salt is like the traffic cop of bread dough … it slows yeast activity down. If you accidentally added a little extra, your rise will be sluggish.
- Vital Wheat Gluten: If your dough is struggling to rise high and proud, add 2 tablespoons of vital wheat gluten per loaf of bread. Think of it as giving your dough a personal trainer … it strengthens the gluten network, traps more gas, and gives you those gorgeous little air pockets.
- Boost Your Leavener: Add a bit more yeast … or if you are using sluggish sourdough, you can add a pinch (½ tsp.) of commercial yeast to help it.
Knead, Rest, Repeat (troubleshooting freshly milled flour)
Freshly milled flour loves a good workout … it needs longer kneading to build that gluten network (use my secret formula: knead for 8 minutes, rest for 30 minutes, knead for another 8 minutes). Curious to learn more? I’ve got a whole video waiting for you!
But beware: too much kneading will break the gluten strands, and then you’re back to dense bread territory.
Shorten Bulk Ferment (troubleshooting freshly milled flour)
Freshly milled flour is like a kid on a sugar rush … it ferments fast because it’s packed with extra nutrients your yeast or sourdough loves to gobble up. When troubleshooting freshly milled flour, try shortening the bulk fermentation time. It’s better to save some of that rising power for after the final shaping, instead of letting the dough burn through all its energy too early.
Let It Rise … But Not Forever (troubleshooting freshly milled flour)
Your dough is like a toddler … it needs supervision.
- Under-proofed dough: Feels tight and springs back right away when poked. Let it rise longer. Be patient. If you rush the rise, your dough won’t have time to build enough gas, and you’ll end up with a tight, dense crumb.
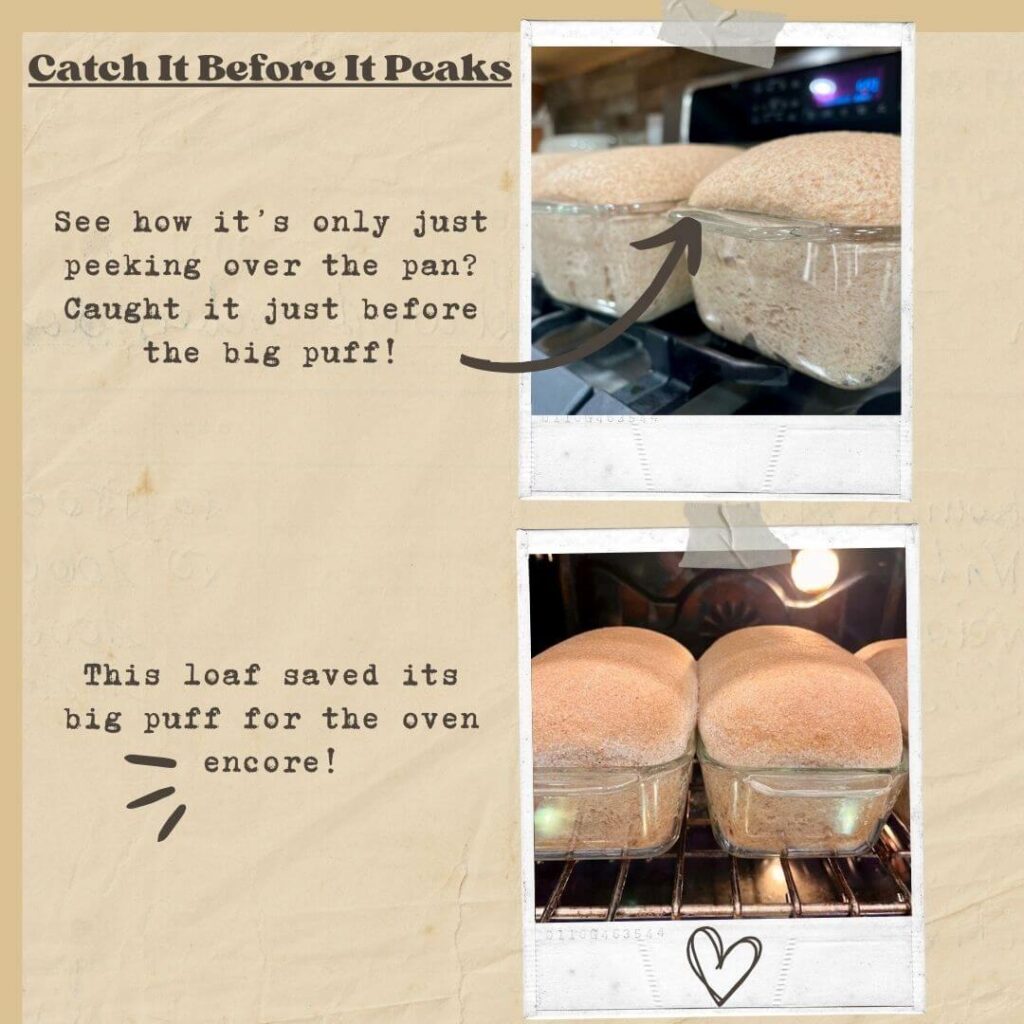
- Over-proofed dough: Do not let it fully crest/dome. If your dough rises too high, then it collapses like a sad soufflé. Freshly milled flour is nutrient-dense … so it ferments quickly (put it in the oven earlier than you would with store-bought flour). Watch the dough, not the clock.

Shaping & Loaf Info. (troubleshooting freshly milled flour)
- Shaping: You worked hard to make gas. Don’t squish it all out. Shape gently, let it rest (for up to 30 minutes), then do a final shape to build crust tension.
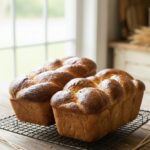
- Loaf Size: Want a higher dome? Make a bigger batch of dough! Since fresh milled loaves don’t get as much oven spring, adding volume helps fill the pan.
- Don’t Score: Oven spring is slower with fresh milled bread. Scoring isn’t really necessary … instead of helping, it just pokes holes in your dough’s balloon and lets the gas sneak out.
The Final Touch (troubleshooting freshly milled flour)
Let It Cool: Cutting hot bread creates a dense and gummy texture. Wait for it to cool. (Yes, it’s torture.)
Be Realistic (troubleshooting freshly milled flour)
Fresh milled bread will be more dense and never reach skyscraper heights. But here is why that’s okay:
- Bran Gets in the Way: The bran flakes in fresh flour act like tiny scissors, snipping at the gluten strands and poking holes in the structure. This means less height, but definitely more flavor and nutrition.
- Gas Escapes: Because of those bran “scissors,” some of the gas slips out instead of puffing the dough up tall.
- Aged Flour: Store-bought flour is oxidized, which strengthens gluten bonds. Fresh flour hasn’t had that time, so it’s more tender … but also more wholesome.
- Taste & Nutrition Win: While your loaf may be shorter, the flavor is richer, the nutrients are intact, and your bread is far more satisfying than anything in a bag at the store.
#2 - Texture Complaints
The #1 complaint when people start baking with fresh milled flour? Dense bread. The #2 complaint? The texture feels “off” … too crunchy, too gritty, or just not what they expected. If you’re in that camp, here are some fixes:
Hydration Time Matters
Freshly milled flour takes longer to hydrate (softened wheat and bran), which means you need to give it extra time before expecting smooth gluten development. Here’s how to handle it:
- Try an Autolyse: Mix only the flour and water, then let it sit for 30 minutes to 2 hours before beginning your recipe. This rest gives the flour time to hydrate and allows gluten development to begin. Since freshly milled flour can be stubborn about forming gluten, this step can help make a difference.
- For Non-Yeast Baked Goods: Quick breads, muffins, pancakes … all of these need a rest, too. After mixing the batter, let it sit for at least 30 minutes. If you skip this, the flour won’t fully hydrate and your baked goods can end up tasting gritty (like someone sprinkled sand into your muffins).
- For Yeast Breads: Use the “knead–rest–knead” rule. Knead the dough for about 8 minutes (keep it on the wetter side), then let it rest for 30 minutes. After that, knead again for around 8 minutes, adding more flour only if necessary. That 30-minute pause is crucial … it allows the flour to soak up liquid and balances out your flour-to-water ratio. Want to see what this looks like? Watch this video for all the details.
Grind the Wheat Berries Finer (troubleshooting freshly milled flour)
Texture starts with how fine your flour is milled. Here’s what I do with different mills:
- Impact/Steel Burr Mills (e.g., Nutrimill Classic): I set mine almost to the finest setting … not just for pastry, but for all my baking. A lot of people say to save that setting for delicate flours, but I love a silky texture in my bread flour too.
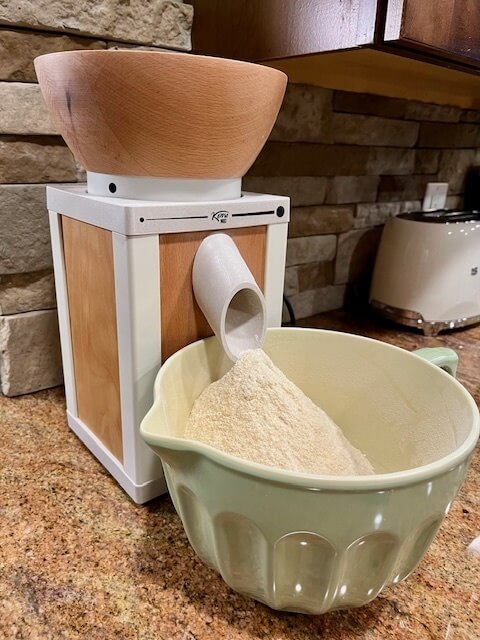
- Stone Mills (e.g., Komo or Nutrimill Harvest): I grind right at the first point where the stones begin to squeak (yes, I know that’s not “by the book”). Technically, you’re supposed to back it off a notch to avoid extra wear or glazing the stones. But honestly? I usually just go for the squeak. If you’re grinding big batches … split the work into smaller runs to allow the stones to cool down. Click here for a quick video example.
- Re-Milling with Stone Mills: Want an even finer texture? Run your flour through again. This only works with stone mills … never with impact or steel burr mills.
- Side Note: In my experience, impact/steel burr mills grind just a touch finer than stone mills.
Make Sure Your Stones Aren’t Glazed
If your flour feels coarser than usual, your mill stones might be glazed. When that happens, they don’t grip and grind the wheat berries as effectively.
Quick Fix: Run a few cups of rice or field corn through the mill to “scrub” the stones clean and restore their bite.
#3 - Bread Sinks or Collapses
The 3rd most common complaint I hear about freshly milled bread? Loaves that concave or collapse in the oven.
If your bread sinks, it’s often caused by the same issues that make bread dense … so check the tips in the “Dense Bread” section first. But here are a few additional ideas to consider:
- Hustle into the Oven: Don’t wait for the tops to puff up to their dramatic peak … slide them into the oven a little sooner than you would with store-bought flour. Otherwise, they’ll do a sad little collapse while baking.
- Increase the Size of Your Loaf: Since fresh milled bread usually has less oven spring, adding a little extra dough can help your loaf fill the pan and look fuller.
- Check Your Cooking Technique: Using a baking stone helps distribute heat evenly, which can give your loaf a better rise.
- Buddy Bake: When making multiple loaves, place the pans touching each other in the oven. They’ll support each other as they rise and can end up a bit taller.

#4 - Crumbly Bread Chronicles
Let me take you back to Salt Lake City, where my oldest daughter had just given birth to my very first grandchild. I lived all the way in Pittsburgh, and hauling my grain mill on a plane wasn’t exactly an option. Desperate to keep her nourished (and honestly, desperate for us not to have to survive without fresh milled bread), I found a wonderful local woman who sold me loaves bursting with nutrition. Delicious? Absolutely. Sandwich-worthy? Not even close. The bread disintegrated in the toaster faster than you could say “crumbly.”
This brings us to the 4th issue … how can you fix crumbly bread? Most of the fixes are actually the same ones you’d use for dense bread (see above), but here I’ll spotlight the biggest troublemakers so you know exactly where to start and add a few more options for troubleshooting.
Too Dry Dough Drama (troubleshooting freshly milled flour)
The number-one culprit behind crumbly bread? Dry dough. Without enough water, your freshly milled flour simply can’t hydrate, and reaching that magical windowpane stage becomes nearly impossible.
Ironically, this problem often traps experienced bakers. If that’s you, take it as a compliment! You’ve mastered store-bought flour so well that you can spot the perfect dough by sight: it pulls neatly from the sides of the bowl, forms a silky ball, and feels wonderfully smooth under your fingers. But with fresh milled flour, that picture-perfect dough is actually a red flag. If your dough already looks like a tidy ball too soon … there’s a good chance you’ll end up staring at toast that crumbles just because you looked at it.
My Secret 8-30-8 Hydration Hack (troubleshooting freshly milled flour)
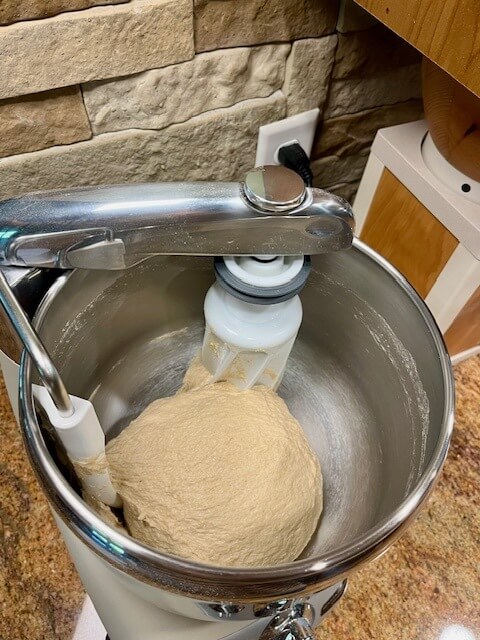
Here’s my favorite hydration trick for keeping your dough wet enough: knead for 8 minutes (leaving your dough wet), rest for 30, then knead another 8. During that first knead, the dough must still look like a wet mess. Don’t panic. After the 30-minute rest, the dough “sips” the liquid, hydrates, and—ta-da—pulls neatly from the bowl on the second knead. Ninety-five percent of the time, I never add more flour. Skip the rest time (or add too much flour during the first kneading) and you’ll almost always end up with crumbly bread.
Depending on your mixer, your “magic numbers” might look different from mine. I usually do 8 minutes of kneading, 30 minutes resting, then another 8 minutes of kneading. But your rhythm could just as easily be 5-30-5, 9-30-9, or 12-30-12. The point is that having wet dough after your first knead and the middle rest time … is VERY important. Find the combo that works best for your dough and your mixer. This video walks you through everything step by step!
Autolyse Adventures (troubleshooting freshly milled flour)
Prefer a longer path to hydrate your dough? Try the autolyse method (instead of the 8-30-8 plan). Mix water with about 85% of your flour, then let it sit for 30 minutes to 2 hours. No yeast yet … this isn’t rise time, just soak time. It’s perfect if you want to start dough, drop off kids at school, and return to finish while sipping coffee. When you’re ready, add the rest of your ingredients and knead all at once … no mid-way pause required. This method gives your bran time to soften and helps prevent crumbly disasters while troubleshooting freshly milled flour.
Under-Kneaded Chaos
Here’s another trouble spot worth calling out. Most bakers (a completely unscientific 84.71% of them!) don’t knead long enough. In other words, under-kneading is a far bigger problem than over-kneading.
Freshly milled flour simply needs more time to build gluten. If you’re an experienced baker, this might trip you up … so, again, take it as a compliment. You’ve trained your eye and hands on store-bought flour, which develops gluten quickly. Three minutes of kneading used to do the trick. But freshly milled flour? It laughs at your three minutes. Think of it like a child at bedtime who keeps asking for “just one more story.” You have to keep going a little longer to get that gluten where it needs to be.
Your mixer plays a big role, too. Every brand has its own power level and kneading style. Take KitchenAid, for example: their manual says mix on speed #4 for just two minutes, then give the motor a ten-minute nap. Cute, right? But that’s nowhere near enough kneading for freshly milled flour. So I kept going … 10, 15, sometimes 20 minutes at a time. Let’s just say I “loved” my KitchenAids a little too hard … two of them (including a Professional 600) are now resting peacefully in appliance heaven.These days I use an Ankarsrum, which kneads gently but with plenty of strength. Even so, I usually give my dough 10–20 minutes of kneading, which is no problem for my new beastly friend.
All mixers—KitchenAid, Ankarsrum, Bosch, NutriMill—behave a little differently. With time, you’ll discover your own “sweet spot” for how long to knead. Or you can trim that kneading time by using the autolyse method, which jump-starts gluten formation and softens the bran … another lifesaver when troubleshooting freshly milled flour.
Over-Kneaded Mayhem (troubleshooting freshly milled flour)
Over-kneading is actually pretty rare. You’ll recognize it right away … your dough turns into a soupy, shapeless mess that won’t hold together, and the finished bread will definitely crumble. The key here is not to fixate on the clock but to pay attention to the dough itself. It will show you when it’s ready, and that’s the true heart of troubleshooting freshly milled flour.
And don’t toss that over-kneaded dough! Repurpose it into something tasty like homemade crackers.
Wrong Grain (crumbly - troubleshooting freshly milled flour)
Using the wrong grain can sabotage your loaf. For yeast or sourdough baked goods (loaves, rolls, pizza), use hard white or hard red wheat berries. Adding ancient grains? Cap them at 15%, because they don’t develop gluten as strongly.
For non-yeast bakes (pancakes, muffins, quick breads, biscuits), choose soft wheat berries for tender, fluffy results. Ancient grains here? Go for it. They behave more like soft wheat.
Also, wheat berries from different farms or years behave differently. One bag may knead more easily, look lighter after milling, etc. For me, opening a new bag of wheat berries is like Christmas morning … surprising and sometimes a little unpredictable. Embrace the mystery while troubleshooting freshly milled flour.
Hungry for grain knowledge? Click here for a complete tour.
Other Crumbly Factors (troubleshooting freshly milled flour)
A few final culprits:
- Overbaking: Aim for 190°F in the center. Overbake, and you dry it out.
- Storage: Keep bread in an airtight container to avoid dryness.
- Knife Choice: Use a sharp bread knife or electric knife for clean slices.
- Cooling Time: Cutting hot bread gives gooey, crumbly crumbs. Wait until cool.
- Your Mill: A KitchenAid attachment or hand-crank mill won’t mill as fine as an electric grain mill, leading to a crumbly consistency.
Paying attention to these details makes all the difference when troubleshooting freshly milled flour and finally conquering crumbly bread.
Miscellaneous Tips for Troubleshooting Freshly Milled Flour
Still struggling to get consistent results? Here are a few more tricks to help you master your fresh-milled baking:
- Stick to One Recipe: When troubleshooting freshly milled flour, consistency is key. Use the same recipe and the same wheat, and make subtle adjustments until you get it right. Once you’ve mastered one dough, you will more easily be able to branch out to new recipes or wheat varieties.
- Using a bread machine? Ah, that’s a whole different beast. All I can say is… may the odds be ever in your favor and may gluten luck be with you. One tiny tip: if your machine allows it, let the flour and water sit for a few minutes before starting the cycle. It gives the freshly milled flour a head start on hydrating!
- Start with a 50/50 Mix: If you’re nervous about jumping straight to 100% fresh flour, try mixing half store-bought and half fresh-milled flour. Once you understand how the dough behaves, gradually increase the fresh-milled portion.
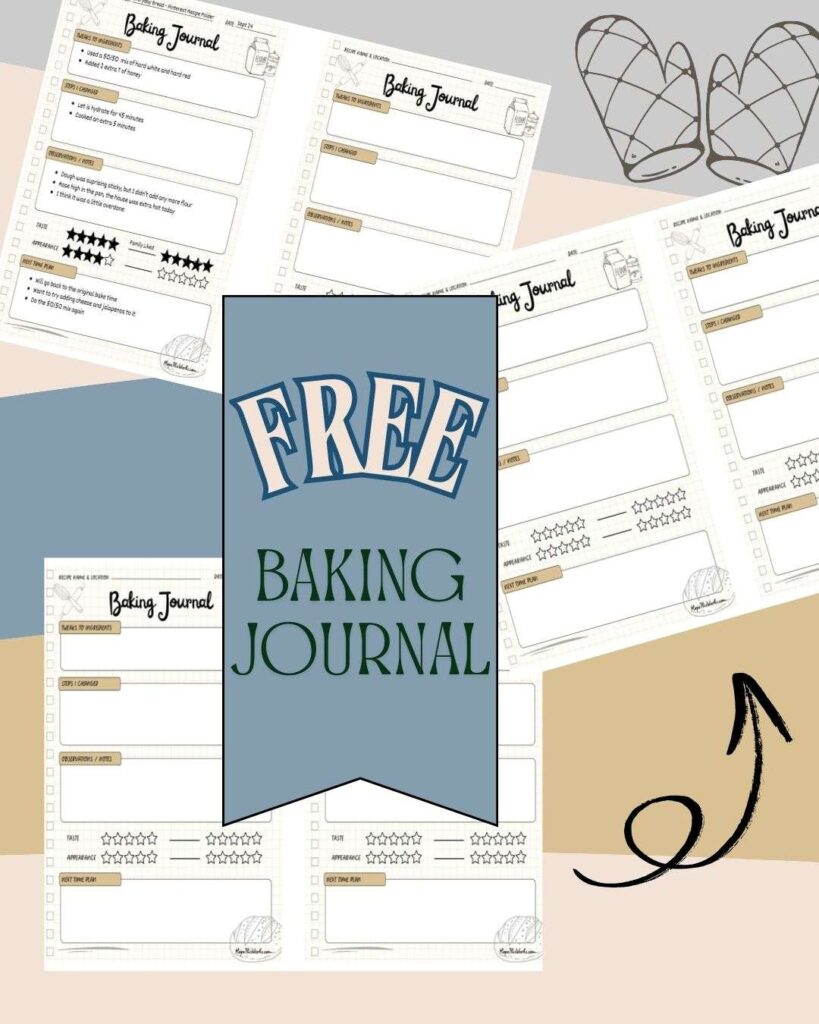
- Keep a Baking Journal: Don’t rely on memory … you’ll forget what tweaks worked! Track your adjustments, timing, and results. I even have a FREE baking journal designed specifically for this. Click here to download yours and start recording your bread adventures.
Conclusion: Don’t Give Up!
Start with just one or two of these ideas and see if they improve your loaf. Take notes … trust me, you’ll forget what worked otherwise (click here for the free baking tracker).
Most importantly, don’t give up. Thousands of people bake fresh-milled bread successfully, and no one gets a perfect loaf on their first try. Yes, you may waste some time in the kitchen. Yes, a few loaves might turn out dense or flat. But you bought your mill for a reason … whether it’s for the incredible flavor, the health benefits, saving money on groceries, or just having the freedom to make bread even if the supply chain collapses.
Think of fresh-milled baking like learning an instrument. You don’t play Beethoven perfectly the first time you sit at the piano. With a little patience, practice, and careful troubleshooting freshly milled flour … you’ll soon be creating loaves so beautiful and delicious you’d be proud to serve them to Beethoven himself.
Before you roll out (pun fully intended), don’t forget to check out my other guides, recipes, and tutorials to keep your kitchen adventures fearless and fun.
You’ve got to check out Christina’s Notebook. She’s a fresh-milled flour lover … and anyone who loves freshly milled flour … that automatically earns a spot on our friends list. Right?!
Want to make sure you never miss my new information or recipes? Subscribe here … I’ll even send you a printable recipe card for the best freshly milled flour pancakes on earth (my Mom’s recipe!) as a thank-you gift.
Until next time… may your loaves rise tall, your crumb stay light, and your kitchen smell like fresh-baked goodness every single day.

If you enjoyed this article and want to help me buy more wheat berries (and maybe a broom for my kitchen), you can click this link … thanks a latte!
Troubleshooting Decision Trees
#1 - Dense Bread
- Is your bread too dense?
- Yes → Check Grind Size
- Impact/Steel Burr Mills: Use almost finest setting (e.g., Nutrimill Classic).
- Stone Mills: Grind until stones squeak. Manufacturer says back off one notch … I sometimes don’t.
- Pro Tip: Re-mill flour with stone mills for finer texture.
- Still dense? → Check for Glazed Stones
- Symptom: Flour feels coarse, won’t grind well.
- Fix: Run a few cups of rice/field corn through mill.
- Prevention: Don’t grind oily grains, let mill cool during long sessions.
- Still dense? → Check Leavening
- Yeast: Replace with fresh yeast.
- Sourdough: Feed starter more. In a rush? Add pinch of yeast.
- Gluten Check: Try the windowpane test during folds.
- Still struggling? → Check Grain Choice (see chart above)
- Still dense? → Ingredients Matter
- Salt: Too much slows yeast. Aim for 1.8–2.0% of flour weight.
- Vital Wheat Gluten: Add 2 Tbsp per loaf to strengthen gluten and trap gas.
- Boost Leavener: Add more yeast, or ½ tsp. commercial yeast to sourdough.
- Still dense? → Knead, Rest, Repeat
- Freshly milled flour needs longer kneading to build gluten.
- But beware: Over-kneading breaks gluten strands → dense bread again.
- Still dense? → Bulk Ferment
- Fresh flour ferments faster (nutrient rich = hyper yeast).
- Fix: Shorten bulk ferment to save energy for proofing.
- Still dense? → Let It Rise … But Not Forever
- Under-proofed: Tight dough, springs back fast → needs more time.
- Over-proofed: Collapses like soufflé. Bake sooner with fresh flour.
- Still dense? → Shaping & Loaf Info
- Shaping: Be gentle, preserve gas. Rest 30 min, final shape builds tension.
- Loaf Size: Bigger batch = higher dome (fresh flour = less oven spring).
- Scoring: Not needed—fresh flour rises slower. Scoring just lets gas escape.
- Still dense? → The Final Touch
- Let it cool! Cutting hot bread = gummy texture. Wait (yes, it’s torture).
- Still dense? → Be Realistic
- Bran interference: Bran flakes snip gluten strands → less rise.
- Gas escapes: Bran creates “roadblocks” for bubbles.
- Aged flour advantage: Store flour is oxidized (stronger gluten). Fresh flour is tender but wholesome.
- Bottom line: Less height, more flavor + nutrition. Worth it!
- Yes → Check Grind Size
- No → Congrats! You’ve mastered dense bread troubleshooting.
#2 - Texture Complaints
- Does your bread/baked good feel dense or gritty?
- Yes → Check Hydration Time
- Try an Autolyse: Mix flour + water only, rest 30–60 min before adding yeast, sourdough, fats, etc.
- For Non-Yeast Baked Goods: Rest batter 30 min before baking (muffins, pancakes, quick breads) → avoids sandy texture.
- For Yeast Breads: Use “knead–rest–knead” rule: 8 min knead → 30 min rest → 8 min knead. Dough hydrates fully and balances water ratio.
- Still gritty? → Check Your Grind Size
- Impact/Steel Burr Mills (e.g., Nutrimill Classic): Set almost to finest for silky flour—even for bread flour.
- Stone Mills (e.g., Komo, Nutrimill Harvest): Grind until stones just squeak. Technically you should back off, but I usually don’t. Split big batches to let stones cool.
- Re-Milling (Stone Mills only): Run flour through a second time for extra fine texture. (Never re-mill with impact/steel burr mills.)
- Side Note: Impact/steel burr mills usually grind a bit finer than stone mills.
- Still off? → Check for Glazed Stones
- Symptom: Flour feels coarser than normal; stones not gripping wheat berries well.
- Fix: Run a few cups of rice or field corn through mill to scrub stones clean.
- Yes → Check Hydration Time
- No → Congrats! You’ve got the texture dialed in.
#3 - Bread Sinks
- Does your loaf collapse in the oven?
- Yes → First check Dense Bread fixes
- Dense bread issues (not enough gas, weak gluten, grind size, leavening, etc.) can also cause collapsing.
- If still sinking → Try these fixes
- Increase the Size of Your Loaf: Fresh milled bread has less oven spring, so adding extra dough helps fill the pan and look fuller.
- Buddy Bake: Bake pans touching each other so loaves support one another as they rise → results in taller loaves.
- Check Your Baking Technique: Use a baking stone to distribute heat evenly, improving rise and structure.
- Yes → First check Dense Bread fixes
- No → You’re in the safe zone
#4 - Crumbly Bread Chronicles
- Is your bread falling apart?
- Yes → Check Dough Hydration
- Too Dry Dough: Freshly milled flour needs enough water to hydrate. If it looks like a neat ball too soon, it may be under-hydrated → leads to crumbly toast.
- 8-30-8 Hydration Hack: Knead 8 min (leave dough wet) → rest 30 min → knead 8 min. Dough should hydrate during rest. Adjust numbers for your mixer: 5-30-5, 6-30-6, 9-30-9.
- Autolyse Method: Mix 85% of flour + water, rest 30 min–2 hrs before adding yeast or other ingredients. Softens bran and jump-starts gluten → avoids crumbly bread.
- Check Kneading
- Under-Kneaded: Most common issue. Freshly milled flour needs more time to build gluten. Think “child asking for one more story”—keep kneading longer than store-bought flour.
- Mixer Differences: KitchenAid, Ankarsrum, Bosch, NutriMill all vary. Ankarsrum kneads gently but strongly; KitchenAid requires breaks. Find your sweet spot.
- Over-Kneaded: Rare. Dough becomes soupy and shapeless → bread crumbles. Tip: Repurpose into crackers or naan.
- Check Your Grain
- Yeast Breads: Use hard white or hard red wheat berries. Limit ancient grains to 15%.
- Non-Yeast Bakes: Use soft wheat berries for tender muffins, pancakes, biscuits. Ancient grains okay, behave like soft wheat.
- Note: Wheat berries vary by farm/year → texture may change slightly each batch. Embrace the surprise!
- Other Crumby Factors
- Overbaking: Aim for 190°F in center → avoid dry bread.
- Storage: Airtight containers keep bread from drying.
- Knife Choice: Use proper bread knife or electric knife → clean slices, less shredding.
- Cooling Time: Wait until fully cool before slicing.
- Your Mill: Hand-crank or KitchenAid attachment mills are coarser → can cause crumbly bread.
- No → Congrats! Your bread isn’t crumbly.
- Yes → Check Dough Hydration
Additional Quick Tips for Troubleshooting Freshly Milled Flour
- Stick to one recipe: Consistency is key. Use the same recipe and wheat until you master it, then branch out.
- Try a 50/50 mix: Start with half store-bought, half fresh-milled flour. Gradually increase fresh flour as you gain confidence.
- Keep a baking journal: Track your tweaks, timings, and results—you’ll never remember everything otherwise. Download a free journal here!
portions of this content may have been generated or refined using AI
Resources:
- https://nutrimill.com/blogs/life-in-healthy-balance/exploring-the-benefits-of-hard-vs-soft-wheat#:~:text=For%20example%2C%20hard%20wheat%20has,texture%2C%20like%20cakes%20and%20pastries.
- https://wholemadehomestead.com/how-to-choose-wheat-berries-wheat-varieties/#:~:text=Spring%20wheat%20is%20a%20faster,Hard%20White%20Wheat
- https://www.kingarthurbaking.com/blog/2024/01/31/hard-vs-soft-wheat#:~:text=The%20difference%20between%20hard%20and,flour:%20Why%20it%20matters.)
- https://www.busbysbakery.com/baking-with-fresh-milled-flour/


6 responses to “Troubleshooting Freshly Milled Flour: How To Fix It – Easy Solutions”
I feel seen! I’ve had too many brick loaf blunders and salted my sourdough with tears.. hopefully this will put me on track! Thanks you so much!!
You’re definitely not alone. Freshly milled flour has a learning curve, but once you crack the code it’s so worth it. You’ve got this, and I’m cheering for your next loaf to be your best one yet!
Great video! Now I get it! Thanks for the troubleshooting tips! Onward!
Yay! Mission accomplished … onward indeed … next stop: Breadlandia!
Ok, I have been needing this information. I am about to start my journey to figure out my dense bread situation. Thanks for the help.
Best of luck! You got this! I find it super helpful to scribble down my tweaks … here’s a free baking journal that might help.