
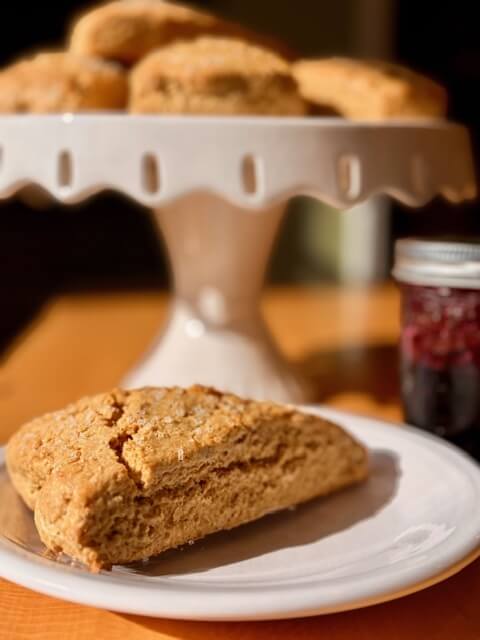



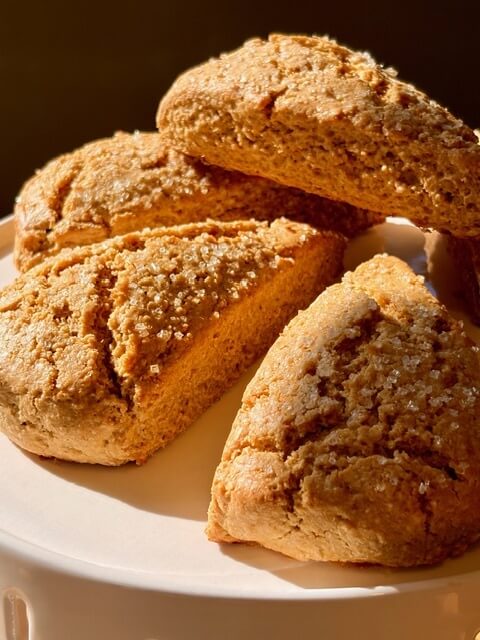
Yes, fresh milled flour scones are amazing! We’re talking crispy golden edges, tall, fluffy centers, and plenty of buttery goodness. The kind of scones that are tender on the inside, just a little crisp on the outside, and definitely worth turning on the oven for.
This is a fabulous base recipe … and I actually recommend trying it without any fruit or extra flavors the first time. That way, you can enjoy the buttery flavor and the delicious taste of freshly milled wheat all on their own. However, if you’re someone who likes to jazz things up a bit, this recipe is also a wonderful blank canvas. Blueberries, cranberries, chocolate chips, apples, cheese, nuts … you name it! You can take these scones in just about any direction your heart desires.
Now, a little scone history. Sure, scones might have originated in Scotland, but England certainly helped make them famous too. Along the way, there have been plenty of variations and opinions. Some were cooked on a griddle, others baked in an oven, some were fermented, and others were dense or sweet. Then there’s the whole jam-first-or-clotted-cream-first debate. Apparently, even a scone can cause a little international drama! Speaking of clotted cream, I have a FREE homemade clotted cream recipe you can whip up to serve alongside your scones.
As for me? I’m not a scone historian, and I certainly don’t claim to be an expert on everything scones. I just know I like to eat a really good one. So, let’s make some! (FYI – I have a separate recipe card for scones made with store-bought flour too!)
Fresh Milled Flour Scones: Let’s Talk Wheat Berries
First things first, let’s talk about the flour. For this fresh milled flour scones recipe, you’ll want to use soft white wheat berries. The lower protein content makes soft white wheat a wonderful choice for tender baked goods. Since we’re not trying to develop a strong gluten structure as we would for bread … soft white helps keep these scones lighter and fluffier.
If you’re new to milling your own wheat berries, you really don’t need to start with a pantry full of different varieties. Instead, I’d suggest beginning with just two: hard white wheat berries for your yeast and sourdough baking, and soft white wheat berries for recipes leavened with baking powder or baking soda. That little combination will get you through a whole lot of baking adventures! Check out my article about the different types of wheat berries if you’d like to learn more.
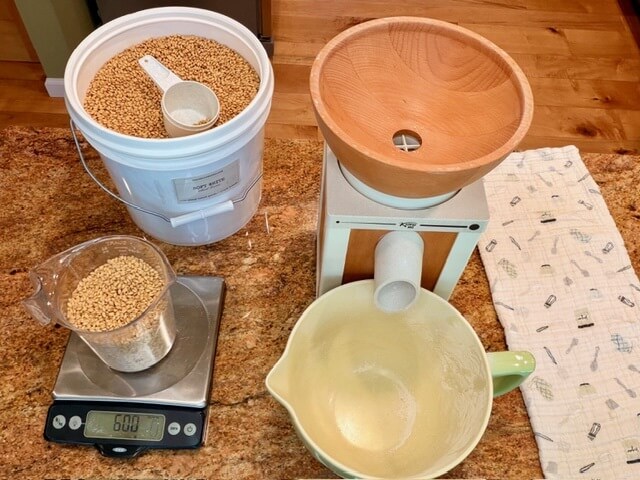
I prefer weighing my wheat berries because it’s easier and more accurate. However, younger Winnie didn’t even own a kitchen scale … and guess what? Her baked goods still turned out delicious! So, whether you’re team scale or team measuring cup, do whatever works for you.
For this recipe, measure out 600 grams of soft white wheat berries, which is approximately 3 cups. Then, grind them into a fine flour. You’ll end up with approximately 5¾ cups of fluffy, freshly milled flour.
I’m curious, though. Are you a weigh-as-you-go baker, or do you have a big milling day and keep a stash of fluffy flour ready to go? Leave me a comment because I’d love to know how you do it!
Food Processor or Elbow Grease? You Choose
There isn’t just one proper way to mix scones. Instead, you have two great options: a good old-fashioned mixing bowl or a food processor. Both will get the job done, although each has its own little quirks.
Option 1: The Good Old Mixing Bowl
You can absolutely grab a big bowl, dump in your ingredients, and get mixing. Sometimes the simplest tools are the best ones! Plus, you don’t have to wash a food processor afterward, which is always a little victory in my book.
When it’s time to cut the butter into the flour, you have three choices:
Pastry Cutter: Pastry cutters are inexpensive, keep your warm hands away from the cold butter, and do a nice job breaking it into little pieces.
Two Forks: Um … they’re free! They also help keep the butter cold. However, the butter does have a tendency to get stuck between the tines, so you’ll occasionally find yourself scraping them off. It’s not fancy, but it works.
Your Fingers: I’m leaving this method to Grandma. She somehow knows exactly how to work butter into flour without warming it up too much. If you have that magical Grandma touch, go for it! Just remember that you don’t want the butter melting into the flour.
All three methods work well, although they’ll take a little longer than using a food processor. Additionally, the butter might not be distributed quite as evenly. That’s perfectly fine, though.
Option 2: The Food Processor (My Favorite)
To me, this is the easiest way to make fresh milled flour scones. A food processor cuts the butter into the flour in seconds, and because you’re not handling the dough as much, it helps keep the butter cold.
BUT … there’s a catch. It’s incredibly easy to overmix everything. Besides warming or melting the butter, overmixing is one of the biggest mistakes you can make when preparing scones. If you overwork the dough, you’ll develop too much gluten, which can leave you with dense, tough scones instead of those tall, fluffy beauties we’re after. Therefore, if you use a food processor, be careful with those pulse buttons. A few quick pulses are all you need.
And maybe don’t drink three cups of coffee right before making them. We want flaky scones, not a food processor operator who gets a little too enthusiastic with the pulse button!
Dry Ingredients
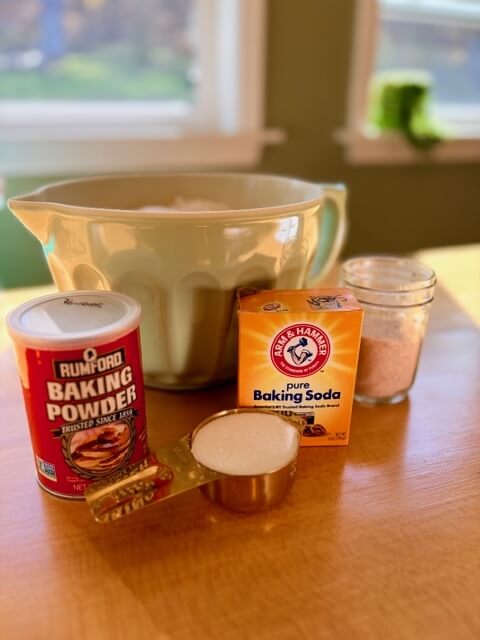
Now that you’ve chosen your mixing method, it’s time to add the dry ingredients. To your freshly milled flour … add the baking powder, baking soda, sugar, and salt.
Give everything a quick mix so the ingredients are evenly distributed. Otherwise, you might end up with a surprise pocket of baking powder in one bite. And trust me, that’s not the kind of surprise anyone wants!
Let’s talk about why each ingredient matters.
Baking Powder
Baking powder is what helps give these scones their height and fluffy texture. Unlike yeast or sourdough bread, we’re not waiting around for fermentation to do the heavy lifting. Instead, baking powder creates the lift we need while the scones bake.
Baking Soda
Baking soda also helps with leavening. However, it has another job: helping the outside of the scones develop a beautiful golden-brown color. Personally, I love a scone with a little crunch on top. Therefore, baking soda helps give us that lovely contrast between the lightly crisp exterior and the soft, tender inside.
Sugar
I like my scones a little less sweet. After all, we’re going to have the option of adding jam, clotted cream, or a glaze later. However, if you prefer a sweeter scone, you can increase the sugar from ⅓ cup to ½ cup.
Salt
I use Redmond Real Salt, which is why I use 1 teaspoon in this recipe. However, if you’re using regular table salt, such as Morton’s in the blue container, reduce the amount to ½ teaspoon. Table salt is more concentrated, so a little goes a long way. Either way, don’t skip it! Salt helps balance the sweetness and brings all those buttery flavors together.
Cold Butter, Happy Scones
Now comes one of the most important parts of making freshly milled flour scones: the butter!
Cold butter is a scone’s best friend. In fact, I’d say they’re practically inseparable. Keep the butter in the refrigerator until you’re ready to use it because we want those little pieces to stay nice and cold.
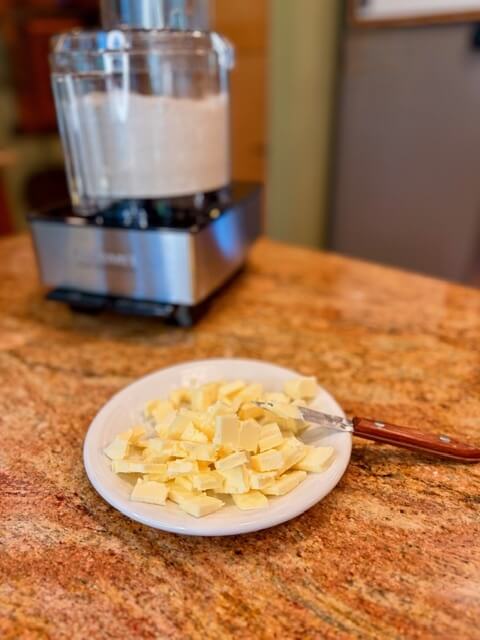
Cut your butter into small pieces. Try not to handle it too much with your fingers because the warmth from your hands can start softening it before it even makes it into the bowl.
I usually use my food processor to incorporate the butter because it’s quick and easy. I’ll add a few chunks of butter to the flour mixture and give it a quick pulse. Then, I’ll add a few more and pulse again until all the butter is incorporated.
Of course, you can also use the pastry cutter or two forks we talked about earlier. Whichever method you choose, just remember: cold butter is your friend, and melted butter is not invited!
But why all the fuss about cold butter? Well, it has three very important jobs.
It helps prevent tough scones. When butter melts into the flour too early, it acts more like a liquid and can encourage gluten development. Consequently, you can end up with a tougher texture instead of a tender one.
It creates flaky layers. Those little solid pieces of butter create pockets of steam as the scones bake. As the water in the butter evaporates, it creates steam that helps push the dough apart, giving us those lovely flaky layers.
It helps the scones rise instead of spread. If the butter melts before the scones get into the oven, the dough can become greasy and spread across the baking sheet. Instead of tall, beautiful scones, you might end up with flatter little scone puddles.
Mix-Ins: Pick Your Scone Personality
Now, if you’re planning to add some extra flavor to your dough, this is the time to do it!
Personally, I think these scones are absolutely delicious plain. However, they’re also a wonderful base for just about any flavor combination you can dream up. Whether you prefer sweet, fruity, nutty, or savory, there’s plenty of room to play.
Here are some ideas to get those creative baking wheels turning:
Fresh Blueberries (1 cup): Fresh blueberries are my preference … frozen blueberries don’t have quite the same texture. If you want to try frozen, thaw them first and drain away any excess liquid. This should help reduce the color bleeding and extra moisture that can make your scones soggy.
Dried Apricots (1 cup): Chop them into smaller pieces so you get a little sweetness in every bite.
Fresh Cranberries (1 cup) + Orange Zest (1 tablespoon): Roughly chop the cranberries and toss them in a little flour to help absorb some of their extra juice. The orange zest adds a lovely bright flavor, too.
Dried Cherries (¾ cup) + Bittersweet Chocolate (¼ cup): A little sweet, a little tart, and a little chocolate. What’s not to love?
Apples (1 cup, peeled and finely diced) + Cinnamon (1 teaspoon): This combination tastes like a little bite of fall.
Toasted Pecans: Add a maple syrup glaze on top for a delicious finishing touch (¾ cup of powdered sugar mixed with a few teaspoons of maple syrup).
Cheddar (1 cup shredded) + Chives (3 tablespoons): A savory option that’s wonderful for breakfast or alongside a bowl of soup.
Bacon (½ cup crumbled) + Smoked Gouda (½ cup shredded): Because sometimes breakfast needs a little bacon intervention.
Rosemary (1 tablespoon) + Gruyère (1 cup shredded): A delicious savory combination that feels a little fancy without requiring a fancy occasion.
Or Your Favorite Flavors: Really, the possibilities are endless!
Note:
One important thing to remember: once you add your mix-ins, you won’t want to use the food processor anymore. Instead, transfer everything to a large mixing bowl and gently stir in your additions by hand.
Alternatively, if you already know you’re going to add blueberries, cheese, or any other goodies … you can start with a big mixing bowl from the beginning. Personally, I prefer fewer dirty dishes, so I often skip the food processor when I know I’m making a flavored batch. That’s one less thing waiting for me in the sink!
Wet Ingredients: Bring Everything Together
Before we add the wet ingredients, I like to pop my flour mixture into the refrigerator while I prepare the next step. I know it probably won’t take very long, but I’m trying to keep that butter as cold as possible. Think of it as giving the butter a little air-conditioning!
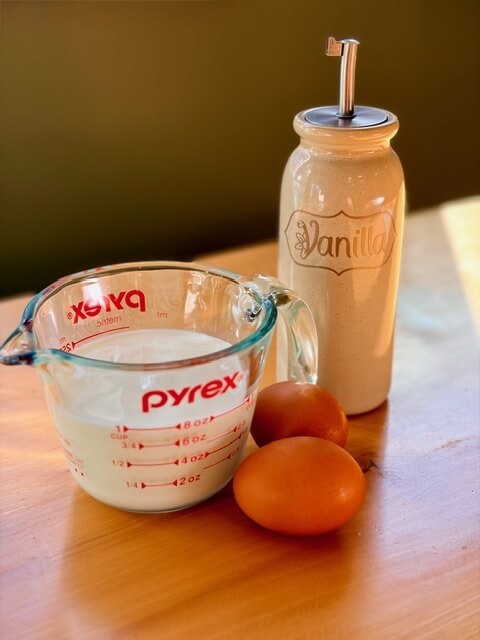
Now, grab a small bowl or measuring cup. Add 1 cup of milk (I use whole milk), 2 eggs, and 2 teaspoons of vanilla. Give everything a good whisk until combined. I make my own vanilla extract, and you can check out my recipe if you’d like to try it!
Next, pour the wet ingredients into the flour mixture. Stir just until a shaggy dough forms and the flour disappears. Don’t worry if the dough looks a little lumpy. That’s completely normal! And here’s where I need you to exercise a little self-control. Stop mixing as soon as everything comes together. You don’t need to make the dough perfectly smooth. In fact, you really don’t want to!
The Secret to Tender Scones? Knowing When to Stop
Overmixing can cause two big problems:
Too Much Gluten: The more you work the dough, the more gluten you develop. As a result, your scones can become rubbery, dense, and tough instead of light and tender.
Melted Butter: The more you handle and mix the dough, the more likely you are to warm up that butter. Once it melts into the flour, you lose those lovely little butter pockets that help create flaky layers and a beautiful rise.
So, resist the temptation to keep stirring. Your dough doesn’t need a spa treatment or a perfectly smooth makeover. A little shaggy is exactly what we’re looking for!
A 30-Minute Break Makes All the Difference
Now it’s time to give your dough a rest. Pop the bowl into the refrigerator for 30 minutes. You can cover it if you’d like, although it isn’t necessary for such a short rest.
Here’s why this step matters: freshly milled flour needs time to hydrate. Unlike flour that has been sitting on a grocery store shelf, fresh flour benefits from a little extra time to absorb the liquid in your recipe. Think of it like giving a thirsty plant a drink. You can’t just sprinkle a little water on the leaves and expect the roots to be happy. The flour needs time to soak up that milk!
After 30 minutes, take a look at your dough. If it’s too sticky, add a little more flour, just a tablespoon at a time. On the other hand, if it seems too dry, add a splash of milk.
The goal is a dough that’s soft and manageable without being overly sticky. Therefore, make small adjustments rather than dumping in a bunch of flour or milk all at once.
Let's Fold in a Little Flakiness
First, lightly flour your countertop and gently bring the dough together into a ball. Don’t knead it like bread dough. We’re not trying to build a strong gluten structure here.
We are going to borrow a little trick from another one of my favorite recipes: biscuits! I asked my biscuits if they minded sharing their secret, and apparently, they were happy to help. So, we’re going to do a little mini lamination session.
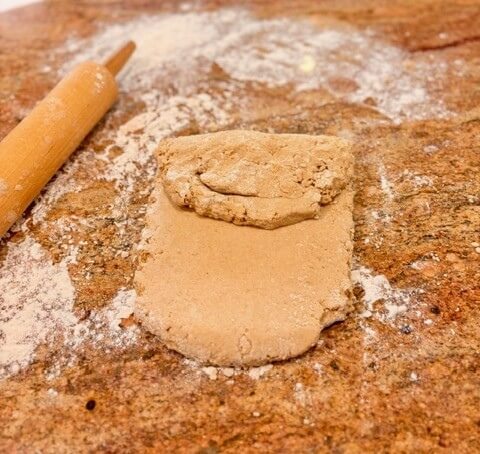
Lamination sounds like something you’d do at an office supply store … but in baking, it simply means folding the dough to create layers. Those layers help give us the flaky texture and tall rise we’re after.
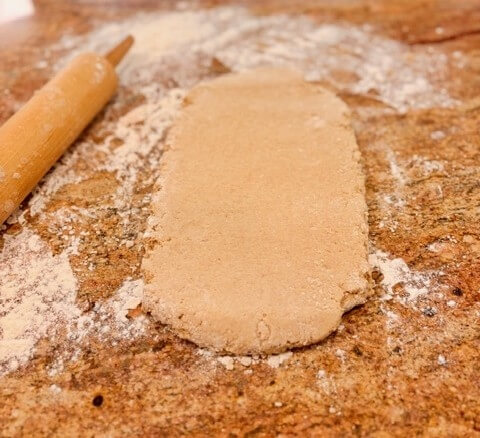
Start by rolling the dough down until it’s about 1 inch thick (I use a rolling pin because it’s cooler than my hands). Then, fold it into thirds, just like folding a business letter before sliding it into an envelope. Next, roll the dough back down to 1 inch thick and fold it into thirds again. Repeat this process until you’ve folded the dough a total of three times.
So, why are we doing all this folding? Here’s the fun part! When the scones hit the hot oven, the water inside those little pieces of butter stacked on top of themselves … evaporates and creates steam. That steam expands and pushes the layers of dough apart before everything sets. As a result, you get a taller scone with flaky layers instead of one dense, solid chunk of dough.
It’s a little extra effort, but those beautiful layers are worth it!
Shape & Slice
After your final fold, use your rolling pin to roll the dough back out to about 1 inch thick. Now you get to choose your own adventure!
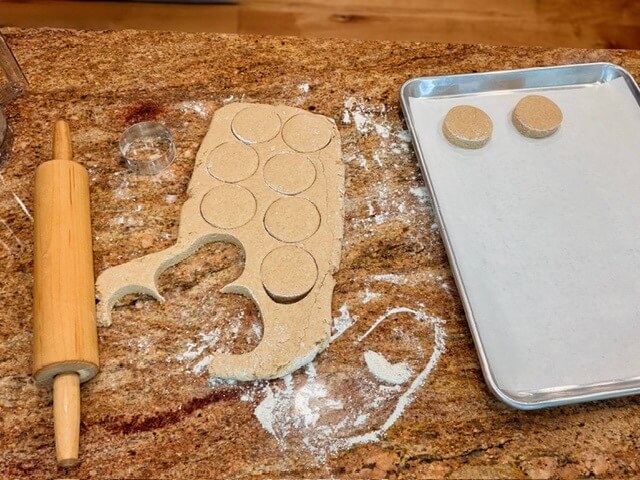
Do you want cute little round scones? Grab a floured 2–3-inch biscuit cutter. Or, if you’re more of a wedge person, shape the dough into a 9-inch circle and cut it into triangles … sort of like slicing a pizza.
Either way, there’s one very important rule: cut straight down and pull straight back up. Don’t twist the cutter or drag it through the dough.
Here’s why that matters. When you twist or drag the cutter, you can press the edges of the dough together and seal them. Those sealed edges can make it harder for the scones to expand upward as they bake. Instead, we want clean, open edges that allow the dough to rise freely. Think of it like opening a little doorway for your scones to puff up. We don’t want to accidentally lock the door!
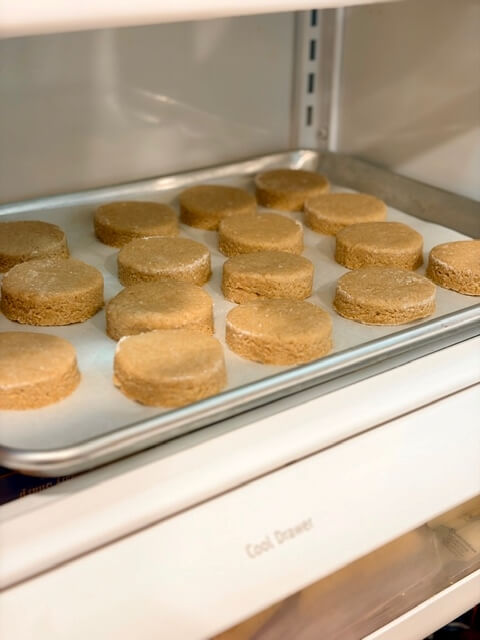
Once you’ve cut your scones, place them on a baking sheet lined with parchment paper.
Scones on Standby: Make Them Ahead
One of my favorite things about this recipe is that you can make the scones ahead of time. That means you can do the work now and enjoy freshly baked scones later. It’s a little like having your own personal bakery hiding in the freezer!
If you’d like to prepare them in advance, this is the perfect time to freeze them. Place the cut, unbaked scones individually on a baking sheet and pop them into the freezer. Once they’re completely frozen, transfer them to a freezer bag or airtight container. That way, they won’t stick together in one giant scone-shaped family reunion.
When you’re ready to bake, simply take out the number of scones you want and place them on a parchment-lined baking sheet. There’s no need to thaw them first! Just add a few extra minutes to the baking time and bake until they’re golden and cooked through.
Now you can have freshly baked scones without having to start from scratch every time.
Cold & Hot
If you’re planning to bake your scones today, pop the baking sheet back into the refrigerator for another 20 minutes.
Yes, we’re chilling that butter again! I know, I know. That butter is spending so much time in the refrigerator. However, this last chill is important because we want the butter nice and cold when the scones hit the hot oven.
Meanwhile, preheat your oven to 400°F. By the time your oven is ready, your scones should be chilled and ready for their big moment.
Brush & Sprinkle
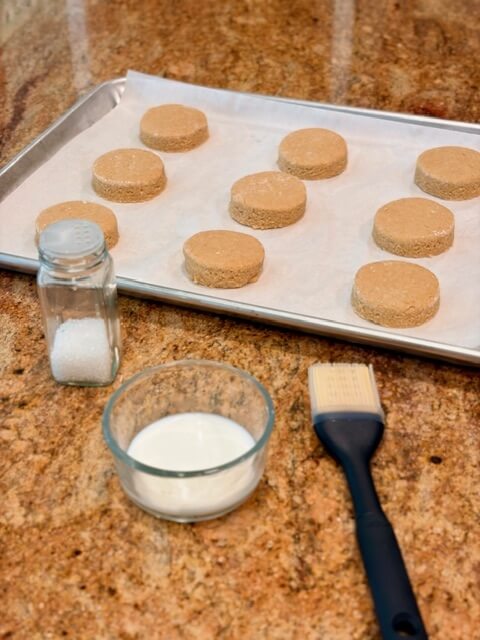
Right before putting your scones into the oven, brush the tops with milk or cream. Then, sprinkle them with coarse sugar.
I especially love this step because these scones aren’t overly sweet. Therefore, that little bit of crunchy sugar on top adds a lovely contrast to the buttery, tender center.
Don’t have coarse sugar? No problem! You can use turbinado sugar, demerara sugar, Swedish pearl sugar, sanding sugar, or even regular white granulated sugar. Basically, use what you have.
Into the Oven They Go!
Now for the exciting part! Bake your scones at 400°F for approximately 18–22 minutes.
I give that baking time with a little hesitation because scone size and thickness can make a difference. If you make your scones thicker or larger, they’ll need a little more time. On the other hand, if you roll the dough thinner or cut smaller scones, they may finish a little sooner.
So, rather than relying only on the clock, look for a few clues. The tops should be golden, and the edges should have a little deeper brown color. If you want to check the internal temperature, aim for approximately 200°F.
Once they’re finished, transfer them to a wire rack to cool slightly. Then, go ahead and dig in!
And if you happen to eat one while it’s still warm, I certainly won’t tell anyone. In fact, I’ll probably be right there doing the same thing.
The Best Part: Time to Eat!
Now that you’ve made a beautiful batch of scones, it’s time for the fun part: deciding how to eat them!
One of my favorite ways is to cut a scone in half, spread butter on each side, add a little jam, and finish with clotted cream. It’s a delicious combination, especially alongside a warm cuppa.
Speaking of clotted cream, it’s a little hard to find near me. Fortunately, I have a crazy-easy recipe that I’m happy to share with you! You don’t have to search every grocery store in town just to enjoy this little treat.
Of course, you can eat your scones any way your heart desires. Add honey, lemon glaze, or absolutely nothing at all. I’m not here to judge your scone decisions!
Make Them Last a Little Longer
If you happen to have leftovers (which is always a big if at my house), store your scones in an airtight container on the counter for up to 3 days.
When you’re ready for another one, pop it into the microwave for about 20 seconds to warm it up. That little bit of warmth brings back some of that fresh-from-the-oven goodness.
And remember, you can always freeze the unbaked scones ahead of time, too. That way, you can bake just what you need whenever a scone craving strikes!
FAQ for Those Uh-Oh Moments!
What type of wheat berries should I use for fresh milled flour scones?
Soft white wheat berries are my recommendation. They have a lower protein content than hard wheat varieties, which helps keep gluten development lower and creates a more tender, fluffy scone.
Why does the butter need to be so cold for fresh milled flour scones?
Cold butter creates little pockets of steam as it bakes. Those pockets help separate the dough into flaky layers and encourage the scones to rise. If the butter melts too early, your scones may spread into scone puddles … instead of puffing up.
Can I use frozen blueberries in fresh milled flour scones?
You can try! However, frozen blueberries tend to have a softer texture and release more liquid than fresh ones. I’d recommend thawing and draining them first to help reduce color bleeding and extra moisture.
Why does the fresh milled flour scones dough need to rest for 30 minutes?
Freshly milled flour needs time to absorb the liquid in the recipe. Therefore, the 30-minute refrigerator rest helps the flour hydrate and the butter stay cold.
What if my fresh milled flour scones dough is too sticky or too dry?
Don’t panic! If the dough is too sticky, add a little flour, one tablespoon at a time. On the other hand, if it’s too dry, add a small splash of milk. Make adjustments gradually until the dough is soft and manageable.
Why do you fold the fresh milled flour scones dough three times?
The folding process creates layers in the dough. As the butter heats up in the oven, the moisture turns to steam and pushes those layers apart. Consequently, you get a taller, flakier scone.
Why did my fresh milled flour scones not rise or turn out flat?
There are several little tricks that help prevent flat scones. First, keep your butter cold and avoid overworking the dough. Also, make sure you cut the scones about 1 inch thick. Finally, press your cutter straight down and lift it straight back up without twisting. Those little details can make a big difference!
Why are my fresh milled flour scones dense?
The most common culprits are overmixing, warm butter, and working the dough too much. When you overwork the dough, you develop more gluten, which can make the scones tough and dense. Additionally, melted butter can prevent those flaky layers from forming. Mix gently, fold carefully, and keep everything cold.
How can I keep the butter cold while making fresh milled flour scones?
Start by keeping the butter in the refrigerator until you’re ready to use it. Then, work quickly when cutting it into the flour. I also like to refrigerate the flour mixture while preparing the wet ingredients. Finally, don’t skip the refrigerator rests before baking!
Why shouldn’t I twist the biscuit cutter?
Twisting can press the edges of the dough together and seal them. As a result, the scones may have a harder time expanding upward. Instead, cut straight down and lift straight back up to leave clean edges.
Can I make these fresh milled flour scones ahead of time?
Yes! Cut the unbaked scones and freeze them individually on a baking sheet. Once frozen solid, transfer them to a freezer bag or airtight container. When you’re ready to bake, place them directly on a parchment-lined baking sheet and add a few extra minutes to the baking time. No thawing needed!
That's a Wrap... Now Pass the Jam!
And there you have it! Delicious, buttery, light scones made with freshly milled flour. They’re wonderful for breakfast, brunch, afternoon tea … or just because you felt like baking something delicious on a Tuesday. Honestly, you don’t need a special occasion to make scones. Sometimes making something yummy is the occasion!
I love that this recipe gives you a delicious basic scone that you can enjoy plain or transform into just about any flavor combination you can dream up. Whether you’re adding blueberries, cranberries, chocolate, cheese, or something completely unexpected, you’ve got a great starting point.
Just remember the two biggest rules: keep that butter COLD and don’t overmix the dough. Follow those little tricks, give your fresh milled flour time to hydrate, and you’ll be well on your way to tall, tender, flaky scones.
Before You Dash Off…
Now that you’ve got a batch of scones under your belt, why stop here? There are plenty more fresh-milled flour adventures waiting for you! Come explore my other recipes, guides, and tutorials, and let’s keep making homemade baking a little easier and a whole lot more fun.
If you make these scones, I’d love to hear what flavors you tried! Leave a comment, tag me on Instagram (@hopethiswerksdiy), come hang out with me on Facebook, or wander over to YouTube. I love seeing what you’re baking in your kitchen!
Want to make sure you never miss a recipe? Subscribe here! I’ll even send you a printable recipe card for the best pancakes on earth as a little thank-you gift.
Until next time, may your butter stay cold, your scones rise tall, and your kitchen always smell like something delicious is happening!
Scones with Freshly Milled Flour
These fresh milled flour scones are buttery, tender on the inside, and golden with slightly crispy edges. They're easy to customize with your favorite mix-ins!
Ingredients
- 600g (3 cups) soft white wheat berries, finely ground (about 5¾ cups fluffy flour)
- 2 tablespoons baking powder
- 1 teaspoon baking soda
- ⅓ cup (70g) sugar
- 1 tsp sea salt (or 1/2 tsp table salt)
- ½ cup (8 tbsp) butter, diced but very cold
- 1 cup cold milk
- 2 eggs
- 2 tsp vanilla or almond extract
Optional
- Mix-Ins: 1 cup of berries, fruit, chocolate chips, nuts, cheese ... or whatever makes you happy!
- Brushing & Topping: Cream (or milk) for brushing the tops & 3 tbsp coarse sugar/turbinado for sprinkling
- Glaze: 3/4 cup powdered sugar & a few teaspoons milk or lemon juice
Instructions
- Mill & Mix: Finely grind wheat berries. In a large bowl (or food processor), mix ... flour, baking powder, baking soda, sugar, and salt.
600 g soft white wheat berries, 2 tbsp baking powder, 1 tsp baking soda, ⅓ cup sugar, ½ tsp salt - Butter Makes it Better: Cut in COLD butter just until incorporated. Use a pastry cutter, fork, or a few quick food processor pulses.
½ cup butter - Mix-Ins: Stir in your favorite mix-ins, if using. If using mix-ins ... it's hands-on mixing ... no more food processor!
- Bring It Together: Whisk eggs, milk, and vanilla in a small bowl. Add to flour mixture and stir just until a shaggy dough forms.
- Hydrate: Let the dough rest for 30 minutes. Too dry? Add a splash of milk. Too sticky? Add a little flour.
- Build Flakiness: On a floured surface, gently form dough into a ball. Roll to 1-inch thick, fold into thirds, and repeat 2 more times.
- Shape & Slice: Roll dough to 1-inch thick (a 9" circle). Cut into wedges or use a floured 2½-inch biscuit cutter. Cut straight down ... no twisting! Place on a parchment-lined baking sheet, 2 inches apart.
- Cold & Hot: Refrigerate for 20 minutes to keep that butter cold ... we want all the steam and puff in the oven. Preheat oven to 400°F while the scones chill.
- Brush & Sprinkle: Brush tops with cream (or milk) and sprinkle with coarse (or turbinado) sugar.
- Bake: Bake for 18–22 minutes, depending on size, until golden and about 200°F inside. Let cool slightly on a wire rack ... then dig in!
Notes
- Don't Overmix: Treat that dough gently! Overworking makes tough scones.
- Keep It COLD: Cold butter = happy scones. Pop the dough back in the fridge whenever it starts warming up.
- Want some ideas for mix-ins? Scroll up for some tasty mix-in ideas!
- Serve It Right: Scone → Butter → Jam → Clotted Cream. Click here for my super-easy clotted cream recipe!
- Store: Keep in an airtight container on the counter for up to 3 days. Microwave for 20 seconds to warm them up again.
- Freeze for Later: Freeze unbaked scones on a baking sheet until solid, then transfer to a freezer-safe container. Bake straight from frozen ... no thawing needed! Add a few extra minutes to the baking time. They'll keep for up to 4 months.
Scones with Store-Bought Flour
These scones are buttery, tender on the inside, and golden with slightly crispy edges. They're easy to customize with your favorite mix-ins!
Ingredients
- 4 cups all-purpose flour
- 2 tablespoons baking powder
- 1 teaspoon baking soda
- ⅓ cup (70g) sugar
- 1 tsp sea salt (or 1/2 tsp table salt)
- ½ cup (8 tbsp) butter, diced but very cold
- 1 cup cold milk
- 2 eggs
- 2 tsp vanilla or almond extract
Optional
- Mix-Ins: 1 cup of berries, fruit, chocolate chips, nuts, cheese ... or whatever makes you happy!
- Brushing & Topping: Cream (or milk) for brushing the tops & 3 tbsp coarse sugar/turbinado for sprinkling
- Glaze: 3/4 cup powdered sugar & a few teaspoons milk or lemon juice
Instructions
- Mix: In a large bowl (or food processor), mix ... flour, baking powder, baking soda, sugar, and salt.
4 cups all-purpose flour, 2 tbsp baking powder, 1 tsp baking soda, ⅓ cup sugar, ½ tsp salt - Butter Makes it Better: Cut in COLD butter just until incorporated. Use a pastry cutter, fork, or a few quick food processor pulses.
½ cup butter - Mix-Ins: Stir in your favorite mix-ins, if using. If using mix-ins ... it's hands-on mixing ... no more food processor!
- Bring It Together: Whisk eggs, milk, and vanilla in a small bowl. Add to flour mixture and stir just until a shaggy dough forms. Too dry? Add a splash of milk. Too sticky? Add a little flour.
- Build Flakiness: On a floured surface, gently form dough into a ball. Roll to 1-inch thick, fold into thirds, and repeat 2 more times.
- Shape & Slice: Roll dough to 1-inch thick (a 9" circle). Cut into wedges or use a floured 2½-inch biscuit cutter. Cut straight down ... no twisting! Place on a parchment-lined baking sheet, 2 inches apart.
- Cold & Hot: Refrigerate for 20 minutes to keep that butter cold ... we want all the steam and puff in the oven. Preheat oven to 400°F while the scones chill.
- Brush & Sprinkle: Brush tops with cream (or milk) and sprinkle with coarse (or turbinado) sugar.
- Bake: Bake for 18–22 minutes, depending on size, until golden and about 200°F inside. Let cool slightly on a wire rack ... then dig in!
Notes
- Don't Overmix: Treat that dough gently! Overworking makes tough scones.
- Keep It COLD: Cold butter = happy scones. Pop the dough back in the fridge whenever it starts warming up.
- Want some ideas for mix-ins? Scroll up for some tasty mix-in ideas!
- Serve It Right: Scone → Butter → Jam → Clotted Cream. Click here for my super-easy clotted cream recipe!
- Store: Keep in an airtight container on the counter for up to 3 days. Microwave for 20 seconds to warm them up again.
- Freeze for Later: Freeze unbaked scones on a baking sheet until solid, then transfer to a freezer-safe container. Bake straight from frozen ... no thawing needed! Add a few extra minutes to the baking time. They'll keep for up to 4 months.

Charts & Summaries: Fresh Milled Flour Scones
Fresh Milled Flour Scones: Recipe at a Glance
| Fresh Milled Flour Scones – Quick Reference | ||
|---|---|---|
| Recipe Detail | Amount | Helpful Note |
| Wheat berries | 600 g | Soft white wheat |
| Flour preparation | Finely ground | Mill before mixing |
| Butter | ½ cup | Very cold and diced |
| Eggs | 2 | Whisk with wet ingredients |
| Milk | 1 cup | Cold |
| Hydration rest | 30 minutes | Allows fresh flour to absorb liquid |
| Shaped dough chill | 20 minutes | Keeps butter cold |
| Oven temperature | 400°F | Preheat while scones chill |
| Baking time | 18–22 minutes | Adjust for scone size |
| Internal temperature | About 200°F | Check the center |
Fresh Milled Flour vs. Store-Bought Flour Conversion
| Flour Conversion Guide | ||
|---|---|---|
| Fresh Milled Flour | Store-Bought Flour | Difference |
| 600 g | 480 g | 120 g less |
| 500 g | 400 g | 100 g less |
| 400 g | 320 g | 80 g less |
| 300 g | 240 g | 60 g less |
Best Wheat for Fresh Milled Flour Scones
| Choosing Wheat for Baking | ||
|---|---|---|
| Wheat Type | Protein | Best Uses |
| Soft white wheat | Lower | Scones, biscuits, muffins, quick breads, and other baking powder or baking soda recipes |
| Hard white wheat | Higher | Bread, rolls, bagels, and yeast recipes |
| Hard red wheat | Higher | Bread and sourdough recipes |
Fresh Milled Flour Scone Mix-In Ideas
| Sweet and Savory Scone Combinations | ||
|---|---|---|
| Flavor | Mix-Ins | Amount |
| Blueberry | Fresh blueberries | 1 cup |
| Apricot | Dried apricots | 1 cup |
| Cranberry Orange | Fresh cranberries + orange zest | 1 cup + 1 Tbsp zest |
| Cherry Chocolate | Dried cherries + bittersweet chocolate | ¾ cup + ¼ cup |
| Apple Cinnamon | Peeled diced apples + cinnamon | 1 cup + 1 tsp |
| Maple Pecan | Toasted pecans + maple glaze | To taste |
| Cheddar Chive | Shredded cheddar + chives | 1 cup + 3 Tbsp |
| Bacon Gouda | Crumbled bacon + shredded smoked gouda | ½ cup each |
| Rosemary Gruyere | Rosemary + shredded Gruyere | 1 Tbsp + 1 cup |
Fresh Milled Flour Scone Baking Timeline
| Scone Preparation Timeline | ||
|---|---|---|
| Stage | Time | Relative Duration |
| Hydration rest | 30 min | |
| Shaped scone chill | 20 min | |
| Baking time | 18–22 min | |
How to Make Fresh Milled Flour Scones
| Step-by-Step Scone Method | ||
|---|---|---|
| Step | What to Do | Important Tip |
| 1 | Mill the wheat berries and combine the dry ingredients. | Use finely ground soft white wheat. |
| 2 | Cut cold butter into the flour mixture. | Stop when the butter pieces are about pea-sized. |
| 3 | Fold in your chosen mix-ins. | Use your hands or a spoon. |
| 4 | Whisk eggs, milk, and vanilla; stir into dry ingredients. | Mix just until a shaggy dough forms. |
| 5 | Rest the dough for 30 minutes. | Give fresh flour time to hydrate. |
| 6 | Fold the dough into thirds three times. | This creates flaky layers. |
| 7 | Shape and cut the scones. | Cut straight down without twisting. |
| 8 | Refrigerate shaped scones for 20 minutes. | Keep the butter cold. |
| 9 | Brush with milk or cream and sprinkle with coarse sugar. | Turbinado sugar adds a nice crunch. |
| 10 | Bake at 400°F for 18–22 minutes. | Look for golden tops and an internal temperature around 200°F. |
Tips for Flaky, Tender Scones
| Scone Success Checklist | |
|---|---|
| Do This | Why It Matters |
| Keep butter very cold. | Cold butter creates steam pockets as it bakes, helping separate the layers. |
| Mix just until combined. | Too much mixing develops gluten and can make scones tough. |
| Rest fresh-milled dough. | Fresh flour needs time to absorb liquid. |
| Fold the dough into thirds. | Folding helps build flaky layers. |
| Shape dough about 1 inch thick. | Thicker dough helps create taller scones. |
| Cut straight down. | Twisting can seal the edges and interfere with rising. |
| Chill shaped scones. | A final chill helps keep the butter cold before baking. |
Fresh Milled Flour Scone Troubleshooting
| Common Scone Problems and Solutions | ||
|---|---|---|
| Problem | Possible Cause | What to Do |
| Flat scones | Overworked dough, warm butter, or dough cut too thin. | Keep butter cold, handle dough gently, and shape about 1 inch thick. |
| Dense scones | Overmixing or too much flour. | Mix only until the flour disappears and measure flour by weight. |
| Tough or rubbery texture | Too much mixing develops gluten. | Stop mixing once a shaggy dough forms. |
| Butter leaking or greasy scones | Butter became too warm before baking. | Chill the shaped scones before putting them in the oven. |
| Sticky dough | Fresh flour may need more time to hydrate. | Rest for 30 minutes, then add a little flour if needed. |
| Dry dough | The flour may have absorbed more liquid. | Add a small splash of milk after the hydration rest. |
How to Store and Freeze Scones
| Scone Storage Guide | ||
|---|---|---|
| Storage Method | How to Store | Storage Time |
| Room temperature | Keep baked scones in an airtight container. | Up to 3 days |
| Reheating | Microwave a scone for about 20 seconds. | As needed |
| Freezing unbaked scones | Freeze individually on a baking sheet, then transfer to a freezer bag or container. | Up to 4 months |
| Baking from frozen | Place frozen scones on a parchment-lined baking sheet and bake without thawing. | Add a few extra minutes as needed |
Frequently Asked Questions About Fresh Milled Flour Scones
| Fresh Milled Flour Scone FAQs | |
|---|---|
| Question | Answer |
| What wheat is best for scones? | Soft white wheat is a great choice because its lower protein content helps make tender scones. |
| Why are my scones flat? | Overworking the dough, warm butter, thin shaping, or twisting the cutter can contribute to flat scones. |
| Why are my scones dense? | Overmixing can develop too much gluten and create a dense or tough texture. |
| Why does fresh-milled dough need to rest? | The rest gives freshly milled flour time to absorb the liquid in the recipe. |
| How do I make scones flaky? | Use cold butter, handle the dough gently, and fold it into thirds to build layers. |
| Can I make scones ahead of time? | Yes. Cut the unbaked scones, freeze them individually, and bake from frozen when ready. |
| Can I use all-purpose flour? | Yes. For 600 g of fresh-milled flour, use approximately 480 g of all-purpose flour. |
| How thick should scone dough be? | Shape the dough to about 1 inch thick before cutting. |
| What temperature should scones bake at? | Bake at 400°F for approximately 18–22 minutes, depending on size. |
| How do I know when scones are done? | Look for golden tops and browned edges. The center should reach about 200°F. |
| How long do homemade scones last? | Store them in an airtight container at room temperature for up to 3 days. |
| Can I freeze baked scones? | The make-ahead method in this recipe is to freeze the cut, unbaked scones. |
If this recipe helped you make something delicious, you can help me keep testing recipes, buying wheat berries, and making a glorious mess in my kitchen by clicking this link. Consider it a little high-five for the baker. Thanks a latte!


2 responses to “Fresh Milled Flour SCONES: Tender, Buttery & Easy”
Trying these this weekend. Sound delicious!
I hope the weekend comes quickly for you 🙂 Enjoy!