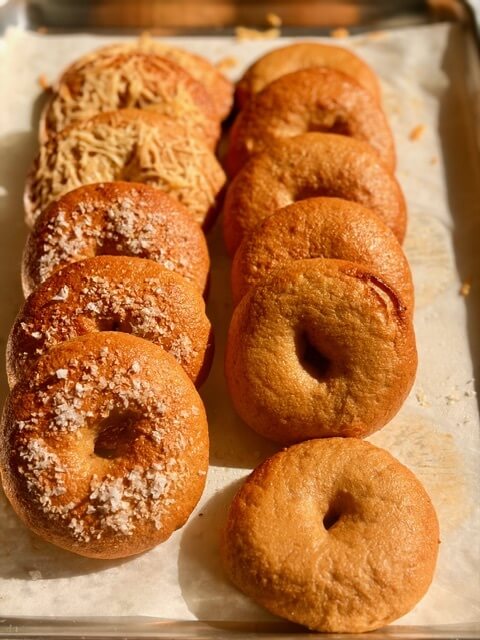

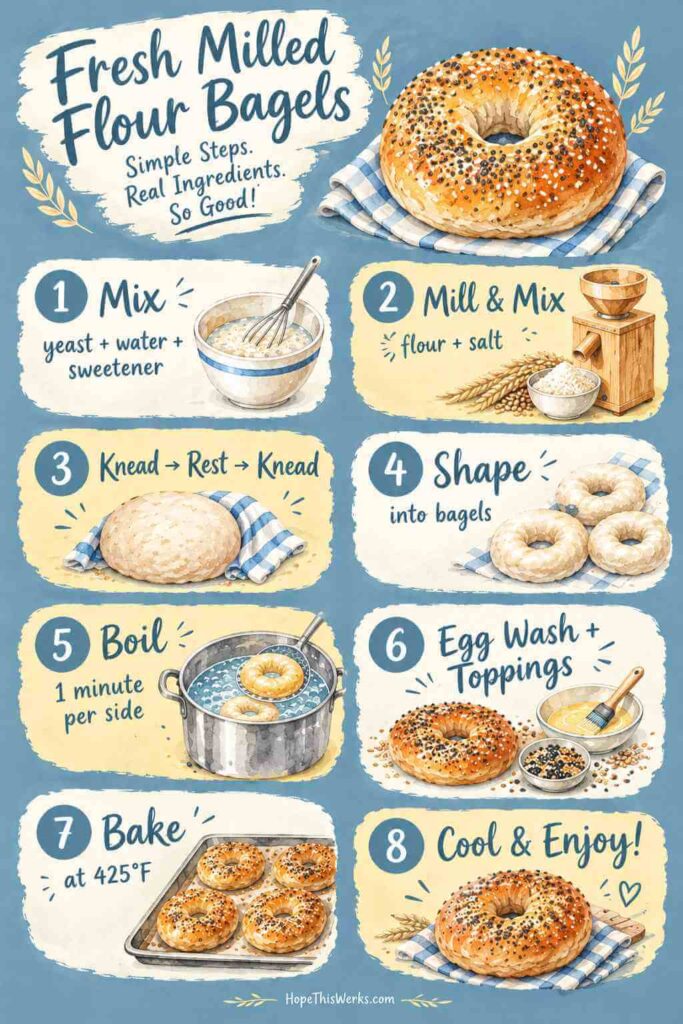
Fresh milled flour bagels and I have a history. And, honestly, it hasn’t always been a pretty one. Everyone who knows me understands that I have a slightly strained relationship with making bagels (along with Rice Krispie treats, but that’s a story for another day). Over the years, I’ve made enough batches to fill a bagel shop, except many of mine looked more like frisbees than breakfast. Delicious frisbees, mind you … but frisbees nonetheless.
On top of that, I used to be terrified of all the steps. Why does boiling bread in a pot of water make an otherwise perfectly reasonable baking project feel like I’m trying to land a plane? And then there’s the pronunciation issue. I grew up saying “bagel” with a short “a,” like “bag-uhl.” However, I’ve worked very hard to retrain myself to say it with a more sophisticated “a” sound. Clearly, these bagels have required personal growth on multiple levels.
But today, I’m triumphantly sharing the fresh milled flour bagels recipe that finally made the whole process feel manageable. Better yet, I’m going to walk you through the steps and help you avoid the mistakes I’ve made along the way. My goal is for YOUR first batch of bagels (yes, said with my fancy new “a” sound) to turn out beautifully. Although this recipe looks like it has a lot of steps, I’ve worked out the little quirks over years of trial and error … you’ll be surprised at how easy they are.
So, without further ado, let’s make bagels!
Gather Your Gear
Let’s start with the equipment because, as much as I love a good recipe, there’s nothing worse than discovering you need a particular kitchen tool when your hands are covered in sticky dough. It’s like realizing you need a screwdriver halfway through assembling furniture. Ask me how I know.
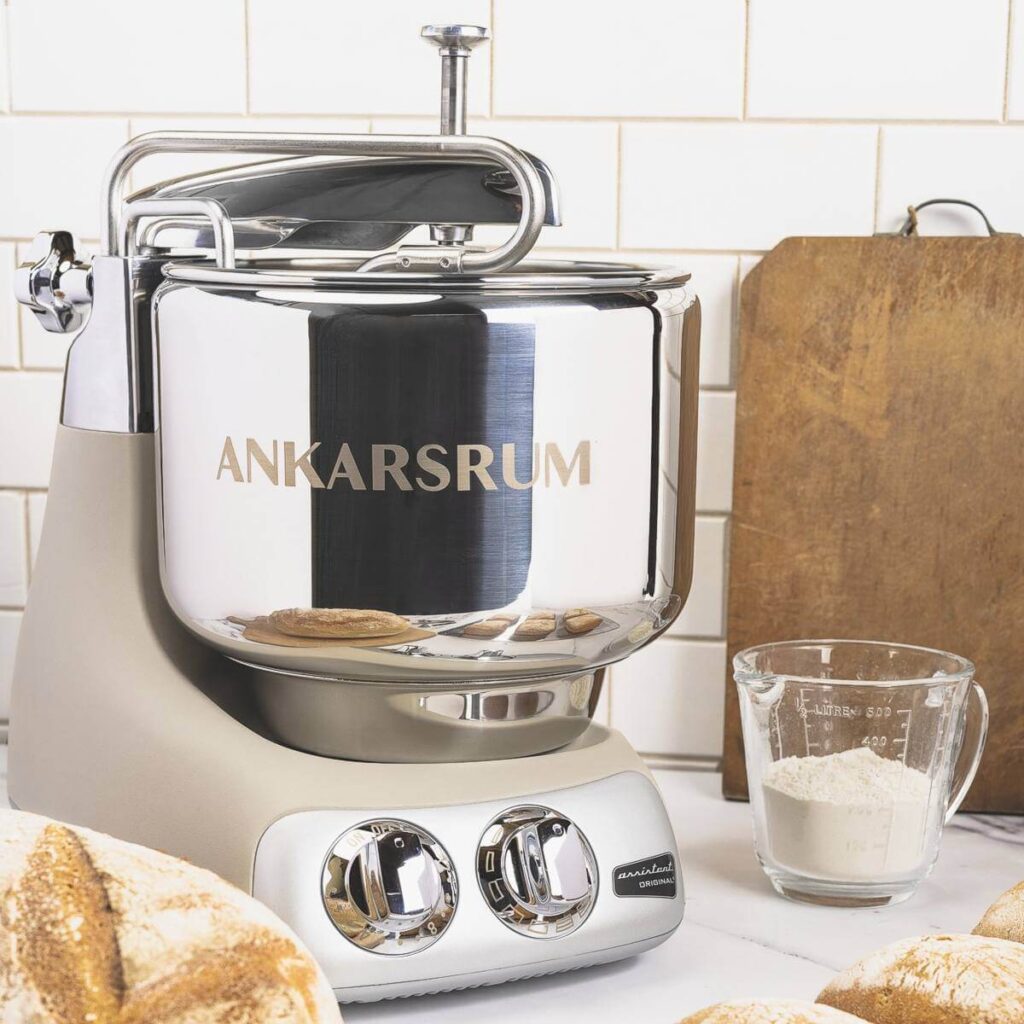
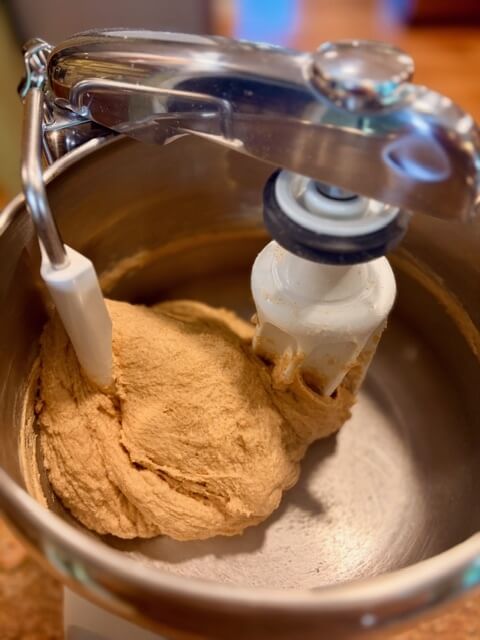
First, let’s talk about stand mixers. A few years ago, I switched to an Ankarsrum mixer after destroying three KitchenAid mixers. Yes, THREE. I even had a Professional Series model with the fancy bowl lift. After the third mixer gave up the ghost … I decided I wasn’t just a cute little home pastry baker. I was a hearty home bread baker, and I needed a mixer that could keep up with my ambitions.
Now, I rejoice every time I use my Ankarsrum. There’s no more grease dripping into my dough, no overheating, no strange smells, and no mixer hopping around on the countertop like it’s trying to escape. Best of all, there are no scary noises that make me wonder if I should call an appliance repair technician. This mixer simply does its job. It was an investment, but it’s one I’m thankful I made.
Of course, you don’t need an Ankarsrum to make this fresh milled flour bagels recipe. You can use a stand mixer (as long as you follow the rules in the manual) or you can knead the dough by hand. However, this dough is fairly stiff and requires some serious kneading … so choose your method accordingly. If you’re kneading by hand, consider it your arm workout for the day. In fact, I hereby name that workout the ABC workout: Arm Bagel Complete workout.
You’ll also want the following equipment, although I’m guessing you already have most of it tucked away in your kitchen:
Large pot for boiling the bagels
Fish spatula, dough whisk, or skimmer to lift the bagels out of the boiling water
Pastry brush for the egg wash
That’s it! Nothing too exotic, and certainly nothing that requires a second mortgage.
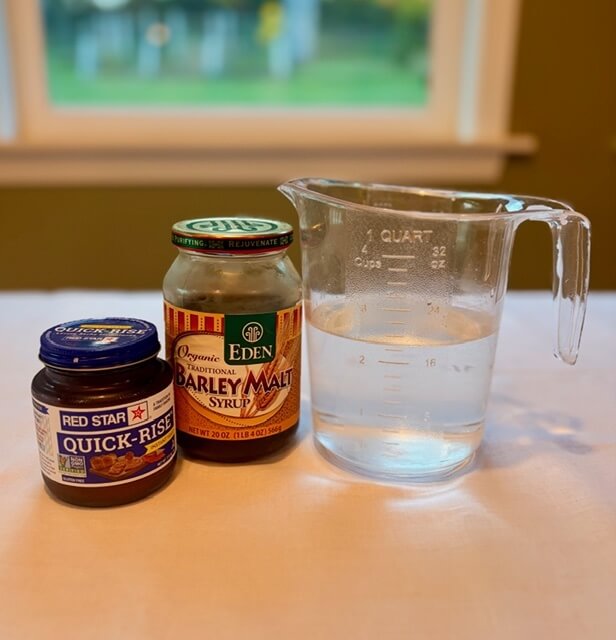
To your mixing bowl, add 2¼ cups of warm water, ideally around 110°F. Think of the temperature you’d use for a wonderfully warm bath. If the water makes you want to jerk your hand away, it’s too hot! Yeast likes to be cozy … not cooked, and water that’s too hot can kill it before it ever gets a chance to do its job.
Next, add your sweetener. You’ll notice that traditional bagel recipes often call for barley malt syrup, and I do tend to use it. One jar can last in your refrigerator for a year or two, so you don’t have to worry about using it all by next Tuesday. I also notice that it gives my bagels a little more of that authentic bagel-shop flavor.
That said, I’ve made bagels with brown sugar, too, and they tasted wonderful. Therefore, don’t let the lack of barley malt syrup stop you from making bagels with freshly milled flour. You have several substitution options, and you can use them in a 1:1 ratio in place of the barley malt syrup:
Honey
Light or dark brown sugar
Maple syrup
Brown rice syrup
Molasses (not blackstrap)
Sucanat
Finally, add your yeast and let everything rest for 5 minutes. During that time, the yeast should begin to wake up and may develop a foamy layer on the surface. Think of it as your yeast clocking in for work before the real job begins.
Does Your Yeast Need a Wake-Up Call?
Back in the day, active dry yeast typically needed to be proofed before using it. In other words, you mixed it with warm water, usually around 105°F–115°F, to wake it from its cozy little slumber. The older processing methods were a bit more aggressive … almost like dehydrating something with the care of a jet engine.
These days, yeast has had a glow-up. Modern active dry yeast is made more gently, so you don’t always have to proof it separately. You can often add it directly to your dry ingredients, just as you would instant yeast.
Instant yeast generally works a little faster than active dry yeast, so keep that in mind when you’re baking. Personally, I tend to reach for instant yeast more often.
However, if you’re like me and haven’t used your yeast since the last solar eclipse because sourdough has taken over your kitchen … a quick test is a smart idea. Before introducing your yeast to your beautiful freshly milled flour, make sure it’s alive, happy, and ready to work. There’s nothing more disappointing than spending time milling wheat, kneading dough, and shaping bagels only to discover that your yeast retired three years ago.
Mill Those Wheat Berries
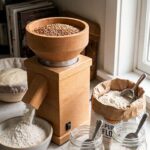
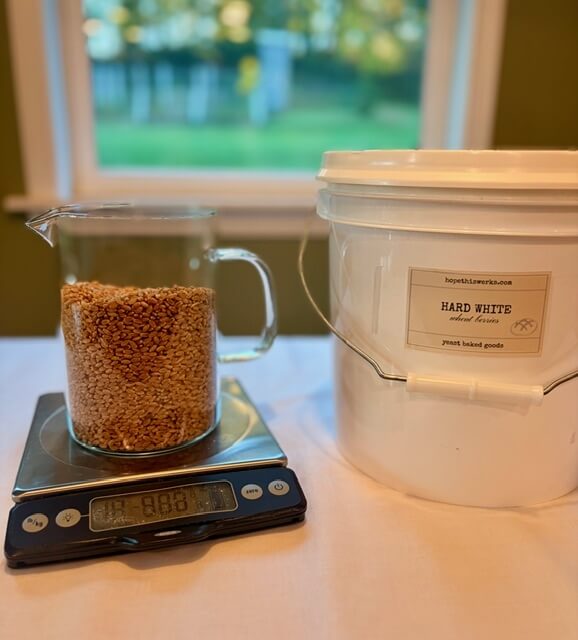
While your yeast is hanging out and getting foamy, grab 700 grams of hard white wheat berries. If you don’t feel like getting out your kitchen scale, that’s approximately 3½ cups of wheat berries. Run the wheat berries through your grain mill on a fine setting. You’ll end up with approximately 5½ cups of fluffy, freshly milled flour. Isn’t it satisfying to turn those little wheat berries into a pile of beautiful flour? It’s like watching a tiny grain makeover happen right on your countertop.
You absolutely can use hard red wheat berries instead of hard white wheat berries. However, I wouldn’t recommend soft white wheat for this recipe … and I’d skip the ancient grains for this particular dough, too. Why? Bagels need a strong gluten structure to hold their shape, develop that chewy texture, and keep their little heads held high instead of spreading into pancakes. Hard wheat brings more protein to the party, making it better suited to the job.
If you’d like to learn more about the different varieties of wheat berries and how they behave in baking, check out my article about wheat berry varieties. Once you understand which wheat works best for which recipe, choosing your grain becomes much less of a guessing game.
Flour Power
Now, add 1 tablespoon of salt (I use Redmond Real Salt) to your mixing bowl.
Next, begin slowly adding your freshly milled flour. You want enough flour for the dough to start pulling away from the sides of the bowl or the beater … but it should still look a little wet. Think soft and slightly sticky, not soupy … and not a dry lump that looks like it belongs in a pottery class.
Here’s where fresh milled flour likes to keep us on our toes. Freshly milled flour takes longer to absorb liquid than store-bought flour, so the dough can look wetter at first. If you keep adding flour until it looks like a perfectly smooth, firm ball right away (like you can with store-bought flour), you will end up with a dough that’s too dry once the flour finishes absorbing the water. And trust me, you don’t want that. The dough will become stiffer as it hydrates, so give it a little time instead of panicking and dumping in another handful of flour.
Want to Flavor Your Fresh Milled Flour Bagels? Now’s the Time!
If you want to add flavor to your dough, this is a great time to do it.
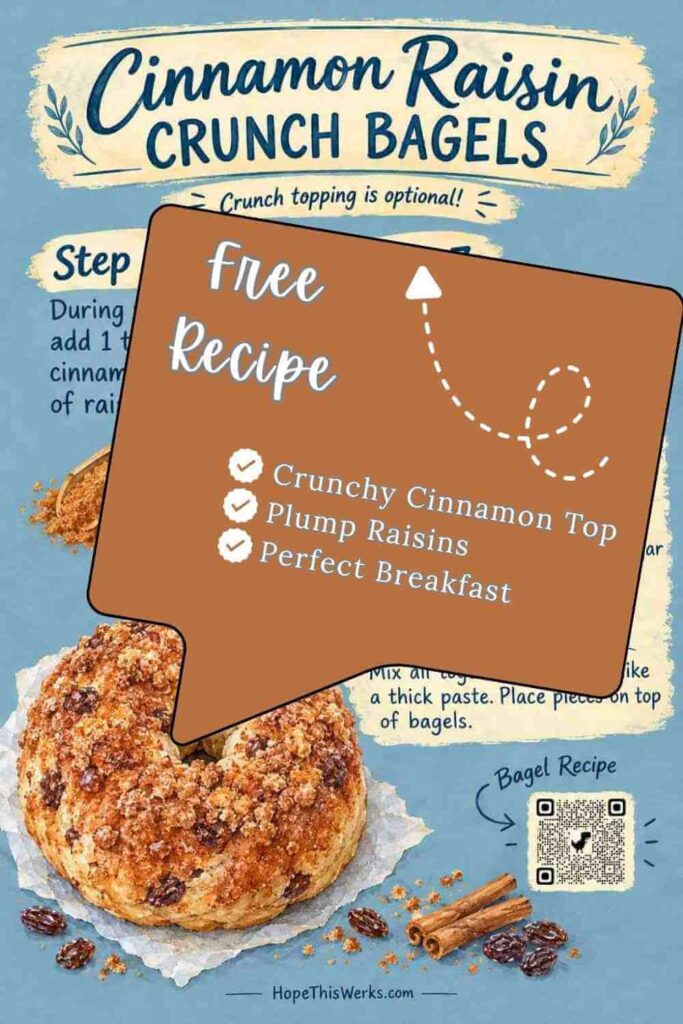
My all-time favorite is a cinnamon raisin crunch bagel, with cinnamon and raisins mixed into the dough and a delicious cinnamon crunch topping baked right onto the top. It’s the kind of bagel that makes you suddenly question why you ever bought the plain ones. You can find my cinnamon raisin crunch bagel recipe here if you’d like to give it a try.
However, there are plenty of other delicious ways to customize your bagels with freshly milled flour. Here are a few ideas:
Blueberries
Jalapeño and cheddar
Chocolate chips
Cranberries
Green chiles
Spinach, Swiss cheese, and garlic seasoning
Whether you prefer sweet, savory, or a little bit of both, you can make these bagels your own. Just remember that additions can affect the dough’s moisture and texture, so use a little judgment as you mix.
If you’ve made many of my bread recipes, you probably already know that I love my secret 8-30-8 trick. Here’s how it works: knead the dough for 8 minutes, let it rest for 30 minutes, and then knead it for another 8 minutes. In short, it helps with the unique needs of freshly ground flour. For my same-day fresh milled flour bagels, this is the method I use. It’s a simple way to give the flour time to hydrate before finishing the kneading process.
However, if you’re making the overnight version of these bagels (which is my personal favorite), we’re going to do something a little different. In fact, we’re going to break one of my favorite rules.
Making Overnight Bagels? Skip the 8-30-8 Trick!
When I tested the overnight version of this recipe using the 8-30-8 method, my bagels repeatedly overproofed in the refrigerator. As a result, the finished bagels were flatter and didn’t have the beautiful tall dome I wanted. After several batches, I decided it was time to stop arguing with the dough and change the method.
Instead, for the overnight version, mix the dough quickly and knead it continuously for 12 minutes in your stand mixer. If you have an Ankarsrum as I do, simply set your timer knob for 12 minutes and let the machine do its thing.
If you’re using a KitchenAid mixer, though, be careful with the extended kneading time. Remember my three KitchenAid casualties? I certainly do. I don’t want your mixer joining the appliance graveyard in my kitchen.
And if you’re kneading by hand for the entire 12 minutes (or a little longer), you have my admiration. You’re officially a bagel-making hero, and I have no interest in challenging you to an arm-wrestling match.
Once the 12 minutes of kneading are finished, move straight to shaping. Don’t wander off to answer your phone, help the kids, or investigate whatever the dog is barking at. You want to get these bagels shaped and into the refrigerator as soon as possible so they don’t overproof before their overnight rest.
Prep Like a Pro
If you’re making same-day bagels, use the 30-minute rest in the 8-30-8 method to get everything ready. After all, why stand around watching dough when you could be getting the rest of your kitchen organized? It’s nice to minimize kitchen time whenever possible, especially when there’s a fresh bagel waiting at the end. By the way, I have two separate recipe cards at the end: one for overnight bagels and the other for same-day bagels (both with freshly milled flour).
If you are making overnight bagels … you are going to wait until tomorrow morning to do this step. So skip ahead to shaping the bagels.
Preheat the Oven
First, preheat your oven to 425°F.
Prepare the Baking Sheets
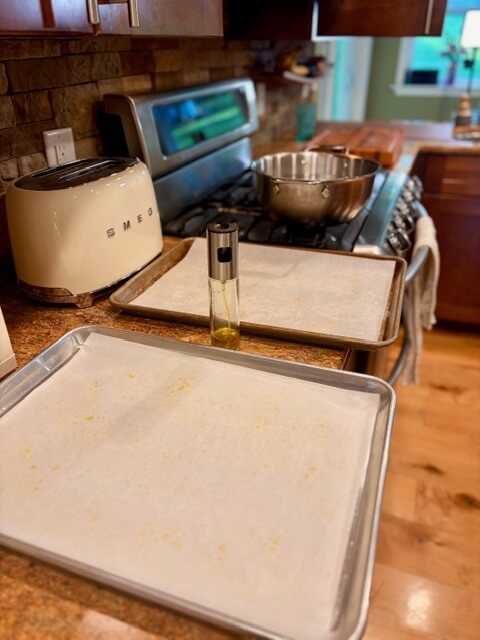
Next, line two baking sheets with silicone baking mats or parchment paper. If you’re using parchment paper, I recommend greasing it lightly, too. I usually squirt a little olive oil over mine because bagels have a sneaky habit of sticking to the pan. And nothing makes me sadder than a beautiful bagel that refuses to leave the baking sheet.
If your bagels have a chronic sticking problem … you can also dust the parchment with cornmeal. I’ve never needed to do that myself, but I know some bakers swear by it. Either way, a little preparation now can save you a lot of frustration later.
Make the Egg Wash
In a small bowl, whisk together 1 egg white and 1 tablespoon of water. You’ll brush this over the bagels after boiling them.
The egg wash helps the bagels develop a lovely golden color and shiny finish. Additionally, it gives toppings something to cling to … so your sesame seeds, cheese, or everything seasoning don’t slide off the moment you look away.
Get the Water Bath Ready
Finally, get a large pot of water boiling. I use a 5.5-quart pot with 3 quarts of water, which gives me enough room to boil three bagels at a time.
If you’re using a different-sized pot, fill it about two-thirds full. You need enough water for the bagels to float comfortably, but not so much that it bubbles over and turns your stovetop into a water park.
Add 3 tablespoons of your chosen sweetener to the water. You can use barley malt syrup, honey, sugar, or molasses. Then bring the water to a full boil.
If you’re making the overnight version, do all this preparation before taking your bagels out of the refrigerator. Keep them cold until you’re ready to boil them. These chilled bagels will puff up surprisingly well in the water bath, sometimes nearly doubling in size … so don’t panic if they look a little different from your same-day batch.
Shape Those Bagels
Now comes the fun part: shaping your bagels! I like to use a kitchen scale because I enjoy having bagels that look like they belong to the same family. However, you can absolutely divide the dough by eye if you’d rather keep things simple.
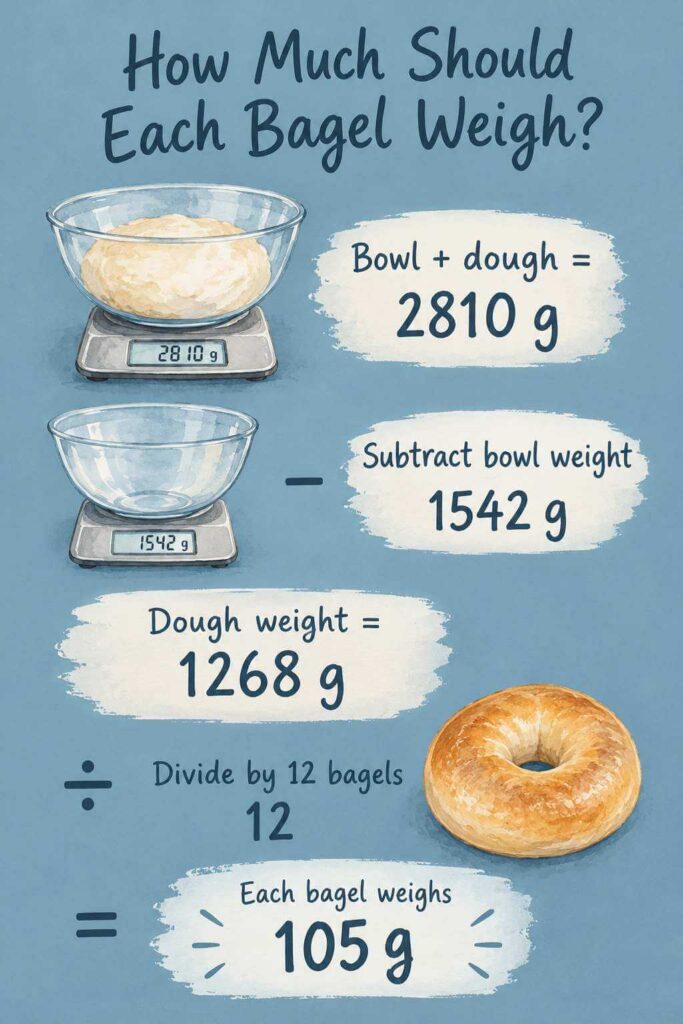
Here’s how I do it. First, I weigh the dough in my mixing bowl and subtract the weight of the empty bowl. Then I divide the dough’s weight by 12 to figure out how much each bagel should weigh.
This recipe makes normal-sized bagels … not the enormous ones you might find at a bakery and not the tiny pizza-bagel bites hiding in your grocery store’s freezer. My bagels generally weigh around 105 grams each. Of course, you can adjust the size to suit your appetite. If you want bigger bagels weighing around 140 grams each, divide the dough into nine pieces instead. Just remember that larger bagels may need a little more baking time.
Why Does Every Bagel Recipe Seem to Make Only Eight Bagels?
Can I rant for a minute? Why do so many bagel recipes make only eight bagels?
The first time I made bagels, I mixed everything together, got ready to divide the dough, and suddenly realized the recipe only made eight. Eight! Now, part of that was my fault because I hadn’t checked the yield before starting, but really, who wants to go through all that work for only eight bagels?
After looking at recipe after recipe that made eight … I decided to solve the problem myself. That’s why I developed this recipe for a full dozen. If you’d prefer the traditional eight-bagel batch, you can reduce all the ingredients by one-third. However, I have a feeling you won’t have much trouble eating those extra four bagels.
Just keep in mind that doubling this recipe (for 24 bagels) creates quite a bit of dough, so make sure your mixing bowl can handle the extra volume before you go all-in.
Divide the Dough
Turn the dough out onto a lightly floured surface. Then use a bench scraper to divide it into 12 equal portions.
You don’t have to weigh every piece, but I find that using a scale helps me make evenly sized bagels. Besides, there’s something satisfying about a tray of matching bagels.
Roll Each Piece into a Ball
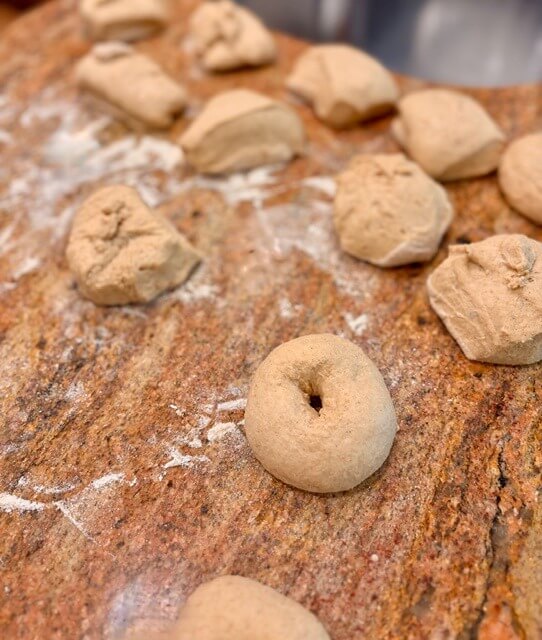
Next, roll each piece of dough into a ball. Here’s my little trick: I use a section of countertop without flour on it.
The slightly tacky surface grips the dough just enough to help you form a tight, smooth ball. If you roll the dough on a heavily floured surface, it may slide around instead of tightening up. Think of it like trying to tie a knot while wearing slippery gloves. It can be done, but why make things harder?
Make the Hole
Once you’ve shaped the balls, poke your index finger through the center of each one to start making the hole.
After making the initial hole, set that bagel aside on the floured part of the counter and move on to the next one. By the time you’ve shaped the last bagel, the first one will have had a little time to relax. Then you can stretch the hole to about 1½–2 inches in diameter.
I like to put both index fingers through the hole and gently swirl them around to widen it. If the dough fights back and keeps shrinking … don’t wrestle with it. Give it another five minutes to relax, then try again. Dough can be stubborn, but it usually becomes more cooperative if you stop arguing with it.
Arrange the Fresh Milled Flour Bagels
Once the holes are large enough, place the bagels on your prepared baking sheets. I arrange six bagels on each sheet, leaving plenty of space between them.
Remember, these bagels will expand during proofing, boiling, and baking, so don’t crowd them together like passengers trying to squeeze onto an already-full elevator.
Another Way to Shape Fresh Milled Flour Bagels
There’s another popular method for shaping bagels that you might prefer. Instead of rolling each piece into a ball, roll it into an 8–9-inch rope. Then wrap the ends around your palm and pinch them together firmly to seal the seam.
My son-in-law grew up in New Jersey, just outside New York, where bagel shops seemed to be everywhere. This rope method is the way they shaped bagels in his hometown, so it’s certainly a technique worth trying.
Both methods can work well. Choose whichever feels more comfortable, and don’t worry if your first few bagels look a little homemade. They’re supposed to be homemade!
The Float Test
This is one of the most important parts of my same-day fresh milled flour bagels recipe. Knowing when to boil the bagels can make the difference between tall, beautiful bagels and the flat frisbees that haunted my baking dreams for years.
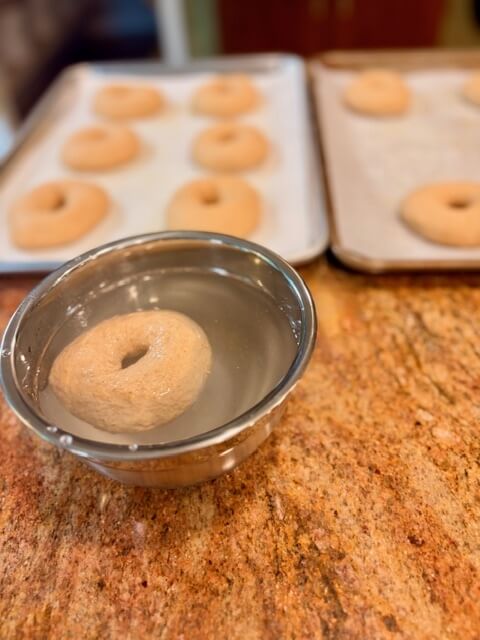
Here’s what I do. As soon as I’ve shaped the bagels, I place one in a small bowl of cool water. If it floats within about 10 seconds, it’s ready to boil. If it sinks to the bottom, it needs a little more time. I check every 5–10 minutes again until the bagel passes the test.
You don’t need to do this test for the overnight version because the bagels have been resting in the refrigerator. However, for same-day bagels, I find the float test especially helpful.
How I Stopped Making Frisbee-Shaped Fresh Milled Flour Bagels
For a long time, I gave up on making bagels because mine always turned out flat. Imagine doing all that work only to produce something so thin that cutting it in half becomes an engineering challenge. Did they still taste delicious? Absolutely! But they weren’t the tall, fluffy bagels of my dreams.
Eventually, I figured out that I was repeatedly overproofing my bagels. Once I understood that, I began paying much closer attention to when they were ready to boil. Therefore, I try to boil my bagels as soon as they pass the float test. If a bagel sinks, I’ll check again in five minutes because I want to get them into the water before they overproof.
There’s another reason to work efficiently: bagels need to be boiled in batches. If the first bagels are ready but the last ones sit around waiting for their turn, they can continue proofing (or overproofing) while you’re busy with the pot.
Boil Time
Now that you’ve prepared your water earlier, it should be ready and waiting for you. If you’re making the overnight version, get the water boiling (oven preheating to 425°F and egg wash made) before taking the bagels out of the refrigerator.
One thing that may surprise you is how much overnight bagels can puff up in the water. Sometimes, they nearly double in size! That’s perfectly normal for this version, so don’t be alarmed if they look considerably plumper after their boil.
Once the water reaches a rolling boil, reduce the heat to maintain a gentle boil. You don’t want the water thrashing around like a wave pool at a water park. Aggressive boiling can be rough on the dough, potentially deflating the bagels a little and making the exterior tougher than you’d like.
Keep your timer handy and set it for one minute.
Step 1: Boil the First Side
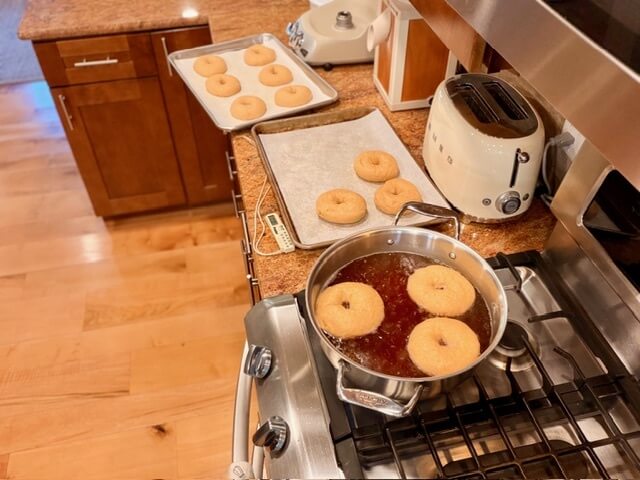
Gently place as many bagels into the pot as will fit comfortably without touching each other. I usually leave about two inches of space around each bagel.
I like to place them top-side down in the water first because that means I have less flipping to do overall. Once the bagels are in the water … start your timer for one minute.
Step 2: Flip and Boil the Other Side
When the timer goes off, gently flip each bagel using a fish spatula or whatever kitchen tool works best for you. I use a fish turner and a chopstick to help me maneuver them without squishing the dough.
Then set the timer for another minute and let the bagels boil on the second side.
You can adjust the texture a little by changing the boiling time. If you boil them longer (such as two minutes per side) the outside will become tougher. If you boil them for only 30 seconds per side, the exterior will be softer.
In other words, you can choose your own adventure. However, you do need to boil them! This step gives bagels their characteristic chewy texture and sets them apart from ordinary bread rolls with holes.
Step 3: Lift the Bagels Out of the Water
Once the bagels have finished boiling, use a fish turner to lift them out of the water and let the excess water drain away.
I find that a fish turner is the perfect tool because it doesn’t squish the bagels (the way a skimmer sometimes can). It also lets the water drain quickly (unlike a slotted spoon that can take a little longer).
Transfer the boiled bagels back to your prepared baking sheets and repeat with the remaining bagels.
And yes, they’re going to look wrinkly. That’s completely normal! The oven will help smooth them out as they bake.
Dress Up Those Bagels
As soon as the bagels come out of the water, brush them with the egg wash you prepared earlier.
If you’re making plain bagels, the egg wash will give them a lovely shiny finish and help them brown beautifully in the oven.
However, if you’re adding toppings, it also acts like edible glue to help everything stay where it belongs. No one wants to bite into a bagel only to have all the toppings slide off onto their shirt. That’s not breakfast; that’s a wardrobe problem.
Personally, I never skip the egg wash. Even if you’re making plain bagels, the extra shine and color are worth the tiny bit of effort.
What Can You Put on Bagels with Freshly Milled Wheat?
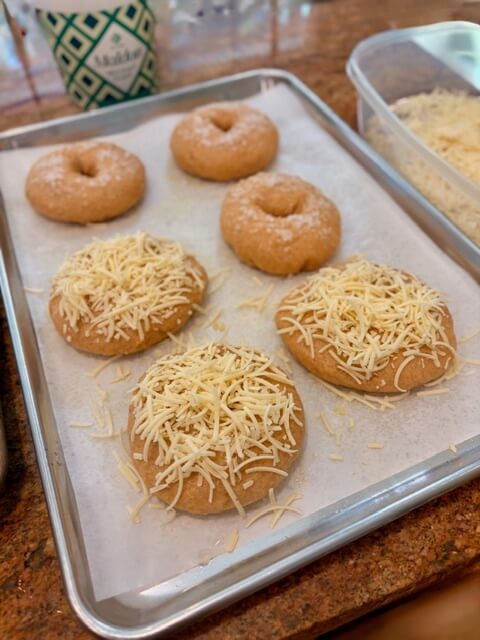
Once you’ve brushed on the egg wash, sprinkle your favorite toppings over the bagels. Here are some ideas to get you started:
Everything bagel seasoning
Cheese
Cinnamon sugar (mix ¼ cup sugar with 2 teaspoons cinnamon)
Coarse salt
Rolled oats
Sesame seeds
Poppy seeds
Dehydrated onion or garlic
Of course, you can mix and match toppings to suit your taste. You could make a batch of savory bagels for sandwiches and a few sweet ones for breakfast. Alternatively, you could go all-in on cinnamon sugar and pretend you’re making a perfectly reasonable breakfast choice.
For cinnamon raisin crunch bagels, add the cinnamon and raisins to the dough during kneading, then apply the optional cinnamon crunch topping after the egg wash. That crunchy, sweet topping is one of my favorite ways to turn a homemade bagel into something extra special. Want the recipe? Click here.
Bake Those Beauties
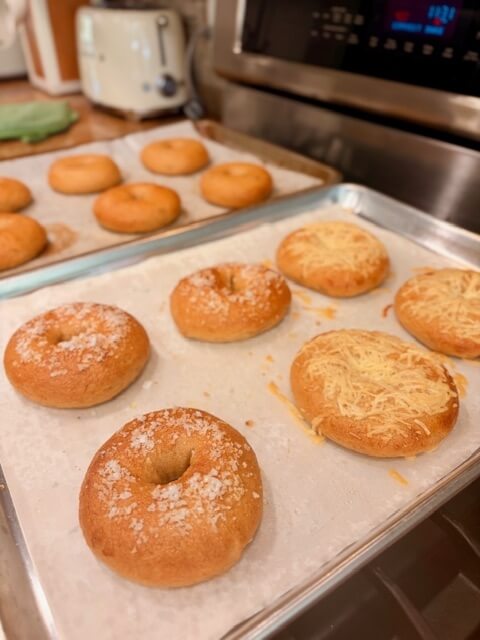
Finally, we’re at the baking stage! Place the bagels in your preheated 425°F oven and bake for 20–25 minutes … rotating the baking sheets halfway through so they brown evenly. When they’re done, the bagels should be shiny and beautifully golden brown. Keep an eye on them toward the end of the baking time because ovens can be as unpredictable as toddlers in a toy store.
You’ll also get a little more oven spring during baking, which means the bagels may puff up a bit more as the heat expands the gases inside the dough.
Once they’re finished, remove the baking sheets from the oven and transfer the bagels to a wire cooling rack. Let them cool before serving if you can manage to resist the temptation.
Bagel Bliss
Congratulations! You’ve made fresh milled flour bagels, and now comes the best part: eating them.
Technically, you should wait until the bagels have cooled completely before slicing them. Cutting into bread while it’s still hot can affect the interior texture because the crumb is still setting. However, I’m not going to pretend I always follow that advice. There’s something spectacular about slicing into a warm bagel and watching a little steam escape. Sometimes, the joy of eating a hot bagel outweighs the desire for a perfectly set crumb. I’m only human.
If you need a little inspiration, here are some ways to enjoy your bagels:
Classic cream cheese
Lox or smoked fish
Butter
Jam
Bacon, egg, and cheese
Avocado and egg
Deli sandwiches
Burgers as bagel buns
Pizza bagels
The beauty of homemade bagels is that you can make them exactly how you like them. Use them for a quick breakfast, turn them into a hearty lunch, or make pizza bagels for an easy dinner. Once you have a batch ready … the possibilities are almost endless.
How to Store Your Fresh Milled Flour Bagels
If you don’t eat the entire batch right away (which is a big if), store your bagels in an airtight container at room temperature for 1–2 days.
For longer storage, let the bagels cool completely and freeze them for up to four months. I recommend slicing them before freezing because then you can pop them straight into the toaster without waiting for them to thaw. It’s a little trick that makes busy mornings much easier.
FAQ: Let's Troubleshoot Those Doughy Disasters
Why were my fresh milled flour bagels flat?
Flat bagels can have several causes, but one important possibility is insufficient kneading. If the dough hasn’t developed enough gluten structure, it may not have the strength to hold its shape. Overproofing can also cause bagels to spread and lose their height.
Why were my fresh milled flour bagels hard as a rock?
Hard bagels can result from too much flour … or expired or inactive yeast. With fresh milled flour, it’s especially important not to add too much flour too soon because the flour continues absorbing liquid as the dough rests.
How big should I make my fresh milled flour bagels?
For this recipe, I generally aim for 105 grams per bagel. However, bagels around 85 grams will be on the smaller side, while 140-gram bagels will be larger. You can adjust the number of portions to suit your preferences, but remember that changing the size can change the baking time.
Why aren’t my fresh milled flour bagels smooth?
Handle the dough gently and avoid working it more than necessary. Additionally, make sure your water bath maintains a gentle boil rather than a vigorous, rolling boil. A few wrinkles after boiling are normal … the oven will help smooth them out.
How do I keep my fresh milled flour bagels from sticking to the baking sheet?
Use parchment paper that’s lightly greased with olive oil, or use silicone baking mats. If your bagels tend to stick to parchment paper, you can also try dusting it with cornmeal.
What if my house is too cold for the dough to rise?
A chilly kitchen can slow down yeast activity, but you don’t need to turn your house into a tropical resort to make bagels. One unique place to proof dough is inside your dryer!
Here’s the trick: run the dryer for five minutes, turn it off, and then place your covered bowl of dough inside. Shut the door and let the dough rest in that warm, dark, humid environment. Just make sure the dryer is off while the dough is inside (and don’t forget about it). It can create a cozy little spot for the yeast to do its work.
Can I add sourdough discard to this fresh milled flour bagels recipe?
Yes! You can add sourdough discard to the dough. Just reduce the water by 3 tablespoons to account for the additional moisture.
Can I make these fresh milled flour bagels overnight?
Yes! This recipe includes an overnight option (which is actually my favorite). For that method, knead the dough continuously for 12 minutes (instead of using the 8-30-8 method). Then shape the bagels promptly and transfer them to the refrigerator.
Keep the bagels refrigerated until you’re ready to boil them the next day. Preheat your oven and prepare your egg wash and water bath before taking the fresh milled flour bagels out of the fridge so they can go straight into the boiling water when everything is ready.
Can I use active dry yeast instead of instant yeast in fresh milled flour bagels?
Yes. Active dry yeast can work in this recipe. It may take longer to become active and can require more time for the dough to rise, depending on the yeast and your kitchen conditions. Check that your yeast is active before proceeding, particularly if it’s been sitting in your pantry for a while.
Can I use hard red wheat instead of hard white wheat in fresh milled flour bagels?
Yes! Hard red wheat is a suitable alternative because it provides the protein and gluten structure needed for chewy bagels. I don’t recommend soft white wheat for this recipe because it generally has less protein and isn’t as well suited to this type of dough.
Can I make these fresh milled flour bagels without a stand mixer?
Absolutely. You can mix the dough in a large bowl with a sturdy spoon or silicone spatula, then knead it by hand. The dough is stiff, so it will require some effort, but a stand mixer isn’t essential. Just be prepared for a little extra exercise!
Why do I need to boil fresh milled flour bagels before baking them?
The water bath helps create the chewy exterior that distinguishes bagels from ordinary bread rolls. It also begins setting the surface of the dough before the bagels go into the oven. Although boiling can feel like an intimidating extra step, it’s one of the things that gives bagels their signature texture.
Goodbye, Frisbees! Hello, Bagel Glory!
After years of making bagels that were flatter than a frisbee, I’m finally thrilled to share this recipe with you. Hopefully, it will save you some of the trial and error I went through while figuring out the quirks of fresh milled flour bagels.
The good news is that making bagels really isn’t as difficult as it might seem. If you can make bread, you can make bagels! Yes, there’s an extra step involving a pot of boiling water, but don’t let that scare you away. Once you’ve done it a couple of times, it becomes just another part of the process.
Remember to pay attention to your dough, give the flour time to hydrate, knead it well, and avoid letting the bagels overproof.
And if you do end up with a batch of frisbees? Well, cream cheese and butter cover a multitude of baking sins.
Before You Roll Away
Before you roll out (pun absolutely intended), grab my free Cinnamon Raisin Crunch Bagel recipe! It’s the perfect way to give your homemade bagels a sweet, cinnamon-y upgrade with raisins tucked inside and an optional crunchy topping baked right on top.
Then, keep your kitchen adventures going by checking out my other recipes, fresh milled flour guides, and baking tutorials. If you make these bagels, I’d love to hear how they turn out. Leave a comment, tag me on Instagram @hopethiswerksdiy, come hang out with me on Facebook, or find me over on YouTube.
I’ll be cheering you on from my kitchen, probably covered in flour and trying not to eat all twelve bagels before anyone else gets home.
Want to make sure you never miss a recipe? Subscribe to my newsletter and join me for more fresh milled flour baking adventures.
Until next time, may your bagels be tall, your crusts be chewy, and your dough never, ever resemble a frisbee.
Bagels with Freshly Milled Flour (overnight)
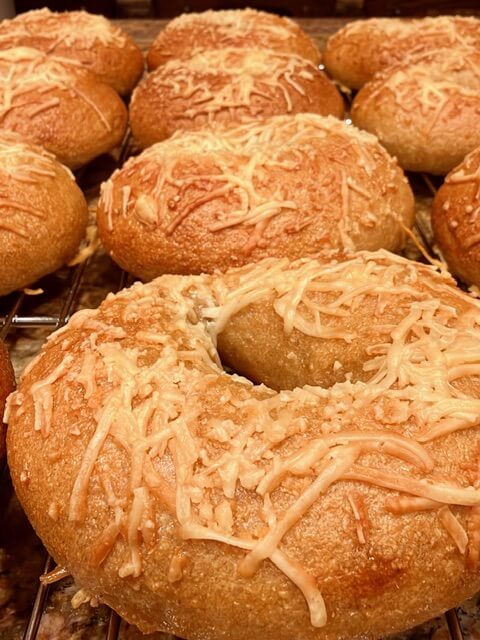
Make chewy, golden fresh milled flour bagels with simple ingredients! Prep the dough tonight ... then boil and bake tomorrow morning for homemade bagel goodness.
Ingredients
Dough
Boiling & Topping
- 2 quarts water
- 3 tablespoons of barley malt, sugar or honey
- Egg wash: 1 egg white and 1 tablespoon water, mixed
- Bagel Flavors (coarse salt, everything bagel seasoning, sesame seeds, asiago cheese, etc)
Instructions
- Yeast ... Go!: Whisk warm water, barley malt syrup (or sugar or honey), and yeast in a stand mixer bowl. Rest for 5 minutes, until foamy.
2¼ cups water, 1 tbsp barley malt syrup, 2 tsp yeast - Mill & Mix: Finely mill wheat berries. Add salt to the mixing bowl, then gradually mix in the flour until a soft, sticky dough forms.
700g hard white wheat berries, 1 tbsp salt - Knead: Knead for 12 minutes.
- Baking Sheet Prep: Line two baking sheets with parchment paper (greased ... bagels like to stick) or silicone baking mats.
- Shape: On a lightly floured surface, divide dough into 12 equal pieces (about 105g each ... I used a scale to be extra precise, but it’s not necessary). Roll each piece into a ball (no flour needed!), poke a hole through the center with your index finger, and gently stretch. Once all are shaped, return to the first bagel and widen each hole to 1½–2 inches. Place on prepared baking sheets.
- Fridge: Cover and refrigerate overnight ... ideally 12 hours.
- Morning Prep: Leave the bagels in the fridge while you prepare the following. Heat oven to 425°F. Whisk 1 egg white with 1 tablespoon water for the egg wash. Bring 3 quarts of water (or enough to fill your pot about ⅔ full) and barley malt syrup (or sugar or honey) to a boil.
- Boil Them: Reduce the water to a gentle boil. Take the bagels out of the fridge. Boil bagels in batches for 1 minute per side. Lift out with a fish turner (or dough whisk or skimmer). Drain and return to the baking sheets. They'll look wrinkly and weird, but don't panic ... the oven works wonders!
- Toppings, Please!: Brush bagels with egg wash and immediately sprinkle with your favorite toppings.
- Bake: Bake for 20–25 minutes until shiny and golden brown. Transfer to a cooling rack.
- Bagel Bliss: Slice, schmear, stack, or sandwich. There's no wrong way to bagel!
Notes
- No Mixer? No problem! Grab a large bowl and a sturdy spoon. Your muscles are the mixer!
- Yeast: Instant or active dry both work! Active dry may need a little longer to rise. One packet is 2¼ tsp.
- Sourdough Discard? Add a ½ cup (100g) fed starter or discard and reduce the dough water by 3 tbsp (50g). Hello, tangy bagels!
- Barley Malt Syrup: Barley malt syrup is the secret to that classic malty bagel flavor! Find it at natural food stores, Amazon, or swap in brown sugar or honey.
- Shape It Another Way: Roll each piece into an 8–9-inch rope, wrap the ends around your palm, and pinch to seal.
- Sticky Bagels? Sprinkle cornmeal on the parchment. No more bagel glue!
- Half or Double? Half all dough ingredients ... but keep the full amount of boiling water and sweetener. No other changes needed. I don't recommend doubling, unless your mixer is ready for a workout!
- Bake the Same Day? Check out the other recipe card.
- Love Cinnamon Raisin? Me too! Click here for the recipe. I even give you a crunch topping that is out of this world. My personal favorite!
- Store: Keep in an airtight container at room temperature for 1–2 days.
- Freeze: Cool completely and seal in a freezer bag or container.
Bagels with Freshly Milled Flour (same day)
Make chewy, golden, fresh-milled flour bagels from scratch in one day! Made with yeast and simple ingredients, these homemade bagels are worth every bite ... no overnight wait required.
Ingredients
Dough
Boiling & Topping
- 2 quarts water
- 3 tablespoons of barley malt, sugar or honey
- Egg wash: 1 egg white and 1 tablespoon water, mixed
- Bagel Flavors (coarse salt, everything bagel seasoning, sesame seeds, asiago cheese, etc)
Instructions
- Yeast ... Go!: Whisk warm water, barley malt syrup (or sugar or honey), and yeast in a stand mixer bowl. Rest for 5 minutes, until foamy.
2¼ cups water, 1 tbsp barley malt syrup, 3 tsp yeast - Mill & Mix: Finely mill wheat berries. Add salt to the mixing bowl, then gradually mix in the flour until a soft, sticky dough forms.
700g hard white wheat berries, 1 tbsp salt - Secret Kneading Trick: Knead for 8 minutes (dough will be sticky) → Let it rest for 30 minutes (freshly milled flour needs a hydration vacation) → Knead for another 8 minutes (if needed ... add flour a sprinkle at a time until the dough pulls away from the bowl and feels stiffer, but not dry).
- Prep: Heat oven to 425°F. Line two baking sheets with parchment paper (greased ... bagels like to stick) or silicone baking mats. Whisk 1 egg white with 1 tablespoon water for the egg wash. Bring 3 quarts of water (or enough to fill your pot about ⅔ full) and barley malt syrup (or sugar or honey) to a boil.
- Shape: On a lightly floured surface, divide dough into 12 equal pieces (about 105g each ... I used a scale to be extra precise, but it’s not necessary). Roll each piece into a ball (no flour needed!), poke a hole through the center with your index finger, and gently stretch. Once all are shaped, return to the first bagel and widen each hole to 1½–2 inches. Place on prepared baking sheets.
- Float Test: Drop one bagel into cool water. If it floats within 10 seconds, it's ready for its hot bath! If it sinks, pat it dry and let the bagels proof longer before trying again (check every 5-10 minutes).
- Boil Them: Reduce water to a gentle boil. Boil bagels in batches for 1 minute per side. Lift out with a fish turner (or dough whisk or skimmer). Drain and return to the baking sheets. They'll look wrinkly and weird, but don't panic ... the oven works wonders!
- Toppings, Please!: Brush bagels with egg wash and immediately sprinkle with your favorite toppings.
- Bake: Bake for 20–25 minutes until shiny and golden brown. Transfer to a cooling rack.
- Bagel Bliss: Slice, schmear, stack, or sandwich. There's no wrong way to bagel!
Notes
- No Mixer? No problem! Grab a large bowl and a sturdy spoon. Your muscles are the mixer!
- Yeast: Instant or active dry both work! Active dry may need a little longer to rise. One packet is about 2¼ tsp.
- Sourdough Discard? Add a ½ cup (100g) fed starter or discard and reduce the dough water by 3 tbsp (50g). Hello, tangy bagels!
- Barley Malt Syrup: Barley malt syrup is the secret to that classic malty bagel flavor! Find it at natural food stores, Amazon, or swap in brown sugar or honey.
- Shape It Another Way: Roll each piece into an 8–9-inch rope, wrap the ends around your palm, and pinch to seal.
- Sticky Bagels? Sprinkle cornmeal on the parchment. No more bagel glue!
- Half or Double? Half all dough ingredients ... but keep the full amount of boiling water and sweetener. No other changes needed. I don't recommend doubling, unless your mixer is ready for a workout!
- Bake Tomorrow? Check out the other recipe card.
- Love Cinnamon Raisin? Me too! Click here for the recipe. I even give you a crunch topping that is out of this world. My personal favorite!
- Store: Keep in an airtight container at room temperature for 1–2 days.
- Freeze: Cool completely and seal in a freezer bag or container.

Charts & Summaries: Fresh Milled Flour Bagels
| Overnight Fresh Milled Flour Bagels | ||
|---|---|---|
| Step | What to Do | Details |
| 1. Activate yeast | Whisk ingredients and rest 5 minutes until foamy. | 2¼ cups warm water, 1 tbsp barley malt syrup (or sugar or honey), 2 tsp yeast |
| 2. Mill and mix | Finely mill wheat berries. Add salt and gradually mix in flour until soft and sticky. | 700 g hard white wheat berries, 1 tbsp salt |
| 3. Knead | Knead the dough for 12 minutes. | Stand mixer |
| 4. Shape | Divide into 12 pieces, roll into balls, poke holes, and stretch to 1½–2 inches wide. | About 105 g per bagel |
| 5. Refrigerate | Cover the shaped bagels and refrigerate overnight. | About 12 hours |
| 6. Prepare morning | Heat oven, line baking sheets, prepare egg wash, and bring water with sweetener to a boil. | 425°F; 1 egg white + 1 tbsp water; 3 quarts water |
| 7. Boil | Boil in batches for 1 minute per side. Drain and return to baking sheets. | Gentle boil |
| 8. Add toppings | Brush with egg wash and immediately add your favorite toppings. | Optional toppings |
| 9. Bake | Bake until shiny and golden brown. Transfer to a cooling rack. | 20–25 minutes |
| 10. Serve | Slice, spread, stack, or make a sandwich. | Enjoy homemade bagels! |
| Overnight Bagel Recipe Quick Guide | |
|---|---|
| Yield | 12 bagels, about 105 g each |
| Flour | 700 g hard white wheat berries, finely milled |
| Kneading | 12 minutes |
| Refrigeration | Overnight, ideally about 12 hours |
| Boiling | 1 minute per side |
| Oven temperature | 425°F |
| Baking time | 20–25 minutes, until golden brown |
| Bagel Problems and Possible Fixes | |
|---|---|
| Problem | What to Try |
| Bagels turn out flat | Avoid overproofing. Follow the overnight refrigeration time and keep the shaped bagels covered in the fridge. |
| Dough feels sticky | A soft, sticky dough is expected. Add flour gradually only as needed while mixing. |
| Bagels stick to the pan | Use greased parchment paper or silicone baking mats. |
| Bagels look wrinkly after boiling | Don't panic! They may look wrinkly before baking. Continue with the recipe. |
| Bagels aren't golden brown | Brush with egg wash before baking and bake at 425°F until shiny and golden, about 20–25 minutes. |
| Bagels seem too dense | Check that the yeast foams before mixing and that the dough is kneaded for the full 12 minutes. |
| Which Bagel Method Fits Your Schedule? | ||
|---|---|---|
| Step | Overnight Method | Same-Day Method |
| Kneading | 12 minutes continuously | 8 minutes, rest 30 minutes, then knead 8 minutes |
| Shaping | Shape before refrigerating | Shape on the same day |
| Resting | Refrigerate overnight, ideally 12 hours | Rest the dough for 30 minutes during kneading |
| Cooking day | Boil and bake the next day | Boil and bake the same day |
| Best for | Planning ahead and splitting the work over two days | Fresh bagels without an overnight wait |
| Bagel Ingredient Quick Guide | ||
|---|---|---|
| Ingredient | Amount | Notes |
| Hard white wheat berries | 700 g | Finely mill for the bagel dough. Hard red wheat can also work. |
| Warm water | 2¼ cups | Used to activate the yeast and mix the dough. |
| Yeast | 2 tsp | Let stand for 5 minutes until foamy. |
| Barley malt syrup | 1 tbsp in dough | Sugar or honey can be used instead. |
| Salt | 1 tbsp | Mix into the dough with the flour. |
| Egg white and water | 1 egg white + 1 tbsp water | Whisk together for the egg wash before adding toppings. |
Resources: Sally’s Baking Addiction, Sophisticated Gourmet, King Arthur
If this post made you smile, help me keep my grain mill spinning and my apron permanently dusty … tip me with this link. Thanks, you’re the best!


4 responses to “Fresh Milled Flour BAGELS (easy yeast recipe)”
Love your perspective and agree on 8 count vs 12 count!
Making tomorrow for overnight – what would be the outcome if refrigerated over 12 hours?
Thanks so much! If they hang out in the fridge too long, they might overproof and turn into skinny frisbee bagels … but they should still taste delicious!
I’ve been nervous to try fresh milled bagels. Can’t wait to try these.
Don’t let those bagels intimidate you! You’ve got this!