


Welcome to

Hope this Werks

Fresh milled. Real Food. Pure energy.

Fresh Milled Flour WAFFLES Made Easy (or store flour)

Updated: September 11, 2026

If you are looking for a no-fuss, easy waffle recipe, then these fresh milled flour waffles are about to become a very welcome addition to your breakfast routine. They’re crispy on the outside, fluffy on the inside, and surprisingly easy to make. Even better, I’ve included an option for using store-bought flour, so you don’t need a grain mill sitting on your counter to join the waffle party.

While these waffles are quick enough for a regular weekday breakfast, they somehow make breakfast feel a little more special. Maybe it’s because waffles have those little squares that practically beg to be filled with butter and syrup. Or maybe it’s because breakfast just feels fancier when you have to get out the waffle iron.

Either way, these waffles are also freezer-friendly, which is excellent news. Of course, whether you actually have leftovers to freeze is another question entirely.

Fresh Milled Flour Waffles with strawberries and whipped cream on a white plate

Welcome to the Great Breakfast Debate

I’ve noticed that the people I know seem to fall pretty evenly into two breakfast camps: the waffle people and the pancake people. You either see a stack of waffles and think, “YES, please,” or you see pancakes and immediately know exactly what you want.

My husband is firmly in the waffle camp. He will choose waffles every single time. I, on the other hand, tend to choose pancakes. And honestly, I thank my Mom because her pancake recipe is the best. I’ll share that one with you here. However, there is one thing I think both camps can agree on: the toppings are half the fun.

So, let’s make some fresh milled flour waffles (or with store-bought flour) that can handle whatever toppings you throw at them.

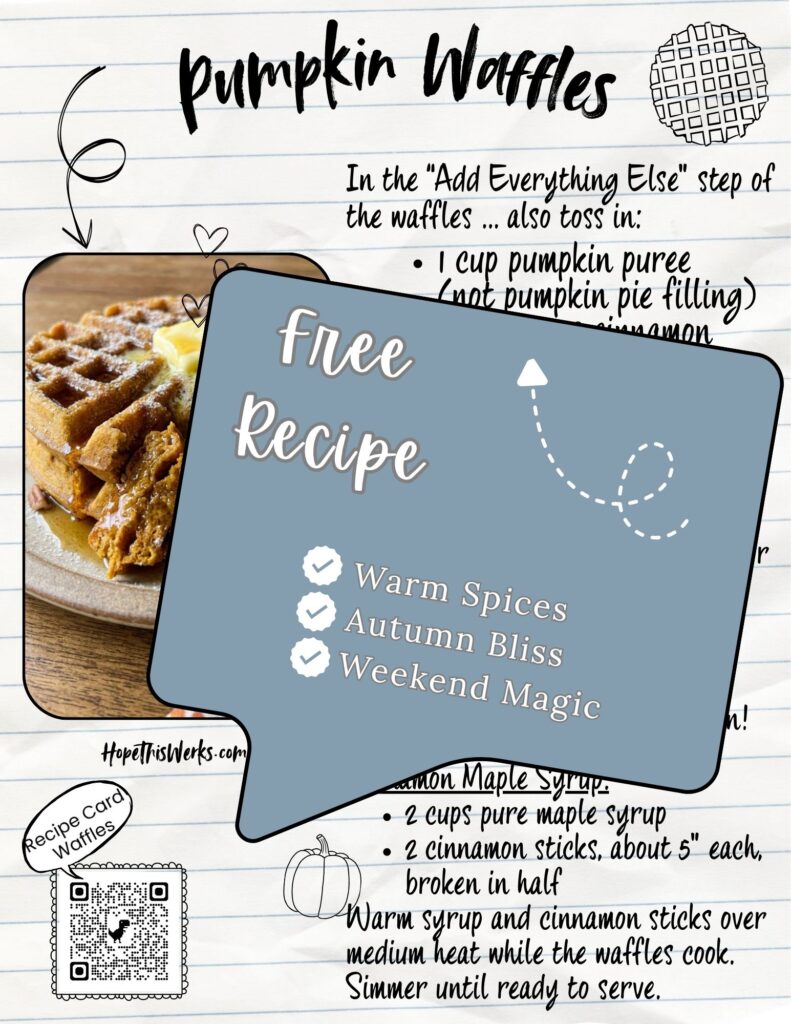
By the way, this recipe also makes some seriously delicious pumpkin waffles. They’re basically fall in waffle form. Want the recipe? You can grab my FREE Pumpkin Waffle Recipe right here.

Fresh Milled Flour Lovers … Time to Grind Some Wheat

If you’re making these with fresh milled flour, grab your soft white wheat berries and measure out 560 grams. That will be about 3 cups of wheat berries. Then, grind them finely in your grain mill. Once they’ve gone through the mill, you’ll end up with about 6 cups of fluffy flour.

For this fresh ground waffles recipe, however, don’t reach for hard wheat berries. You want soft white wheat. Hard wheat will create too much gluten, which changes the texture of the finished waffle. Instead of giving you that fluffy interior we’re after, you can end up with something much stiffer.

Here’s the little grain wisdom I use when deciding which wheat berry belongs in which recipe:

“Yeast/sourdough likes hard wheat. Baking soda/powder likes soft wheat.”

In other words, if your recipe calls for yeast/sourdough … like bread recipes, it generally wants the strength of hard wheat … while waffles, muffins, biscuits, and other quick breads (the recipe calls for baking soda/powder) prefer the gentler touch of soft wheat.

If you’re curious about choosing the right wheat berry for different recipes, I have a whole article that will walk you through the wheat-choosing process. Think of it as becoming a grain matchmaker. Because apparently, wheat berries have compatibility issues too.

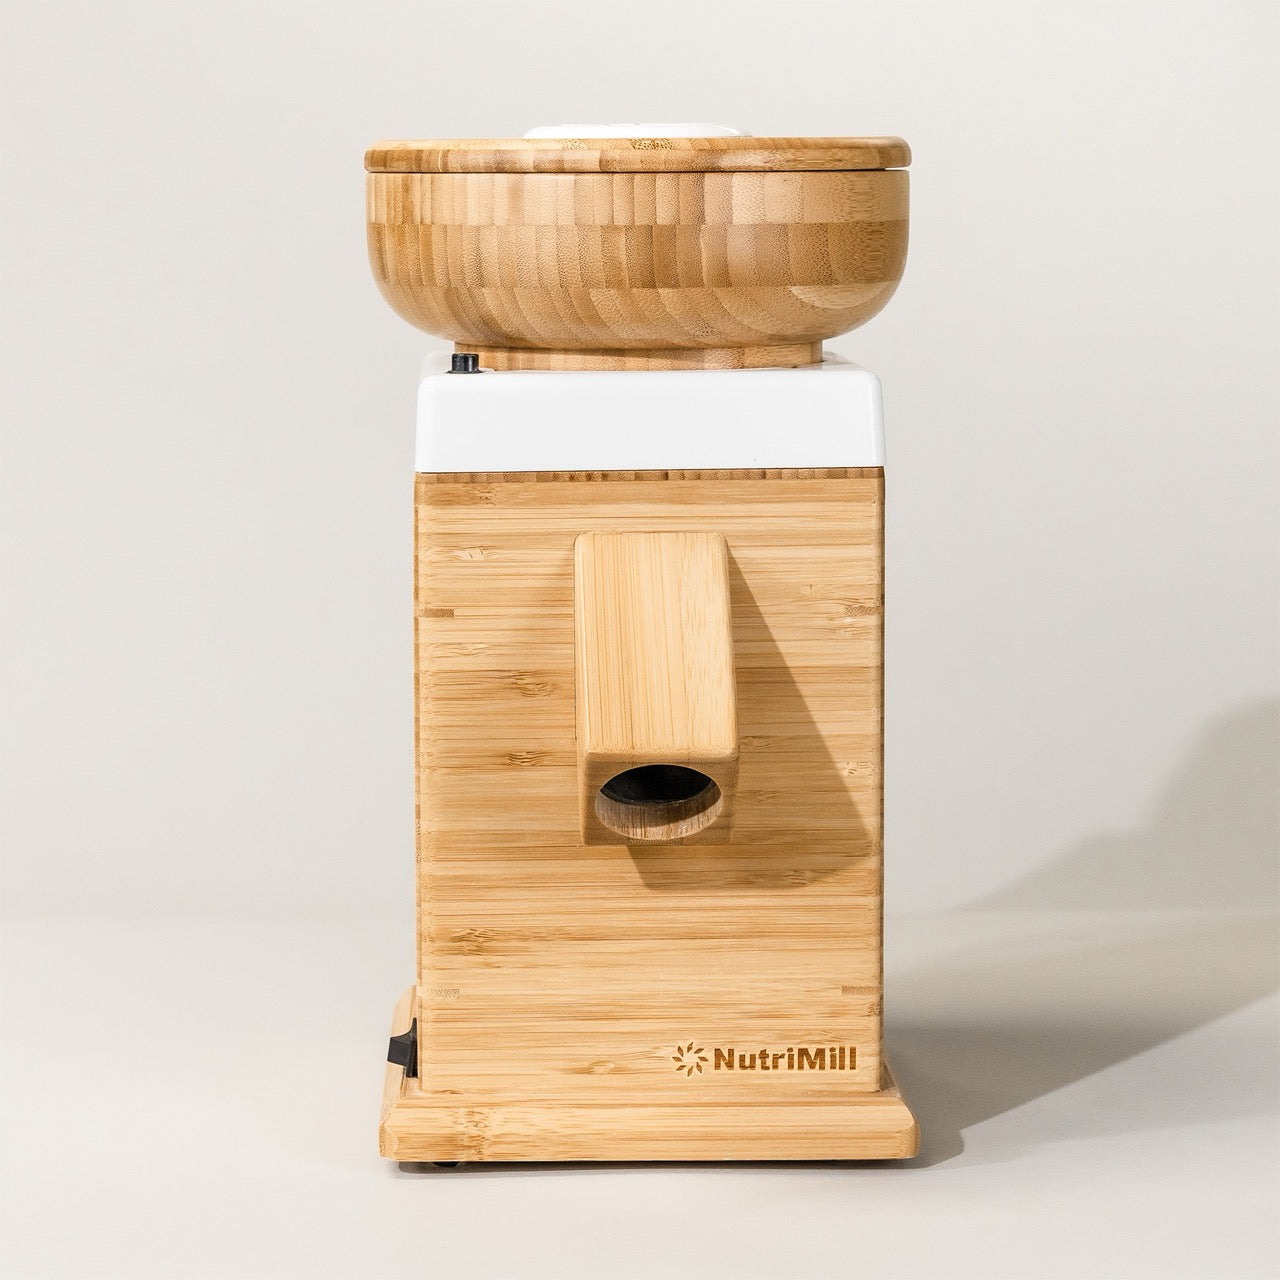
Grain mill to make fresh milled flour

Let’s Whisk Those Eggs

While your flour is grinding, you can get started on the eggs. Crack 4 eggs into the bowl of your mixer with the whisk attachment, and whisk them for about 2 minutes. The goal here is to incorporate some air into the eggs. That little bit of extra air will help give the inside of your waffles a soft, fluffy texture.

Meanwhile, I like to use room-temperature eggs whenever possible. Cold eggs can cause the melted butter to congeal when everything comes together, which can leave you with a chunkier-looking mixture.

That said, don’t let forgotten eggs derail breakfast. If you forgot to set them out ahead of time, you can absolutely continue with the recipe. Or, if you have a few extra minutes, place the eggs in a bowl of warm water for about 10 minutes to take the chill off.

Basically, room-temperature eggs are helpful … but they are not worth cancelling a waffle breakfast over.

Give Those Eggs a Bit of Sugar

Once your eggs are nice and fluffy, add ¼ cup of sugar. Then, give everything another good whirl for about 1 minute. This extra minute isn’t just the waffle batter equivalent of making the eggs do unnecessary cardio. It actually has a few jobs to do.

  1. First, whisking the sugar with the eggs helps incorporate a little more air, which contributes to a fluffier waffle. 

  2. At the same time, it helps dissolve the sugar and creates a smoother batter.

  3. Sugar also contributes to tenderness because it attracts and holds onto moisture. As a result, your finished waffles stay softer and more tender inside.

  4. Finally, sugar helps with browning. It encourages that beautiful golden-brown exterior that makes a waffle look like it knows exactly what it’s doing.

If you prefer, you can substitute honey for the sugar at a 1:1 ratio. Depending on the honey you use, you’ll get a subtle honey flavor in the finished waffles.

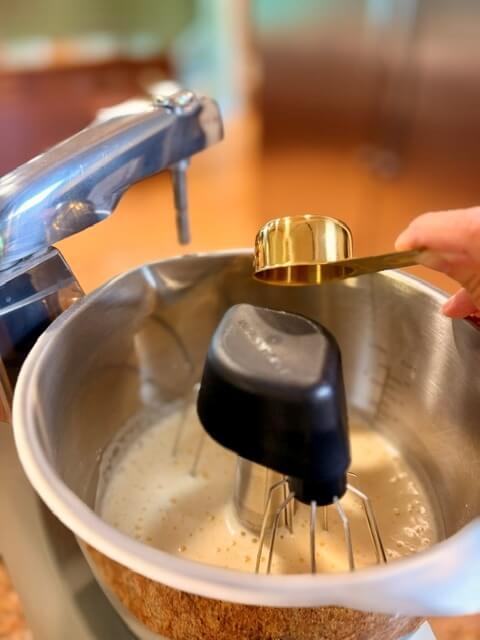
Sugar being added to mixed eggs in mixing bowl

Now Dump Everything Else In

Now comes the wonderfully glamorous part of the recipe: add a bunch of ingredients to the mixing bowl. Once the eggs and sugar have been whisked, add the remaining ingredients and mix just until everything is combined.

For these fresh milled flour waffles (or store flour), you’ll need:

  • 1–2 teaspoons of salt
  • 2 tablespoons of baking powder
  • 4 teaspoons of vanilla extract
  • 12 tablespoons of melted butter
  • 4 cups of milk
  • the fresh milled flour you ground earlier … or 4 cups of all-purpose flour if you’re using store-bought flour (If you’re using store-bought flour, be sure to use all-purpose flour rather than bread flour. Bread flour will give you a different texture because of its higher gluten-forming potential.)

If you still see a few lumps in your batter … congratulations! That’s actually a good thing. It means you didn’t overmix it.

Fresh Milled Flour Waffles: A Few Words About Salt

Saltiness can vary depending on the brand of salt you use. I personally use Redmond Real Salt because it contains trace minerals that can give it a slightly different and more complex flavor … but I tend to need a little bit more of it.

Morton’s iodized salt, on the other hand, is refined and has a cleaner, more straightforward salty taste.

Ultimately, there are plenty of options out there … so use what you love or what you already have sitting in the cabinet. I am not about to make you go on a midnight salt-shopping expedition for waffles.

Fresh Milled Flour Waffles: Vanilla Is Worth It

I make my own vanilla extract, and you can too. It’s incredibly easy to do and can save you a bunch of money over time.

Plus, homemade vanilla sitting in your pantry makes you feel like you have your life together … even if there are three loads of laundry waiting upstairs.

Fresh Milled Flour Waffles: What Milk Should You Use?

I like to use whole milk because it gives the waffles a nice richness, but pretty much any milk should work.

You could also use buttermilk if you’d like to add a little tang. 

If you need a dairy-free option, just be careful that the milk you choose isn’t sweetened. Otherwise, you may accidentally turn your waffle dreams into dessert before you even get to the toppings.

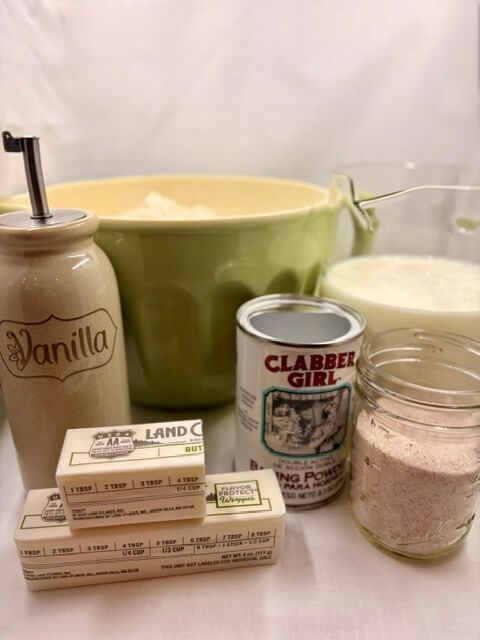
The ingredients for waffles on a white background

Let the Batter Take a Nap

At this point, your batter will probably look pretty thin. Don’t panic. That’s exactly what we expect.

Now, let the batter rest for 30 minutes.

If you’re using freshly milled flour, this rest time is especially important. Freshly milled flour needs time to soak up the liquid, and giving it those 30 minutes allows the flour to properly hydrate. Think of it like giving the flour a chance to wake up, look around, and figure out what’s happening before we ask it to become breakfast.

If you’re using store-bought flour, you could technically start cooking the batter right away. However, the flour won’t complain if you give it a few extra minutes to hydrate. In fact, a little resting time can be helpful.

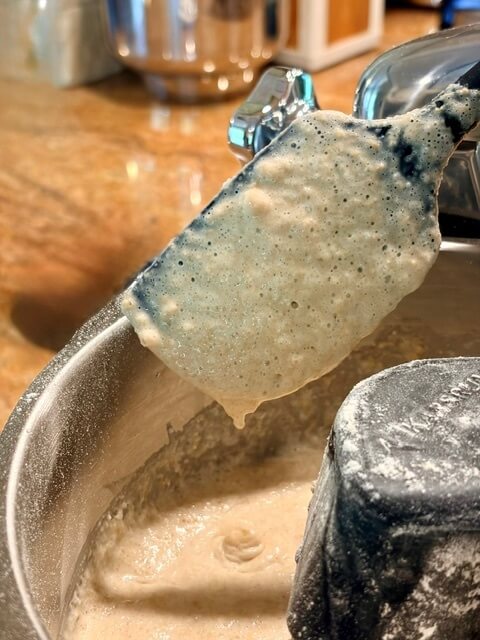
batter in a bowl and on a spatula

Want Waffles Tomorrow Morning? Make the Batter Tonight

If you want to make these waffles tomorrow morning, you can absolutely get a head start.

However, there’s one important change: wait to add the baking powder.

You want the baking powder to have all of its lifting power ready to go when you actually cook the waffles. So, add everything except the baking powder, mix gently, cover the bowl, and pop it into the refrigerator. Then, tomorrow morning, don’t forget to stir in the 2 tablespoons of baking powder before you start cooking.

The batter will be waiting for you in the fridge like a friend who showed up early and brought coffee.

Heat Up That Waffle Iron

While the batter is resting, this is the perfect time to preheat your waffle iron.

And here’s where I’ll tell you something that may save you some money: in my humble opinion, you do not need to spend hundreds of dollars on a waffle maker. I have an inexpensive waffle maker, and I think it does the job very well.

If you have a fancy waffle maker, however, hats off to you. I would genuinely love to hear what you love about it. I’m always willing to be convinced that the fancy kitchen gadget is worth it.

From what I understand, the biggest difference between inexpensive and expensive waffle makers is often the amount of control you get. It isn’t necessarily about whether one can make a waffle crispy and fluffy while the other cannot.

For these freshly milled flour waffles, I set my waffle iron to a hotter setting because I like my waffles crispy on the outside. Also, cooking them faster tends to help the inside stay fluffier. However, if you prefer a softer waffle, simply decrease the heat on your waffle iron.

Butter and Batter It Up

Once your waffle iron is piping hot and your batter has rested for 30 minutes, it’s time to get cooking.

First, slather some butter all over the waffle iron. I simply use a stick of butter and run it over the hot iron. Alternatively, you can melt the butter and use a brush to coat it.

Next, add some batter. However, don’t fill the waffle iron all the way to the brim. Leave a little room for expansion because the batter is going to puff up as it cooks.

Cook Until They’re Golden

Eventually, you’ll get to know your waffle maker and exactly how long it takes to reach your preferred level of crispiness.

Since I didn’t spend hundreds of dollars on mine, I cook my waffles for about 5 minutes. For me, that seems to be the sweet spot between a crispy exterior and fluffy interior. Most waffle makers will fall somewhere around 3½ to 6 minutes per waffle, depending on the machine and how crispy you like them.

And now for the most important waffle rule I can give you:

Don’t peek.

I know. I know. You want to look. I have done it too. One time, I lifted the lid while my waffle was still cooking, and it ripped the waffle right in half. The top of the waffle stayed with the top of the waffle maker, the bottom stayed on the bottom … and I had a very close encounter with the fluffy center of my waffle. That waffle had to be scrapped. Bummer.

Instead, look for the steam. As the waffle gets closer to being done, the steam coming from the waffle iron will slow down. That’s a much better signal than repeatedly opening the lid like you’re checking on a sleeping baby.

Between each waffle, let the waffle iron reheat for about 30 seconds. That way, each waffle gets a properly heated iron and a chance to be its very best self.

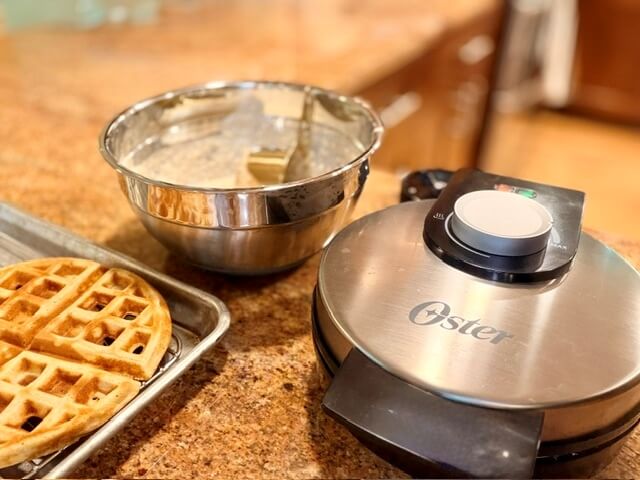
Waffle maker, bowl of batter and waffles on a wire rack

Keep ‘Em Hot

Now, if you can eat these waffles straight off the iron, do it. That is when they are at their most perfect, crispy, fluffy, wonderful state.

However, if you want to cook a whole batch before everyone sits down for breakfast, there’s a strategy. Preheat your oven to 200°F. Then, get out two sheet pans and place wire racks on top of them. As each waffle comes off the iron, place it directly onto the wire rack and put it in the oven. The wire rack allows air to circulate around the waffle, helping it stay warm and crispy.

Whatever you do, don’t stack the waffles on top of each other or put them on a plate. The steam will make them moist and soggy … and we have worked far too hard to create crispy waffles only to turn them into sad, floppy waffles.

fresh milled flour waffles on a wire rack

Crispy Tricks for the Crunch Lovers

If your waffles aren’t getting as crispy on the outside as you’d like, don’t worry. A few little adjustments can make a big difference.

First, make sure your waffle maker is piping hot before you add the batter. Then, let the waffle maker reheat for about 30 seconds between each waffle.

Also, cook the waffles until they’re golden rather than pale. Pale waffles are basically waffles that haven’t finished getting dressed yet.

Finally, don’t stack them. Eat them right away when possible, or place them single-file on a wire rack in a 200°F oven to keep them warm and crispy.

For easy reference, here are the crispy-waffle rules:

  1. Eat them right away. (Most effective rule!)

  2. Don’t stack them on top of each other. (Yucky soggy waffles.)

  3. Make sure your waffle maker is piping hot.

  4. Reheat the waffle maker between each waffle.

  5. Cook them until they are golden, not pale.

  6. Place them single-file on a wire rack in the oven. (If you need to wait to eat)

Fluffy Tricks for the Soft Inside

If your waffles are crispy on the outside but not as fluffy inside as you’d hoped, there are a few things to check.

First, make sure you’re using soft wheat berries rather than hard wheat berries if you’re milling your own flour.

Next, if you’re using store-bought flour, use all-purpose flour rather than bread flour.

Then, make sure you whisk the eggs well. Remember, we’re trying to incorporate air into them to help create that fluffy interior.

Also, whisk the sugar into the eggs as directed.

When you add everything else to the batter, be careful not to overmix. A few lumps are perfectly fine.

If you’re making the batter the night before, remember to wait until morning to add the baking powder so it has all of its lifting power ready when you cook the waffles.

Finally, cook the waffles faster rather than slower. A hotter waffle iron and shorter cooking time can help you get that wonderful combination of crispy outside and fluffy inside.

For a quick checklist:

  1. Use soft wheat berries, not hard wheat.

  2. Use all-purpose flour, not bread flour.

  3. Whisk the eggs well.

  4. Whisk the sugar into the eggs.

  5. Don’t overmix the batter when you add everything else.

  6. If you’re cooking them tomorrow, wait to add the baking powder.

  7. Cook them faster rather than slower.

Let’s Talk Toppings

Now we get to the really important stuff. Because honestly, one of the best things about waffles is that the waffle is basically a delicious little grid designed to hold toppings. You can go sweet, savory, simple, ridiculous, or somewhere in between.

For a classic breakfast, try:

  • Butter & Syrup
  • Peanut butter
  • Fresh fruit
  • Fruit sauce … such as strawberry or blueberry
  • Jam
  • Sauteed Apples
  • Lemon curd
  • Chocolate sauce
  • Caramel sauce
  • Nutella
  • Ice cream
  • Yogurt … especially a flavored variety

And if you’re feeling adventurous, try one of these savory combinations:

  • Fried Chicken & Hot Honey – Crispy chicken, hot honey, and a little butter.
  • Bacon, Egg & Cheddar – Crispy bacon, fried or scrambled egg, melted cheddar.
  • Avocado & Poached Egg – Mashed avocado, poached egg, salt, pepper, and a sprinkle of everything seasoning.
  • Pulled Pork & Coleslaw – BBQ pulled pork topped with creamy or tangy slaw.
  • Sausage & Gravy – Your favorite breakfast sausage gravy poured right over the waffle.
  • Caprese – Fresh mozzarella, tomato, basil, balsamic glaze, and a drizzle of olive oil. Suddenly your waffle is wearing linen pants and vacationing in Italy. 
  • Buffalo Chicken – Buffalo chicken, blue cheese or ranch, and green onions.
  • Smoked Salmon & Cream Cheese – Cream cheese, smoked salmon, red onion, capers, and dill.
  • Pizza Waffle – Marinara sauce, mozzarella, pepperoni, and Italian seasoning. You could even pop it under the broiler to melt everything.
  • Taco Waffle – Seasoned ground beef, shredded cheese, salsa, avocado, sour cream, and cilantro. It’s taco night, but with little waffle squares holding everything together. Honestly, I see no downside.

Want to take your waffles one step further? You can add a few extra goodies to the batter and turn them into my favorite pumpkin waffles. Click here to grab the FREE Pumpkin Waffle Recipe.

fresh milled flour waffle with fried chicken and hot honey o top

FAQ: But Wait … What About This?

What kind of wheat berries should I use for fresh milled flour waffles?

Use soft white wheat berries. They produce a lighter, more tender waffle. Avoid hard wheat berries because they can create too much gluten and give your waffles a stiffer texture.

Can I use store-bought flour instead of freshly milled flour?

Absolutely. Use 4 cups of all-purpose flour instead of the freshly milled flour. Just be sure to use all-purpose flour rather than bread flour for the best texture.

Why should I use room-temperature eggs for fresh milled flour waffles?

Room-temperature eggs help prevent the melted butter from congealing when it is mixed into the batter. Cold eggs can make the mixture look a little chunky. However, if you forget to warm them up, don’t worry … you can still make delicious waffles.

Can I substitute honey for sugar in fresh milled flour waffles?

Yes. You can substitute honey for the sugar at a 1:1 ratio. Depending on the honey you use, you’ll get a subtle honey flavor in the finished waffles.

What kind of milk can I use in fresh milled flour waffles?

Whole milk is my preference, but pretty much any milk should work. You can also use buttermilk for a little extra tang. For dairy-free waffles, use an unsweetened milk so the waffles don’t become too sweet.

Why does fresh milled flour waffles batter need to rest?

Freshly milled flour needs time to absorb the liquid in the batter. Letting the batter rest for 30 minutes gives the flour time to hydrate and helps create a better texture (removes any gritty feel).

Can I make the fresh milled flour waffles batter the night before?

Yes! If you want to make the waffles the next morning, mix everything except the baking powder, cover the bowl, and refrigerate it. Then, in the morning, stir in the 2 tablespoons of baking powder before cooking. You want the baking powder to have all of its lifting power ready when you cook the waffles. Adding it right before cooking helps give you the best rise.

How hot should my waffle iron be to cook fresh milled flour waffles?

For crispy waffles with a fluffy inside, I recommend using a hotter setting on your waffle maker. If you prefer softer waffles, decrease the heat.

How much batter goes in each fresh milled flour waffle?

This one depends on the size and shape of your waffle maker, so there isn’t one magic number that works for every machine. Start with enough batter to cover most of the cooking surface while leaving some room around the edges for the batter to expand.

For a standard 7-inch round or similar waffle iron … about ½ to ¾ cup of batter per waffle is a reasonable starting point. However, your particular waffle maker may need more or less. The first waffle is basically your test subject. Use it to figure out how much batter your machine likes without creating a waffle volcano all over your counter. Once you know how much your waffle maker holds, use that same amount for the rest of the batch. This will also help your waffles cook more evenly and finish in about the same amount of time.

How long should I cook fresh milled flour waffles?

Most waffles will take about 3½ to 6 minutes, depending on your waffle maker and how crispy you like them. I cook mine for about 5 minutes because that gives me the crispy outside and fluffy inside I’m looking for.

How do I know when my fresh milled flour waffles are done?

One helpful clue is the steam. As the waffle gets closer to being done, the steam coming from the waffle maker will slow down. You’ll also want the waffle to be golden rather than pale.

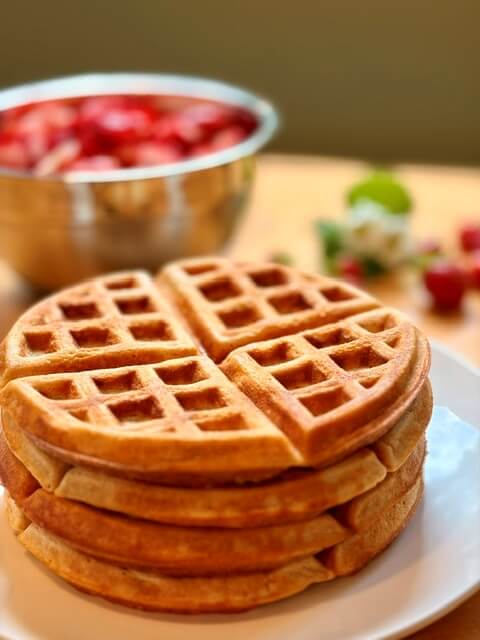
A stack of fresh milled flour waffles with strawberries in the background

Why should I let my waffle maker reheat between fresh milled flour waffles?

Letting the waffle maker reheat for about 30 seconds helps keep the cooking temperature consistent. That gives each waffle a better chance of becoming crispy and golden.

How do I keep fresh milled flour waffles warm and crispy?

Heat your oven to 200°F and place the cooked waffles on wire racks set over sheet pans. The wire racks allow air to circulate around the waffles. Avoid stacking them because the trapped steam can make them soggy.

Why aren’t my fresh milled flour waffles crispy?

For the crispiest results, eat them right away. Make sure your waffle maker is piping hot. Then, allow it to reheat between waffles and cook the waffles until they’re golden. Also, avoid stacking them. Keep them on a wire rack in a warm oven (if you need to wait to eat).

Why aren’t my fresh milled flour waffles fluffy inside?

Make sure you’re using soft wheat berries rather than hard wheat if you’re milling your own flour. Also, use all-purpose flour rather than bread flour if you’re using store-bought flour. Whisk the eggs and sugar well, avoid overmixing the batter, and make sure you’re using fresh baking powder.

Are fresh milled flour waffles the same batter as pancakes?

They have many of the same ingredients, but the ratios are a bit different. So, while they’re definitely related, waffle batter and pancake batter aren’t quite twins.

How long is fresh milled flour waffles batter good for?

If you have leftover batter, cover it tightly and keep it refrigerated. For the best quality, I recommend using it within 24–48 hours. Waffle batter contains eggs and milk … so it needs to stay refrigerated rather than hanging out on the counter. Also, it will lose some of its leavening power to puff up those waffles.

What is the difference between fresh milled flour waffles and Belgian waffles?

Belgian-style waffles are typically thicker, lighter, and have much deeper pockets than traditional American-style waffles. So I’m told … there are actually two traditional Belgian styles: Brussels Waffles, which are light and crisp with deep pockets … and Liège Waffles, which are made from a richer, yeast-raised dough with pearl sugar that caramelizes as it cooks. The thick Belgian waffle you commonly see in American restaurants is more closely related to the Brussels style. 

What can I put on fresh milled flour waffles?

You can go sweet or savory. Try berries and whipped cream, peanut butter, fruit sauce, jam, lemon curd, chocolate or caramel sauce, Nutella, ice cream, or yogurt. For savory waffles, try bacon and eggs, chicken and hot honey, sausage and gravy, pulled pork and coleslaw, buffalo chicken, smoked salmon, pizza toppings, or taco toppings.

The Final Waffle Word

This fresh milled flour waffles recipe is so easy that I think you’ll find yourself making it again and again. And not just for breakfast. Once you realize that waffles can handle everything from strawberries and whipped cream to pulled pork, buffalo chicken, and tacos … breakfast-only waffles suddenly become a very flexible concept.

You could have a waffle party! Set out a whole bunch of toppings and let everyone decorate their own waffle. It’s a meal and an activity all rolled into one. Plus, nobody can complain about the toppings because they picked them themselves.

This is really a no-fuss recipe that gives you reliable, consistent results. It uses simple ingredients that you probably already have in the house. In fact, I was at my daughter’s house yesterday, and she was running low on groceries. So, naturally … it was waffles for dinner. And honestly? That sounds like an awesome dinner to me.

Whether you make waffles with freshly milled flour (or store flour) for a weekend breakfast … make waffles for dinner … or simply pull out the waffle maker because everyone needs a little breakfast-for-dinner therapy once in a while, I hope this recipe becomes one you come back to.

Last Few Tidbits

Before you fire up the waffle maker … take a little time to wander around Hope This Werks. You’ll find plenty of recipes, guides, and tutorials to help you make things from scratch without making your kitchen feel like a science experiment. 

And if you make these waffles with freshly milled wheat (or store-bought flour), I’d love to hear what you put on top. Did you keep it classic with berries and whipped cream? Or create something completely unhinged that somehow turned out to be amazing? Leave a comment, tag me on Instagram (@hopethiswerksdiy), come hang out with me on Facebook, or wander over to YouTube.

And don’t forget to grab your FREE Pumpkin Waffle Recipe! Because sometimes a perfectly good waffle just needs a little pumpkin to reach its full fall potential. 

Until next time, may your waffles be crispy on the outside, fluffy in the middle, and topped with exactly what your heart … and your waffle squares … desire.

Yield: 11 Waffles

Waffles with Fresh Milled Flour

Fresh Milled Flour Waffles with strawberries and whipped cream on a white plate
5.0 Stars (1 Review)

No-fuss waffles with irresistibly crispy edges, fluffy insides, and a golden finish. They’re simple to make, ready in minutes, and guaranteed to make breakfast feel a little more exciting.

Ingredients

Instructions

  1. Grind the Flour:Grind your soft white wheat berries into fine flour. Fresh flour, coming right up!
    560g soft white wheat berries
  2. Whisk the Eggs: Add eggs to your mixing bowl and whisk for 2 minutes to add some air.
    4 eggs
  3. Add the Sugar: Add sugar and whisk for 1 more minute.
    ¼ cup sugar
  4. Add Everything Else: Add salt, baking powder, vanilla, butter, milk, and flour. Mix just until combined. A few lumps? Perfect.
    2 tsp salt, 2 tbsp baking powder, 4 tsp vanilla, 12 tbsp butter, 4 cups milk, ground flour
  5. Let It Rest: The batter will look thin. That's okay! Let it rest for 30 minutes so the fresh-milled flour can soak up all that liquid. It will thicken as it rests.
  6. Heat Things Up: While the batter rests, preheat your waffle iron. For crispier waffles, use a higher heat setting.
  7. Butter and Batter It Up: Right before cooking, grease the waffle iron with butter. Add batter, but don't fill it to the brim ... it needs room to puff up.
  8. Cook Until Golden: Cook for 3½–6 minutes ... depending on your waffle maker and how crispy you like them. Don't peek! The steam will slow down when they're getting ready. Opening the iron too early can tear your waffle apart. Between waffles, give the iron about 30 seconds to reheat.
  9. Keep 'Em Hot: They're at their crispy best hot off the press. Need to keep them warm? Place them in a 200°F oven on a wire rack.

Notes

  • Eggs: Cold eggs are totally fine! But you also could ... set them in a bowl of warm water for about 10 minutes to take the chill off.
  • Salt: Saltiness varies by brand. I use 2 teaspoons of fine Redmond Real Salt. If you're using a saltier brand ... you may want a little less.
  • Cook Time: Waffle makers are all a little different. Fancier ones may cook your waffles faster!
  • Make It Tomorrow: Want to prep the batter the night before? Mix everything except the baking powder and refrigerate overnight. Add the baking powder right before cooking.
  • Storage: Refrigerate for up to 3 days or freeze for up to 3 months.
  • Reheat: Pop them in the toaster or warm in a 350°F oven for 5–10 minutes.
  • Pumpkin Waffles: By the way, this recipe also makes some seriously delicious pumpkin waffles. Want the recipe? You can grab my FREE Pumpkin Waffle Recipe right here.

Recommended Products

As an Amazon Associate and member of other affiliate programs, I earn from qualifying purchases.

Yield: 11 Waffles

Waffles with Store-Bought Flour

A stack of fresh milled flour waffles with strawberries in the background
5.0 Stars (1 Review)

Crispy on the outside, fluffy on the inside, and made with good old all-purpose flour. An easy, no-fuss waffle recipe for breakfast, brunch, or whenever waffles sound like a good idea.

Ingredients

Instructions

  1. Whisk the Eggs: Add eggs to your mixing bowl and whisk for 2 minutes to add some air.
    4 eggs
  2. Add the Sugar: Add sugar and whisk for 1 more minute.
    ¼ cup sugar
  3. Add Everything Else: Add salt, baking powder, vanilla, butter, milk, and flour. Mix just until combined. A few lumps? Perfect.
    2 tsp salt, 2 tbsp baking powder, 4 tsp vanilla, 12 tbsp butter, 4 cups milk, 4 cups flour
  4. Let It Rest: The batter will look thin. That's okay! Let it rest for 30 minutes. It will thicken a bit as it rests.
  5. Heat Things Up: While the batter rests, preheat your waffle iron. For crispier waffles, use a higher heat setting.
  6. Butter and Batter It Up: Right before cooking, grease the waffle iron with butter. Add batter, but don't fill it to the brim ... it needs room to puff up.
  7. Cook Until Golden: Cook for 3½–6 minutes ... depending on your waffle maker and how crispy you like them. Don't peek! The steam will slow down when they're getting ready. Opening the iron too early can tear your waffle apart. Between waffles, give the iron about 30 seconds to reheat.
  8. Keep 'Em Hot: They're at their crispy best hot off the press. Need to keep them warm? Place them in a 200°F oven on a wire rack.

Notes

  • Eggs: Cold eggs are totally fine! But you also could ... set them in a bowl of warm water for about 10 minutes to take the chill off.
  • Salt: Saltiness varies by brand. I use 2 teaspoons of fine Redmond Real Salt. If you're using a saltier brand ... you may want a little less.
  • Cook Time: Waffle makers are all a little different. Fancier ones may cook your waffles faster!
  • Make It Tomorrow: Want to prep the batter the night before? Mix everything except the baking powder and refrigerate overnight. Add the baking powder right before cooking.
  • Storage: Refrigerate for up to 3 days or freeze for up to 3 months.
  • Reheat: Pop them in the toaster or warm in a 350°F oven for 5–10 minutes.
  • Pumpkin Waffles: By the way, this recipe also makes some seriously delicious pumpkin waffles. Want the recipe? You can grab my FREE Pumpkin Waffle Recipe right here.

Recommended Products

As an Amazon Associate and member of other affiliate programs, I earn from qualifying purchases.

Charts: Fresh Milled Flour Waffles

Fresh Milled Flour Waffles: Quick Recipe Guide
Category Details
Waffle type Crispy outside, fluffy inside, easy homemade waffles
Fresh-milled flour 560 g soft white wheat berries, about 3 cups; yields about 6 cups flour
Store-bought flour 4 cups all-purpose flour; do not use bread flour
Eggs 4 eggs, whisked for 2 minutes
Sugar 1/4 cup; honey may be substituted 1:1
Milk 4 cups; whole milk preferred; buttermilk also works
Butter 12 tablespoons, melted
Vanilla 4 teaspoons
Salt 1–2 teaspoons
Baking powder 2 tablespoons
Batter rest 30 minutes; especially important for freshly milled flour
Waffle iron Preheat well; hottest setting recommended for crispy waffles
Cooking time About 3 1/2–6 minutes; about 5 minutes for the author's waffle maker
Best texture Crispy outside and fluffy inside
Fresh Milled Flour vs. Store-Bought Flour
Feature Fresh Milled Flour Store-Bought Flour
Flour choice Soft white wheat All-purpose flour
Amount 560 g wheat berries, about 3 cups 4 cups flour
Grinding Grind finely No grinding needed
Resting 30 minutes is important for hydration Can cook immediately, but resting still helps hydration
Do not use Hard wheat berries Bread flour
Fresh Milled Flour Waffles: Step-by-Step
Step What to Do Why It Matters
1. Grind Grind 560 g soft white wheat berries finely Provides fresh milled flour for the waffles
2. Whisk eggs Whisk 4 eggs for 2 minutes Incorporates air for a fluffy interior
3. Add sugar Add 1/4 cup sugar and whisk 1 minute Helps dissolve sugar, add air, improve tenderness and browning
4. Add ingredients Add flour, milk, butter, vanilla, salt and baking powder Creates the waffle batter
5. Mix gently Mix only until combined; a few lumps are fine Prevents overmixing
6. Rest Let batter rest 30 minutes Allows fresh milled flour to absorb liquid
7. Preheat Heat waffle maker while batter rests A hot iron helps create crispy waffles
8. Butter Coat hot waffle iron with butter Helps prevent sticking and adds flavor
9. Add batter Fill waffle iron without overfilling Leaves room for batter to expand
10. Cook Cook about 3 1/2–6 minutes Cook until golden and crispy
11. Reheat Let iron reheat about 30 seconds between waffles Helps each waffle cook consistently
How to Make Crispy Waffles
Problem What to Do
Waffles aren't crispy Eat them right away; this is the best insurance for crispy waffles
Waffles become soggy Don't stack them; trapped steam makes waffles soggy
Iron isn't hot enough Make sure the waffle maker is piping hot before adding batter
Later waffles aren't as crispy Reheat the waffle maker for about 30 seconds between waffles
Waffles are pale Cook until golden rather than pale
Need to keep waffles warm Place waffles single-file on a wire rack in a 200°F oven
How to Make Fluffy Waffles
Problem Check This
Dense waffles Use soft wheat berries rather than hard wheat
Store-bought flour waffles are dense Use all-purpose flour rather than bread flour
Not enough lift Whisk the eggs well to incorporate air
Egg mixture isn't fluffy Whisk the sugar into the eggs for another minute
Tough waffles Do not overmix the batter
Making batter ahead Wait until morning to add baking powder
Waffles aren't fluffy enough Try a hotter waffle iron and shorter cooking time
Make-Ahead Waffle Batter
When What to Do
Night before Mix everything except baking powder
Refrigerate Cover batter and refrigerate overnight
Next morning Stir in 2 tablespoons baking powder
Cook Preheat waffle maker and cook as directed
Fresh Milled Flour Waffle Topping Ideas
Sweet Savory
Butter and maple syrup Fried chicken and hot honey
Fresh berries and whipped cream Bacon, egg and cheddar
Fruit sauce Avocado and poached egg
Jam Pulled pork and coleslaw
Lemon curd Sausage and gravy
Chocolate or caramel sauce Caprese
Nutella Buffalo chicken
Ice cream Smoked salmon and cream cheese
Mascarpone Pizza waffle
Yogurt Taco waffle
Fresh Milled Flour Waffles: Quick Answers
Question Short Answer
Are fresh milled flour waffles the same as pancakes? They use many of the same ingredients, but the ratios are different.
What wheat should I use? Soft white wheat berries.
Can I use regular flour? Yes. Use 4 cups of all-purpose flour.
Why rest fresh milled flour waffle batter? The flour needs time to absorb the liquid and hydrate.
How long should waffle batter rest? 30 minutes.
Can I make the batter the night before? Yes. Mix everything except baking powder and refrigerate.
When should I add baking powder? Add it immediately before cooking if making the batter ahead.
How long do waffles take to cook? About 3 1/2–6 minutes, depending on the waffle maker.
How do I make waffles crispy? Use a hot waffle maker, cook until golden, don't stack, and eat immediately when possible.
How do I keep waffles crispy? Keep them single-file on a wire rack in a 200°F oven.
How do I make waffles fluffy? Use soft wheat, whisk eggs well, avoid overmixing, and cook quickly on a hot iron.
What can I put on waffles? Sweet toppings include fruit, syrup and whipped cream; savory options include chicken, bacon and eggs, sausage gravy, pizza and tacos.

If this post made you smile, help me keep my grain mill spinning and my apron permanently dusty … tip me with this link. Thanks, you’re the best!

Share the Post:

6 responses to “Fresh Milled Flour WAFFLES Made Easy (or store flour)”

  1. Excited to try this recipe! Do you ever have the butter clump up on you when you make waffles? If so, how do you stop that from happening?

    • So excited for you to try it! And yes, butter clumping is such a common one … it almost always happens when melted butter hits cold eggs or milk and re-solidifies into little bits. The fix: let your melted butter cool slightly, then stream it in slowly while whisking, or temper it by stirring in a spoonful of the wet ingredients first before adding the rest. Also make sure your eggs/milk aren’t fridge-cold. Happy waffle making!

  2. These are by far the best waffles I have ever had. They have the buttery crisp of a croissant on the outside while being fluffy in the inside! Waffle perfection!

  3. I can eat waffles every single day. Crispy and fluffy is my favorite combination. Thanks very much for a great recipe.

Leave a Reply

Your email address will not be published. Required fields are marked *

Skip to Recipe