
Is it possible to do a teak furniture restoration to get rid of that old and gray look? Good news – Yes! Teak furniture, known for its durability and beautiful golden hue, is a popular choice for outdoor furniture. However, exposure to the elements can cause it to weather and turn a silvery-gray color. While some people appreciate this natural patina, others prefer the warm, rich tones of freshly finished teak. If you fall into the latter category, this guide will help you restore your weathered teak furniture to its former glory. For illustration, I will walk through restoring a set of chairs that I purchased on Facebook Marketplace.
Background:
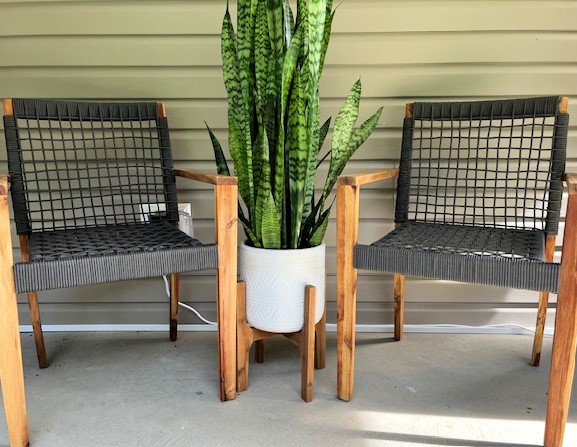
Why did I purchase a weathered set of teak chairs? My back porch needed to be updated. Have you ever looked at a portion of your house and suddenly seen it differently? That’s what happened to my back porch. My furniture had served us well and probably had more life left in it. One day, I looked at it and it hit me like lightning that it was dated. I couldn’t stop thinking about the stain on that one cushion. That set was always a smidge too big for that area. It needed a spring cleaning it, and where the fake rattan wove together … dirt loved to snuggle in there and no amount of cleaning could get rid of it. Yesterday, this furniture was fine. Today, I need to fix this problem. I feel like I can’t get rid of it fast enough.
(enter) Facebook Marketplace. I started searching for cute outdoor furniture. Nope, Nope, Nope, Nope …. definitely Yes! These cute teak chairs were perfect for me even though they had a silver-gray patina. Basically, I am saying that I wanted to exchange my outdated outdoor furniture for someone else’s outdated outdoor furniture. But these chairs were made out of teak. I am a sucker for anything made out of real wood. I can restore a piece of wood! Ideally, I would rather the chairs display their former golden hue majesty. Not a problem! I own a sander.

Why is teak used for outdoor furniture?
Before we dive into the restoration process, let’s take a moment to applaud teak. Teak is prized for outdoor furniture because:
-
- it contains natural oils that repel water and insects, reducing the need for chemical treatment (yay for teak)
-
- it is durable and resistant to mildew and rot (gotta love that)
-
- it is a luxurious golden-brown color and has a fine wood grain (helloooo teak)
What a beautiful choice for outdoor furniture!
Materials you will need:
-
- bucket of water
- microfiber rags
- vinegar, optional
- vacuum cleaner, maybe
- sandpaper (220 and 150 grit)
- sander
- teak oil (or in my case, danish oil)
Step 1 (of your teak furniture restoration)
Clean the chairs.
Specifically, I focused on the bird poop. I am not unique. Certainly, nobody enjoys touching bird poop. Fun fact, I have an uncanny way of becoming the loo for birds. What is it about me? I washed each chair with warm water and a microfiber rag. I then let the chairs sit overnight to dry completely. You don’t have to wait overnight, just long enough that your furniture no longer has any moisture in it.
If your furniture is particularly dirty, add a dash of vinegar to your water (up to one cup of vinegar for a gallon of water). I don’t recommend using a pressure washer, that is too harsh and can damage your furniture. (Trust me, I gouged the top of a table because I tried cleaning it with my pressure washer. Oops!) You want to be thoughtful about not stripping the natural oils in the wood. For that reason, don’t use any harsh chemicals (i.e., bleach).
Step 2 (of your teak furniture restoration)
Repair the chairs.
If you need to repair areas of your furniture, now is the time. Unfortunately, I sometimes forget to fix my furniture at this point. That is disappointing because I usually have to get my sander out an additional time (sad face).
Step 3 (of your teak furniture restoration)
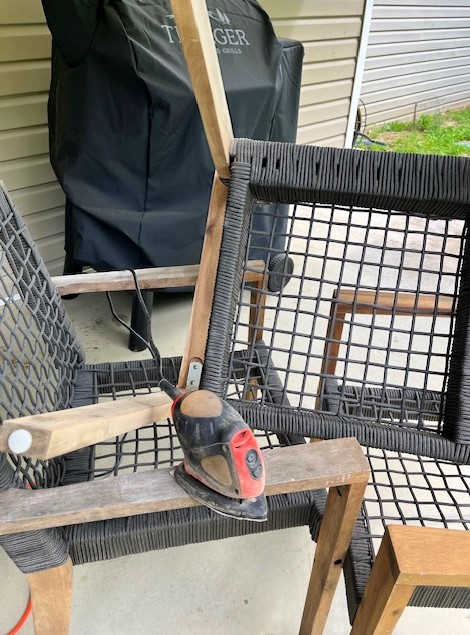
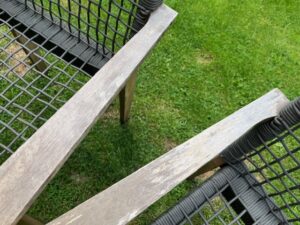
Sand the chairs.
At this point, I suggest that you wear a mask. This is up to you. My mom would yell at me if I didn’t remind you to wear a mask (she loves you and wants you to be safe). Maybe you would want to consider safety goggles too (right, Mom!)?
I used a corner palm sander. I could not take the seat cording off the chairs. Therefore, I needed a sanding tool that could get very close to the cord. The triangle head on the sander worked perfectly.
Initially, I tried using 220-grit sandpaper. As a little reminder, don’t forget to sand in the direction of the wood grain (if you are hand sanding). The 220-grit wasn’t doing it. It wasn’t taking off enough of the weathered wood. Next, I tried using 150-grit sandpaper. The extra grit is exactly what I needed. I sanded the wood down to expose the raw golden teak underneath. Another little reminder is, the higher the grit number means it is less abrasive, which creates a smoother surface. The lower the grit number means it is more abrasive, which aggressively scrapes off the gray patina faster (i.e., 150 is more aggressive than 220).
Overall, I had six chairs that I was restoring. When you restore so many similar pieces it can be easy to forget what sections you have and have not completed. Therefore, as I sanded each chair, I had a system (all four sides of the left front leg, all four sides of the right front leg, top of the armest, flip the chair upside down to sand the bottom of the armrest, etc.). I needed to ensure that each chair was fully sanded.
Step 4 (of your teak furniture restoration)
Get a drink and a snack. How about a cold glass of homemade shrub (maybe a recipe will be coming in post)?
Step 5 (of your teak furniture restoration)
Sand the chairs again.
This time, I used the 220-grit sandpaper to give the chairs a nice finish. I ran my hand over the wood to make sure it felt smooth and nice to the touch.

Step 6 (of your teak furniture restoration)
Clean the chairs.
I wiped down each chair with a microfiber rag. I did not need to use water this time. If you do need to use water, be sure to let it dry completely before proceeding. I also vacuumed the seat cording because it was dusty.
Step 7 (of your teak furniture restoration)
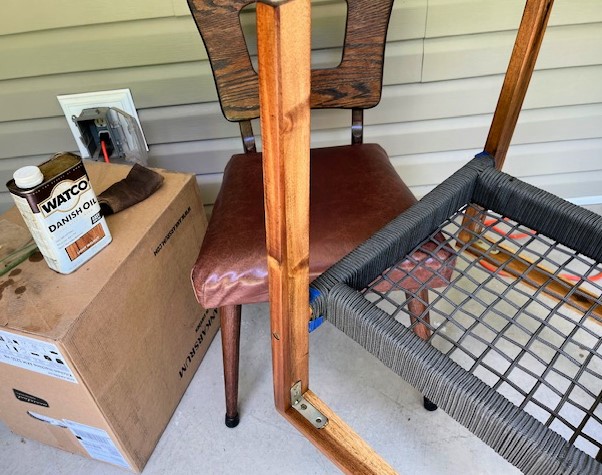
Apply teak oil.
Just an idea, test the teak oil out in an inconspicuous place on your piece of furniture. After all, you want to make sure it looks how you dreamed.
Apply teak oil, and allow it to dry for 15 minutes. Repeat applications of teak oil until the wood is saturated (maybe 3 coats?). Once it is saturated, allow it to permeate the wood for another 24 hours before you use it. If you find that the surface of your furniture is not as smooth as you desire, you may sand between coats of teak oil. Subsequently, you may have to add an extra coat or two of teak oil. You will want to read YOUR can of teak oil for specific instructions.
OK, I admit that I didn’t obey this step. My friend gave me a jug of Danish oil before she moved across the country. I researched and decided it would be acceptable for me to use this. I love using supplies that I already own.
At any rate, if you use Danish oil, follow these steps:
-
- shake the oil container
- test the oil on an inconspicuous section of the wood
- put gloves on
- soak a microfiber rag with Danish oil
- apply
- allow to penetrate for 15 minutes
- reapply
- allow to penetrate for 15 minutes
- reapply again
- allow to penetrate for 15 minutes
- wipe the surface completely dry
- wait for 10 hours to use
- At this time, some people may choose to topcoat with polyurethane. If that is your desire, then allow the Danish oil to dry for 72 hours. Please note that, I did not apply polyurethane to my chairs. The chairs are under a roof and won’t be directly exposed to the elements. If they were not going to be protected from the elements, then I would have applied polyurethane.
Step 8 (of your teak furiture restoration)
Cover your furniture.
You might want to consider covering your furniture if it will be directly exposed to the elements. Purchasing a tailored cover or using an extra bed sheet will prolong the life of your finish.
Step 9 (of your teak furniture restoration)
Enjoy your restored teak furniture! Have your friends over for a BBQ.
How much did this cost?
I paid $100 for the chairs. The sander and sandpaper were in my shed. The Danish oil was from my friend. Overall, it only cost me one hundred bucks. I researched and found chairs similar to mine. To buy six brand new chairs it would have cost me $750. That is a savings of $650!
How often does teak need to be oiled?
It depends on the exposure to the elements. As soon as the piece of furniture shows signs of weathering, you should treat it. Sand the furniture with 220-grit sandpaper. Then, apply 2-3 coats of oil (following the instructions above).

Conclusion
Restoring a weathered teak outdoor piece of furniture is a rewarding project that can breathe new life into your outdoor space. With a bit of elbow grease and maintenance, your teak furniture can look beautiful and serve you well for many years. So, roll up your sleeves and get ready to restore your teak furniture.
If you are in the mood for another fum DIY adventure, check out this guide on how to whip up your own homemade tallow balm … your skin will thank you!


One response to “Teak Furniture Restoration: A Step-by-Step Guide”
I feel inspired to refinish my outdoor furniture. Thanks