


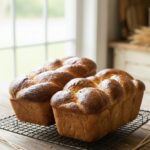
Challah Bread (freshly milled flour + sourdough)

This sourdough challah made with freshly milled flour is tender, buttery, and full of depth ... surprisingly simple but show-stopping.
Ingredients
Levain
- 2-3 tbsp (30g) sourdough starter
- ½ cup (113g) room temperature water
- ¾ cup (90g) flour
Dough
- ¼ cup (85g) honey (sugar works too)
- 4 eggs
- 1½ tsp salt
- ½ cup (120g) milk (whole is great, but whatever is lurking in your fridge is fine)
- 1 cup (2 sticks) butter, softened
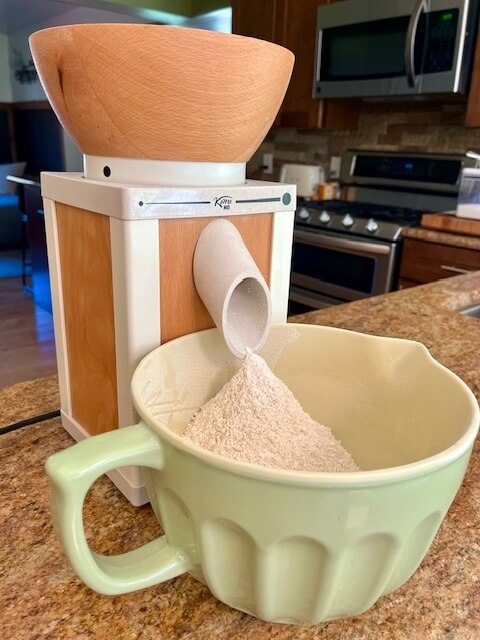
- 2¼ cups (415g) hard white wheat berries, ground finely
- ⅓ cup (70g) hard red wheat berries, ground finely
Instructions
- Levain: Combine your starter, water, and flour in a container. Mix until it's a thick, smooth paste ... like cozy porridge. Cover it up and let it snooze on the counter for about 12 hours to get bubbly and ready. (3 tbsp sourdough starter, ½ cup water, ¾ cup flour)
- Add Stuff: Add your levain + all of the remaining ingredients (except the flour) to a mixing bowl. Give that a whirl. (¼ cup honey, 4 eggs, 1½ tsp salt, ½ cup milk, 1 cup butter,)
- Freshly Milled Flour: Grind those wheat berries nice and fine. Gradually sprinkle in the flour until the dough is soft and slightly sticky ... it should be on the wetter side. (2 ¼ cup hard white, ⅓ cup hard red ... or go all hard white or all hard red)
- Knead: Knead for 8 minutes, rest for 30 minutes, knead another 8 minutes (add more flour now, if needed).
- Stretch-and-Fold (x4): Let the dough relax for 20 minutes, covered. Imagine a compass. Grab the North side, stretch it up high, and fold it over the center. Repeat this from the South, East, and West sides. Cover the dough and let it rest for another 20 minutes. That's one set! You need to repeat this entire stretch-and-fold cycle four times total (or until you get it to windowpane).
- Rest: Cover and let the dough rise peacefully for 30 minutes to 2 hours. The dough should look slightly puffy. You have a little flexibility here ... when it's convenient for you, move on to shaping.
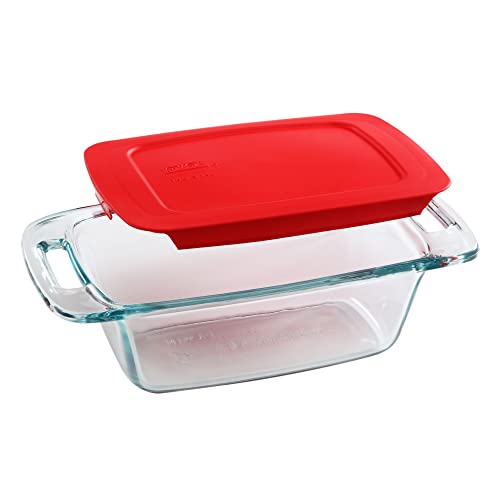
- Shape: Split the dough into two equal large portions. Now, divide each of those large portions into 3 equal smaller pieces (you should have 6 pieces total). Roll each of these 6 pieces into a long, skinny strand about 14" long (relive your playdough days). Braid 1: Take 3 strands and make your braid. Pinch them firmly at the starting end and the finished end to keep them together. Fold the ends under neatly and place the finished braid into a greased loaf pan. (I use a Pyrex 1.5-Quart glass loaf pan.) Braid 2: Repeat the same process with the remaining three strands and place that braid in the second loaf pan.
- Final Rise: Cover the loaves and let them rise until they are approximately doubled in size. (Slow Option: Or, if you aren't ready to bake ... you can pop the covered pans in the fridge at this point for a slow rise.)
- Bake: Preheat the oven to 425°. Brush the top of the dough with an egg wash (1 egg mixed with 1 tbsp water). Bake for 15 minutes. Reduce the temperature to 375° and bake for 20-30 minutes more. You're looking for an internal temperature of 190°. Too Toasty? If the top starts getting too dark too fast, create an aluminum foil dome and gently place it over the bread.
- Cool Down: Let the loaves sit in the pan for 5 minutes. Carefully transfer them to a cooling rack to cool completely.
- Enjoy! Don't forget to save a slice or two ... challah makes the yummiest french toast.
Notes
Shaping:
- Do I have to braid it? No, if you're feeling more "chill" than "skill" today, you can shape this into a standard loaf.
- Can I make 2, 3, 4, or 5-strand braids? Yes, please. Go wild! Just tag me on Instagram ... I'm obsessed with your beautiful creations.
- Do I have to use a pan? Nope! You’re welcome to free-form the loaf right on a parchment-lined baking sheet.
Bake:
- Set a timer! Check your bread after 20 minutes.
- Because of the eggs and sugar ... challah can get a "sunburn" very quickly. If it's looking a little too bronzed, simply pop an aluminum foil hat over the top.
Storage:
- Keep it in an airtight container or bag right on the counter.
- Never, ever bag a warm loaf!
- Slice-as-you-go.
- Peak Freshness (days 1-2). Toasting Phase (days 3-4). French Toast Prime (days 5-7).
Freeze:
- If you won't finish both loaves in a few days ... challah freezes like a dream!
- Wrap a cooled loaf up, and it'll stay perfect in the freezer for a few months. It's like a gift to your future self.
What can I do with Challah?
- Ultimate Bread Pudding
- French Toast
- Gourmet Grilled Cheese
- Fancy Burger Bun
- Savory Strata (think spinach, sausage, eggs, and plenty of cheese)
- Buttery Croutons
- Thanksgiving-Style Stuffing (my absolute favorite thing to do with challah ... a major crowd-pleaser)
Timeline (ish):
- Thursday 8 PM: Mix levain.
- Friday 7:30 AM: Mix and knead dough
- 8:30 AM: stretch-and-folds every 20 minutes
- 10:30 AM: dough rests until puffy
- 12:30 PM: shape and braid
- 1 PM: final rise (2–4 hours)
- 4 PM: bake
- 4:30 PM: cool before slicing
Recommended Products
As an Amazon Associate and member of other affiliate programs, I earn from qualifying purchases.


Challah Bread (freshly milled flour + yeast)
This yeast-raised challah uses freshly milled flour for a loaf that’s tender, flavorful, and sure to impress anyone at the table.
Ingredients
- 1 cup (240g) warm water
- 2 tsp yeast (active dry or instant/bread machine)
- ¼ cup (85g) honey (sugar works too)
- 4 eggs
- 1½ tsp salt
- ½ cup (120g) milk (whole is great, but whatever is lurking in your fridge is fine)
- 1 cup (2 sticks) butter, softened
- 3 cups (615g) hard white wheat berries, finely ground
- 1 cup (185g) hard red wheat berries, finely ground
Instructions
- Yeast: Add the water, yeast, and honey to a large mixing bowl. Give it a quick stir, then let it hang out for about 5 minutes until bubbly and frothy. (1 cup water, 2 tsp yeast, ¼ cup honey)
- Add Stuff: Add all of the remaining ingredients (except the flour) to the yeast mixture. Give that a whirl. (4 eggs, 1½ tsp salt, ½ cup milk, 1 cup butter)
- Freshly Milled Flour: Grind those wheat berries nice and fine. Gradually sprinkle in the flour until the dough is soft and slightly sticky ... it should be on the wetter side. (3 cups hard white, 1 cup hard red ... or go all hard white or all hard red)
- Knead: Knead for 8 minutes, rest for 30 minutes, knead another 8 minutes (add more flour now, if needed).
- Rest: Cover and let the dough rise peacefully for 30 minutes to 2 hours. The dough should look slightly puffy. (You have a little flexibility with the time here.)
- Shape: Split the dough into two equal large portions. Now, divide each of those large portions into 3 equal smaller pieces (you should have 6 pieces total). Roll each of these 6 pieces into a long, skinny strand about 14" long (relive your playdough days). Braid 1: Take 3 strands and make your braid. Pinch them firmly at the starting end and the finished end to keep them together. Fold the ends under neatly and place the finished braid into a greased loaf pan. (I use a Pyrex 1.5-Quart glass loaf pan.) Braid 2: Repeat the same process with the remaining three strands and place that braid in the second loaf pan.
- Final Rise: Cover the loaves and let them rise until they are approximately doubled in size. (Slow Option: Or, if you aren't ready to bake ... you can pop the covered pans in the fridge at this point for a slow rise.)
- Bake: Preheat the oven to 425°. Brush the top of the dough with an egg wash (1 egg mixed with 1 tbsp water). Bake for 15 minutes. Reduce the temperature to 375° and bake for 20-30 minutes more. You're looking for an internal temperature of 190°. Too Toasty? If the top starts getting too dark too fast, create an aluminum foil dome and gently place it over the bread.
- Cool Down: Let the loaves sit in the pan for 5 minutes. Carefully transfer them to a cooling rack to cool completely.
- Enjoy! Don't forget to save a slice or two ... challah makes the yummiest french toast.
Notes
Shaping:
- Do I have to braid it? No, if you're feeling more "chill" than "skill" today, you can shape this into a standard loaf.
- Can I make 2, 3, 4, or 5-strand braids? Yes, please. Go wild! Just tag me on Instagram ... I'm obsessed with your beautiful creations.
- Do I have to use a pan? Nope! You’re welcome to free-form the loaf right on a parchment-lined baking sheet.
Bake:
- Set a timer! Check your bread after 20 minutes.
- Because of the eggs and sugar ... challah can get a "sunburn" very quickly. If it's looking a little too bronzed, simply pop an aluminum foil hat over the top.
Storage:
- Keep it in an airtight container or bag right on the counter.
- Never, ever bag a warm loaf!
- Slice-as-you-go.
- Peak Freshness (days 1-2). Toasting Phase (days 3-4). French Toast Prime (days 5-7).
Freeze:
- If you won't finish both loaves in a few days ... challah freezes like a dream!
- Wrap a cooled loaf up, and it'll stay perfect in the freezer for a few months. It's like a gift to your future self.
What can I do with Challah?
- Ultimate Bread Pudding
- French Toast
- Gourmet Grilled Cheese
- Fancy Burger Bun
- Savory Strata (think spinach, sausage, eggs, and plenty of cheese)
- Buttery Croutons
- Thanksgiving-Style Stuffing (my absolute favorite thing to do with challah ... a major crowd-pleaser)
Timeline (ish):
- 8:15 AM: bloom the yeast
- 8:30 AM: mix and knead
- 9:30 AM: first rise
- 11 AM: shape and braid
- 11:30 AM: final rise (1-2 hours)
- 1:30 PM: bake
- 2:00 PM: cool before slicing
Recommended Products
As an Amazon Associate and member of other affiliate programs, I earn from qualifying purchases.
Challah Bread (sourdough + store flour)
Meet your new favorite kitchen tradition! This sourdough challah contains the artisanal depth of a slow-fermented starter. The result? A golden, braided masterpiece that is incredibly soft, slightly sweet, and impressively pillowy.
Ingredients
Levain
- 2-3 tbsp (30g) sourdough starter
- ½ cup (113g) room temperature water
- ¾ cup (90g) flour
Dough
- ¼ cup (85g) honey (sugar works too)
- 4 eggs
- 1½ tsp salt
- ½ cup (120g) milk (whole is great, but whatever is lurking in your fridge is fine)
- 1 cup (2 sticks) butter, softened
- 2 cups (240g) bread flour (for structure)
- 1½ cups (180g) all purpose flour (for tenderness)
Instructions
- Levain: Combine your starter, water, and flour in a container. Mix until it's a thick, smooth paste ... like cozy porridge. Cover it up and let it snooze on the counter for about 12 hours to get bubbly and ready. (3 tbsp sourdough starter, ½ cup water, ¾ cup flour)
- Add Stuff: Add your levain + all of the remaining ingredients (except the flour) to a mixing bowl. Give that a whirl. (¼ cup honey, 4 eggs, 1½ tsp salt, ½ cup milk, 1 cup butter,)
- Flour: Gradually sprinkle in the flour until the dough is soft and slightly sticky ... it should be on the wetter side. (2 cups bread flour, 1½ cups all-purpose flour)
- Knead: Knead for 10-15 minutes. If it’s too sloppy, sprinkle in a little more flour and knead to incorporate it.
- Stretch-and-Fold (x4): Let the dough relax for 20 minutes, covered. Imagine a compass. Grab the North side, stretch it up high, and fold it over the center. Repeat this from the South, East, and West sides. Cover the dough and let it rest for another 20 minutes. That's one set! You need to repeat this entire stretch-and-fold cycle four times total (or until you get it to windowpane).
- Rest: Cover and let the dough rise peacefully for 30 minutes to 2 hours. The dough should look slightly puffy. You have a little flexibility here ... when it's convenient for you, move on to shaping.
- Shape: Split the dough into two equal large portions. Now, divide each of those large portions into 3 equal smaller pieces (you should have 6 pieces total). Roll each of these 6 pieces into a long, skinny strand about 14" long (relive your playdough days). Braid 1: Take 3 strands and make your braid. Pinch them firmly at the starting end and the finished end to keep them together. Fold the ends under neatly and place the finished braid into a greased loaf pan. (I use a Pyrex 1.5-Quart glass loaf pan.) Braid 2: Repeat the same process with the remaining three strands and place that braid in the second loaf pan.
- Final Rise: Cover the loaves and let them rise until they are approximately doubled in size. (Slow Option: Or, if you aren't ready to bake ... you can pop the covered pans in the fridge at this point for a slow rise.)
- Bake: Preheat the oven to 425°. Brush the top of the dough with an egg wash (1 egg mixed with 1 tbsp water). Bake for 15 minutes. Reduce the temperature to 375° and bake for 20-30 minutes more. You're looking for an internal temperature of 190°. Too Toasty? If the top starts getting too dark too fast, create an aluminum foil dome and gently place it over the bread.
- Cool Down: Let the loaves sit in the pan for 5 minutes. Carefully transfer them to a cooling rack to cool completely.
- Enjoy! Don't forget to save a slice or two ... challah makes the yummiest french toast.
Notes
Shaping:
- Do I have to braid it? No, if you're feeling more "chill" than "skill" today, you can shape this into a standard loaf.
- Can I make 2, 3, 4, or 5-strand braids? Yes, please. Go wild! Just tag me on Instagram ... I'm obsessed with your beautiful creations.
- Do I have to use a pan? Nope! You’re welcome to free-form the loaf right on a parchment-lined baking sheet.
Bake:
- Set a timer! Check your bread after 20 minutes.
- Because of the eggs and sugar ... challah can get a "sunburn" very quickly. If it's looking a little too bronzed, simply pop an aluminum foil hat over the top.
Storage:
- Keep it in an airtight container or bag right on the counter.
- Never, ever bag a warm loaf!
- Slice-as-you-go.
- Peak Freshness (days 1-2). Toasting Phase (days 3-4). French Toast Prime (days 5-7).
Freeze:
- If you won't finish both loaves in a few days ... challah freezes like a dream!
- Wrap a cooled loaf up, and it'll stay perfect in the freezer for a few months. It's like a gift to your future self.
What can I do with Challah?
- Ultimate Bread Pudding
- French Toast
- Gourmet Grilled Cheese
- Fancy Burger Bun
- Savory Strata (think spinach, sausage, eggs, and plenty of cheese)
- Buttery Croutons
- Thanksgiving-Style Stuffing (my absolute favorite thing to do with challah ... a major crowd-pleaser)
Timeline (ish):
- Thursday 8 PM: Mix levain.
- Friday 8 AM: Mix and knead dough
- 8:30 AM: stretch-and-folds every 20 minutes
- 10:30 AM: dough rests until puffy
- 12:30 PM: shape and braid
- 1 PM: final rise (2–4 hours)
- 4 PM: bake
- 4:30 PM: cool before slicing
Recommended Products
As an Amazon Associate and member of other affiliate programs, I earn from qualifying purchases.
Challah Bread (yeast + store flour)
A foolproof challah recipe made with yeast and store-bought flour, delivering a beautifully fluffy loaf with rich flavor every time.
Ingredients
- 1 cup (240g) warm water
- 2 tsp yeast (active dry or instant/bread machine)
- ¼ cup (85g) honey (sugar works too)
- 4 eggs
- 1½ tsp salt
- ½ cup (120g) milk (whole is great, but whatever is lurking in your fridge is fine)
- 1 cup (2 sticks) butter, softened
- 4 cups (480g) bread flour (for structure)
- 1½ cups (180g) all purpose flour (for tenderness)
Instructions
- Yeast: Add the water, yeast, and honey to a large mixing bowl. Give it a quick stir, then let it hang out for about 5 minutes until bubbly and frothy. (1 cup water, 2 tsp yeast, ¼ cup honey)
- Add Stuff: Add all of the remaining ingredients (except the flour) to the yeast mixture. Give that a whirl. (4 eggs, 1½ tsp salt, ½ cup milk, 1 cup butter)
- Flour: Gradually sprinkle in the flour until the dough is soft and slightly sticky ... it should be on the wetter side. (4 cups bread flour, 1½ cups all-purpose flour)
- Knead: Knead for 10-15 minutes. If it’s too sloppy, sprinkle in a little more flour and knead to incorporate it.
- Rest: Cover and let the dough rise peacefully for 30 minutes to 2 hours. The dough should look slightly puffy. (You have a little flexibility with the time here.)
- Shape: Split the dough into two equal large portions. Now, divide each of those large portions into 3 equal smaller pieces (you should have 6 pieces total). Roll each of these 6 pieces into a long, skinny strand about 14" long (relive your playdough days). Braid 1: Take 3 strands and make your braid. Pinch them firmly at the starting end and the finished end to keep them together. Fold the ends under neatly and place the finished braid into a greased loaf pan. (I use a Pyrex 1.5-Quart glass loaf pan.) Braid 2: Repeat the same process with the remaining three strands and place that braid in the second loaf pan.
- Final Rise: Cover the loaves and let them rise until they are approximately doubled in size. (Slow Option: Or, if you aren't ready to bake ... you can pop the covered pans in the fridge at this point for a slow rise.)
- Bake: Preheat the oven to 425°. Brush the top of the dough with an egg wash (1 egg mixed with 1 tbsp water). Bake for 15 minutes. Reduce the temperature to 375° and bake for 20-30 minutes more. You're looking for an internal temperature of 190°. Too Toasty? If the top starts getting too dark too fast, create an aluminum foil dome and gently place it over the bread.
- Cool Down: Let the loaves sit in the pan for 5 minutes. Carefully transfer them to a cooling rack to cool completely.
- Enjoy! Don't forget to save a slice or two ... challah makes the yummiest french toast.
Notes
Shaping:
- Do I have to braid it? No, if you're feeling more "chill" than "skill" today, you can shape this into a standard loaf.
- Can I make 2, 3, 4, or 5-strand braids? Yes, please. Go wild! Just tag me on Instagram ... I'm obsessed with your beautiful creations.
- Do I have to use a pan? Nope! You’re welcome to free-form the loaf right on a parchment-lined baking sheet.
Bake:
- Set a timer! Check your bread after 20 minutes.
- Because of the eggs and sugar ... challah can get a "sunburn" very quickly. If it's looking a little too bronzed, simply pop an aluminum foil hat over the top.
Storage:
- Keep it in an airtight container or bag right on the counter.
- Never, ever bag a warm loaf!
- Slice-as-you-go.
- Peak Freshness (days 1-2). Toasting Phase (days 3-4). French Toast Prime (days 5-7).
Freeze:
- If you won't finish both loaves in a few days ... challah freezes like a dream!
- Wrap a cooled loaf up, and it'll stay perfect in the freezer for a few months. It's like a gift to your future self.
What can I do with Challah?
- Ultimate Bread Pudding
- French Toast
- Gourmet Grilled Cheese
- Fancy Burger Bun
- Savory Strata (think spinach, sausage, eggs, and plenty of cheese)
- Buttery Croutons
- Thanksgiving-Style Stuffing (my absolute favorite thing to do with challah ... a major crowd-pleaser)
Timeline (ish):
- 9 AM: bloom the yeast
- 9:15 AM: mix and knead
- 9:30 AM: first rise
- 11 AM: shape and braid
- 11:30 AM: final rise (1-2 hours)
- 2:30 PM: bake
- 3:00 PM: cool before slicing
Recommended Products
As an Amazon Associate and member of other affiliate programs, I earn from qualifying purchases.


2 responses to “Freshly Milled Challah (or store-bought flour … sourdough or yeast)”
My grandma used to make challah for Easter. I can’t wait to try this.
Your grandma clearly had excellent bread instincts. I can’t wait for you to try it … please come back and tell me how it turns out!